Find the Nearest Edge to a Point Using Python OSMnx Distance Module
Last Updated :
19 Mar, 2024
OSMnx distance module can find the nearest edge to a point using the nearest_edges functionality. In this article, we will see how to find the nearest edge to a point using the OSMnx distance Module in Python.
Syntax of osmnx.distance.nearest_edges() Function
Here, the below function uses an R-tree spatial index and minimizes the Euclidean distance from each point to the possible matches.
osmnx.distance.nearest_edges(G, X, Y, interpolate=None, return_dist=False)
Parameters
- G (networkx.MultiDiGraph) – graph in which to find nearest edges
- X (float or list) – points’ x (longitude) coordinates, in same CRS/units as graph and containing no nulls
- Y (float or list) – points’ y (latitude) coordinates, in same CRS/units as graph and containing no nulls
- interpolate (float) – deprecated, do not use
- return_dist (bool) – optionally also return distance between points and nearest edges
Returns : ne or (ne, dist) – nearest edges as (u, v, key) or optionally a tuple where dist contains distances between the points and their nearest edges.
Return Type: tuple or list
Find the Nearest Edge to a Point Using OSMnx Distance Module
To find the nearest edge to a point, we need to pass a multidigraph and x-y coordinates as parameters. The functionality returns the nearest edge from the multidigraph w.r.t the x-y coordinate. here, the step-by-step example of how to find the nearest edge to a point using OSMnx distance module in Python:
Step 1: Assign Geographical Coordinates
Let’s start by creating a multidigraph that has 4 nodes and 2 edges. Here we will consider osmid of 4 coordinates as nodes: Thiruvanathapuram, Kollam, Palakkad and Bangalore and the edges as: (Thiruvananthapuram – Bangalore) and (Kollam – Palakkad). Consider Kochi coordinates as the X-Y points and identify the nearest edge w.r.t Kochi. The coordinates are as follows:
Python3
# Palakad coordinates
pal_lat, pal_lon = 10.7867, 76.6548

# Bangalore coordinates
blr_lat, blr_lon = 12.9716, 77.5946

# Thiruvananthapuram coordinates
tvm_lat, tvm_lon = 8.50606, 76.96153

# Kollam coordinates
kol_lat, kol_lon = 8.88795, 76.59550

# Kochi coordinates
cok_lat, cok_lon = 9.9312, 76.2673
Step 2: Fetching OSM ID with Geopy
As a next step, let’s get the osmid (nodes) for the corresponding coordinates. Using Geopy’s Nominatim module, the code retrieves the OpenStreetMap (OSM) ID for a location based on its latitude and longitude coordinates (here, for Bangalore).
Python3
from geopy.geocoders import Nominatim
# fetch osm id
geolocator = Nominatim(user_agent="sample_app")
loc_osmid = "{lat}, {lon}".format(lat=blr_lat, lon=blr_lon)
location = geolocator.reverse(loc_osmid)
location.raw.get('osm_id')
Output
38773287
Step 3: OSM IDs for Various Coordinates
Similarly you can fetch the osmid for the remaining coodinates. OpenStreetMap (OSM) IDs assigned to the geographical coordinates for Thiruvananthapuram, Kollam, Bangalore, Palakad.
Python3
# osmid for each coordinates
tvm_osmid, kol_osmid = 955820326, 281828280
blr_osmid, pal_osmid = 38773287, 464139803
Step 4: Creating MultiDiGraph with NetworkX
Now, its time to create the multidigraph that has the necessary nodes and edges. Using NetworkX library, a multidigraph is initialized with EPSG:4326 coordinate reference system. Nodes are added with OSM IDs and corresponding coordinates (latitude and longitude).
Python3
import networkx as nx

# initialize multidigraph
G = nx.MultiDiGraph(crs="EPSG:4326")

# add nodes
G.add_nodes_from([tvm_osmid, blr_osmid, pal_osmid, kol_osmid])
# set x and y coordinates
G.nodes[tvm_osmid].update({'x': tvm_lon, 'y': tvm_lat})
G.nodes[kol_osmid].update({'x': kol_lon, 'y': kol_lat})
G.nodes[pal_osmid].update({'x': pal_lon, 'y': pal_lat})
G.nodes[blr_osmid].update({'x': blr_lon, 'y': blr_lat})

# add edges
G.add_edges_from([(tvm_osmid, blr_osmid), (kol_osmid, pal_osmid)])
Step 5: Converting MultiDiGraph to GeoDataFrame
To get accurate distance from the nearest edge, it is better to use projected coordinates. Let’s convert multidigraph to projected coordinates using geodataframe. Using OSMnx library, the multidigraph is converted into two GeoDataFrames: one for nodes and one for edges. The node coordinates are projected to EPSG:7781.
Python3
import osmnx as ox

# convert multidigraph nodes to geodataframe
gdf_nodes = ox.utils_graph.graph_to_gdfs(
    G, nodes=True, edges=False,
    node_geometry=True, fill_edge_geometry=False)

# convert multidigraph edges to geodataframe
gdf_edges = ox.utils_graph.graph_to_gdfs(
    G, nodes=False, edges=True,
    node_geometry=False, fill_edge_geometry=True)

# apply projection
gdf_nodes['geometry'] = gdf_nodes.geometry.to_crs("EPSG:7781")
# update x and y coordinates with projected coordinates
gdf_nodes['x'] = gdf_nodes['geometry'].x
gdf_nodes['y'] = gdf_nodes['geometry'].y

# convert edges to projected coordinates
gdf_edges['geometry'] = gdf_edges.geometry.to_crs("EPSG:7781")
Output
        x             y                         geometry
osmid
955820326  1.105863e+06  7.796105e+05   POINT (1105863.471 779610.506)
38773287   1.173015e+06  1.273927e+06  POINT (1173015.423 1273927.376)
464139803  1.071608e+06  1.031786e+06  POINT (1071608.015 1031786.480)
281828280  1.065496e+06  8.217651e+05   POINT (1065495.736 821765.127)
                                                                  geometry
u         v         key
955820326 38773287  0    LINESTRING (1105863.471 779610.506, 1173015.42...
281828280 464139803 0    LINESTRING (1065495.736 821765.127, 1071608.01...
The edges on map as shown below:
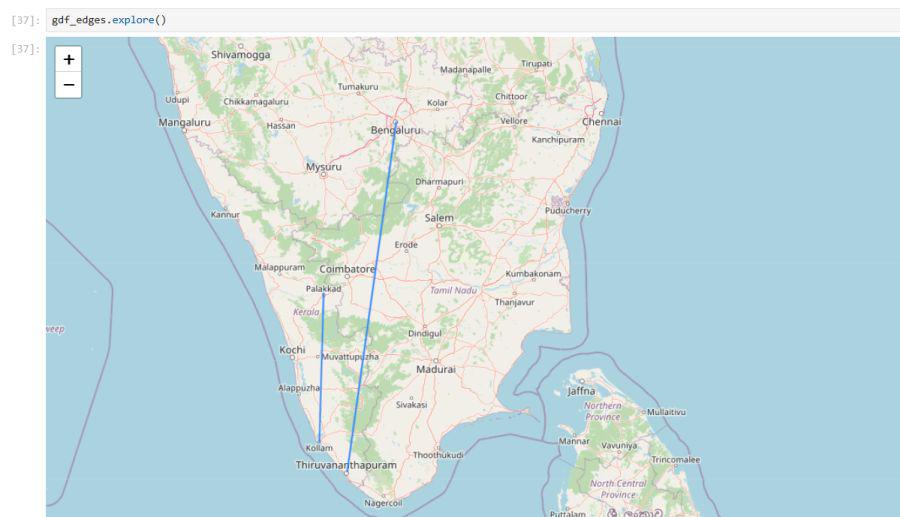
edges plot
Step 6: Convert GeoDataFrames to MultiDiGraph
Now we need to convert projected geodataframe back to multidigraph. Using OSMnx library, the GeoDataFrames containing nodes and edges are converted back into a multidigraph with the specified CRS attribute (EPSG:7781).
Python3
import osmnx as ox
# set crs attribute
graph_attrs = {"crs": "EPSG:7781"}

# convert geodataframe to multidigraph
proj_multidigraph = ox.utils_graph.graph_from_gdfs(
  gdf_nodes, gdf_edges, graph_attrs=graph_attrs)
Step 7: Creating GeoDataFrame for Kochi Node
We have multidigraph which has projected coordinates. Since every parameter must be of same CRS unit, we need to convert the X-Y coordinates (Kochi) to projected coordinates. A GeoDataFrame is created for the Kochi node using GeoPandas, with a point geometry representing its coordinates.
Python3
import geopandas as gpd
from shapely import Point

# create geodataframe
cok_node_dict = {'col1':['Kochi'], 'geometry': [Point(cok_lon, cok_lat)]}
cok_node_gdf = gpd.GeoDataFrame(cok_node_dict, crs="EPSG:4326")

# convert to projected coordinates
cok_node_gdf['geometry'] = cok_node_gdf.geometry.to_crs("EPSG:7781")
cok_proj_lon = cok_node_gdf['geometry'].x[0]
cok_proj_lat =  cok_node_gdf['geometry'].y[0]
Step 8 : Finding Nearest Edges to Kochi Node
We have projected geometry for the parameters. Its time to make use of ‘nearest_edge’ functionality to find the nearest edge. Using OSMnx library, the code finds the nearest edges to the Kochi node within the projected multidigraph, providing the distances from the node to the nearest edge.
Python3
import osmnx as ox

ox.distance.nearest_edges(
  proj_multidigraph, cok_proj_lon, cok_proj_lat,
  interpolate=None, return_dist=True)
Output
((281828280, 464139803, 0), 39525.24413890172)
The output has the nearest edge and the distance. The nearest edge is (281828280, 464139803, 0) – (Kollam – Palakkad) and the distance is 39525.244 meters
Please Login to comment...