Amazon VPC – IP Addressing in VPC
Last Updated :
27 Mar, 2023
This article intends to educate you all about IP Addressing in VPC’s. An IP address is a unique identifier attached to a particular or particular computer network. It acts as a bridge while communicating with the respective device. IP addresses are generally classified into four categories,
- Public IP Address
- Private IP Address
- Static IP Address
- Dynamic IP Address
Amazon VPC supports both IPv4 and IPv6 addressing protocols but by default addressing is set to IPv4. Let us look at the criteria while allotting IP addresses to VPC, subnets, etc.
|
IPv4
|
IPv6
|
| It is a 32 bit IP address, for example – 66.94.29.13 |
It is a 128 bit IP address, for example – 2001:db8:3333:4444:5555:6666:7777:8888. |
| It is a plain numeric address consisting of 4 fields, separated by (.). |
It is an alphanumeric address consisting of 8 fields, distinguished by a (:). |
| It includes 5 different classes of IP addresses like Class A, Class B, Class C, Class D, and Class E. |
Whereas, here in IPv6 there is no such concept of various classes. |
| It does not facilitate its users with features like encryption and authentication. |
It comes along with the facility of encryption ad authentication. |
| It supports all instance types as well as all AMI’s. |
On the other hand, there are certain limitations or criteria while choosing an IPv6 IP address. |
| We can choose a private CIDR block for our VPC |
We can choose the CIDR block but from the list of IPv6 addresses currently available. We cannot select our own range. |
Out of all types of IP addresses available, users mostly prefer “Private IP Addresses” because they are not accessible over the internet without any permission from the user. Thus, to ensure your VPC’s safety from any kind of data theft or any other illegal cyber practices, it is advised to choose a private IP address.
Even if one cannot afford to assign a private IP address to all the resources attached with their respective VPC’s, we can go with assigning a public IP address to their EC2 instances or subnets and attach extra security channels with it.
Now, let us look at the step-by-step guide to assign an IPv4 address to your EC2 instance during launching it.
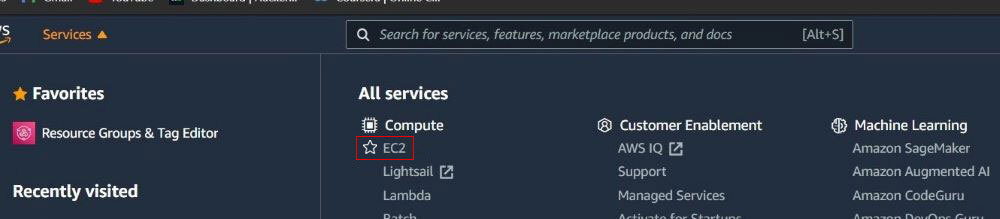
Step 1: Login to your AWS account and click on Amazon EC2. Refer to the screenshot attached ahead.
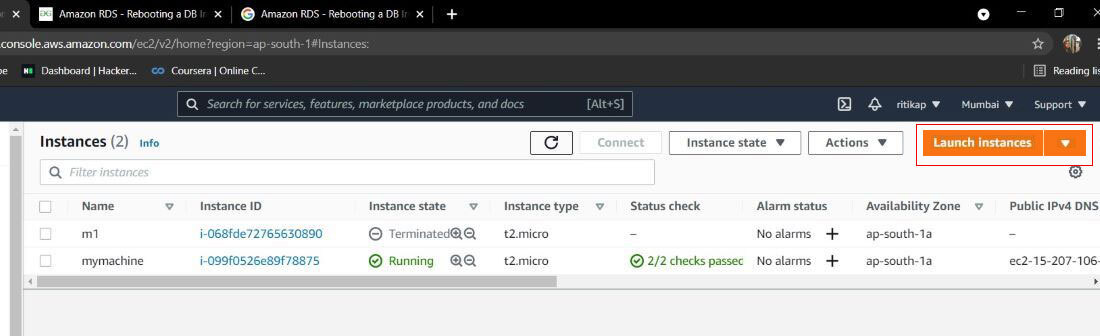
Step 2: After being redirected ahead, click on Launch Instance. Refer to the screenshot while any confusion.
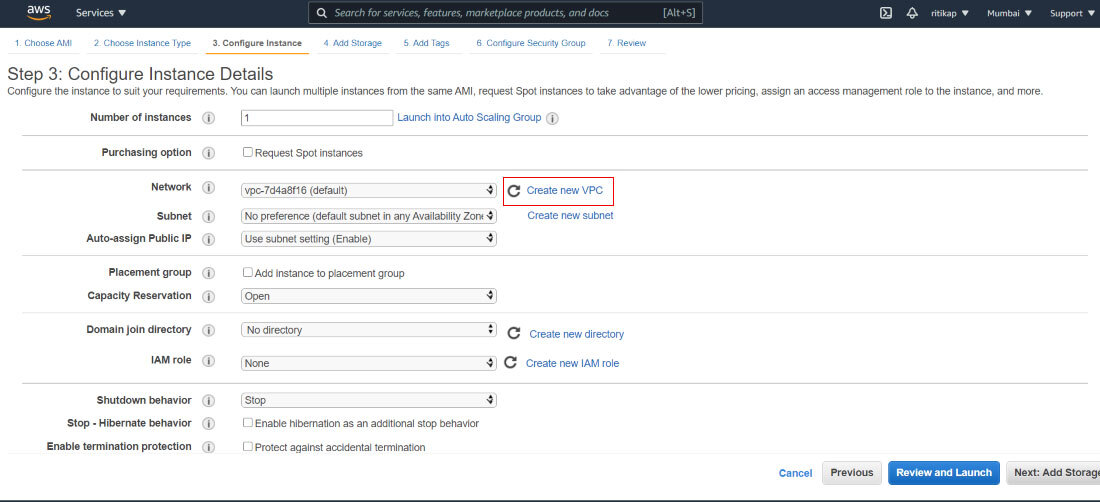
Step 3: Follow all the initial steps involved in launching an instance, on the Configure Instance Details step, in Network select a VPC. A list of IP addresses will appear, select enable or disable as per your choice. You can even create a new VPC during this stage. And finally, launch the EC2 instance.
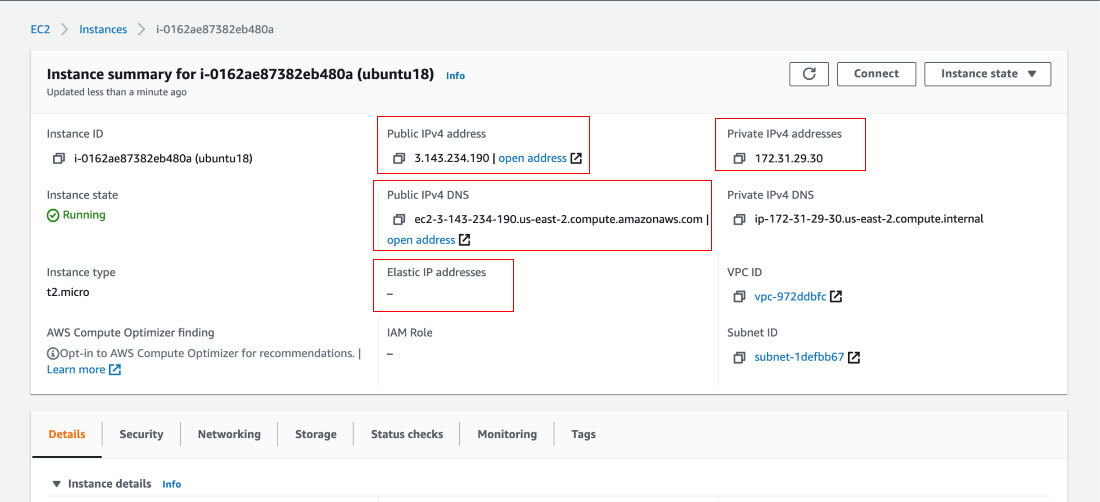
Step 4: On the dashboard, click on your instance and read see the IP address attached to it. Refer to the screenshot attached ahead of you for understanding better.
This was a quick sneak peek with the IP addressing in Amazon VPC. And if you also have a free tier account then make sure, you delete all the resources before logging out of your AWS account.
Like Article
Suggest improvement
Share your thoughts in the comments
Please Login to comment...