Angular PrimeNG ListBox Component
Last Updated :
22 Aug, 2021
Angular PrimeNG is an open-source framework with a rich set of native Angular UI components that are used for great styling and this framework is used to make responsive websites with very much ease. In this article, we will know how to use the ListBox component in Angular PrimeNG.
ListBox component: It is used to make a list component from which we can select one or more items and can also be discarded if the item is not required by unchecking in the list.
Properties:
- ariaFilterLabel: It is used to define a string that labels the input filter element. It is of string data type, the default value is null.
- checkbox: It is used to allow selecting items with checkboxes. It is of boolean data type, the default value is false.
- dataKey: It is the property that is used to Identify an option. It is of string data type, the default value is null.
- disabled: It specifies that the element should be disabled. It is of the boolean data type, the default value is false.
- filter: It is used to display a filter input at the header. It is of boolean data type, the default value is false.
- filterMatchMode: It is used to define how the items are filtered. It is of string data type, the default value is contained.
- filterValue: It is used to specify filter displays with this value. It is of string data type, the default value is null.
- filterLocale: It is used to set the locale to use in filtering. It is of string data type, the default value is undefined.
- filterPlaceHolder: It is used to define the placeholder of the filter input. It is of string data type, the default value is null.
- listStyle: It is used to set the Inline style of the list element, It is of string data type, the default value is null.
- listStyleClass: It is used to set the Style class of the list element, It is of string data type, the default value is null.
- metaKeySelection: It is used to defines how multiple items can be selected. It is of the boolean data type, the default value is true.
- multiple: It is used to allow selecting multiple values. It is of the boolean data type, the default value is false.
- readonly: it specifies that the element value cannot be changed. It is of the boolean data type, the default value is false.
- emptyMessage: It is used to set the text to display when there is no data. It is of string data type, the default value is no records found.
- emptyFilterMessage: It is used to set the text to display when filtering does not return any results, It is of string data type, the default value is no records found.
- options: It is an array representing select items to display as the available options, It is of array data type, the default value is null.
- optionLabel: It is used to give the label of an option, It is of string data type, the default value is the label.
- optionValue: It is used to give the value of an option, defaults to the option itself when not defined. It is of string data type, the default value is value.
- optionGroupLabel: It is used to give a label to the option group. It is of string data type, the default value is the label.
- optionGroupChildren: It is used to get the name of the options field of the option group. It is of string data type, the default value is an item.
- group: It is used to set whether to display options as grouped when nested options are provided. It is of the boolean data type, the default value is false.
- showToggleAll: It is used to set whether the header checkbox is shown in multiple modes. It is of the boolean data type, the default value is true.
- style: It is used to set the inline style of the element. It is of string data type, the default value is null.
- styleClass: It is used to set the style class of the element. It is of string data type, the default value is null.
Events:
- onChange: It is a callback that is fired when the value of the list box changes.
- onDblClick: It is a callback that is fired when an item is double-clicked.
- onClick: It is a callback that is fired when the Listbox option clicks.
Styling:
- p-listbox: It is used for the container of an element.
- p-listbox-list: It is used as a container for the list.
- p-listbox-item: It is used to keep the item in the list.
- p-listbox-header: It is used to show the header of the element.
- p-listbox-filter-container: It is a container of filter input in the header.
Creating Angular application & module installation:
-
Step 1: Create an Angular application using the following command.
ng new appname
-
Step 2: After creating your project folder i.e. appname, move to it using the following command.
cd appname
-
Step 3: Install PrimeNG in your given directory.
npm install primeng --save
npm install primeicons --save
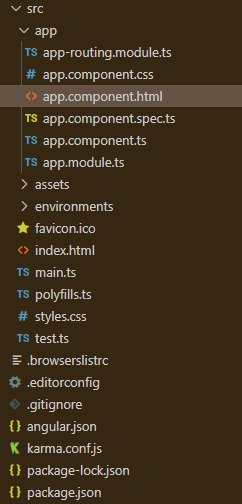
Project Structure: After completing the above processes, it will look like the following.
Example 1: This is the basic example that shows how to use the ListBox component.
app.component.html
<h2>GeeksforGeeks</h2>
<h5>PrimeNG ListBox component</h5>
<p-listbox
[options]="gfg"
[(ngModel)]="selectedCourse"
optionLabel="name"
[style]="{'width':'15rem'}">
</p-listbox>
|
app.module.ts
import { NgModule } from "@angular/core";
import { BrowserModule }
from "@angular/platform-browser";
import { FormsModule } from "@angular/forms";
import { BrowserAnimationsModule }
from "@angular/platform-browser/animations";
import { AppComponent } from "./app.component";
import { ListboxModule } from "primeng/listbox";
@NgModule({
imports: [BrowserModule,
BrowserAnimationsModule,
ListboxModule, FormsModule],
declarations: [AppComponent],
bootstrap: [AppComponent],
})
export class AppModule {}
|
app.component.ts
import { Component } from "@angular/core";
import { PrimeNGConfig, SelectItemGroup } from "primeng/api";
interface Course {
name: string;
}
@Component({
selector: "my-app",
templateUrl: "./app.component.html",
styles: [],
})
export class AppComponent {
gfg: Course[];
selectedCourse: Course;
constructor(private primengConfig: PrimeNGConfig) {
this.gfg = [
{ name: "HTML5" },
{ name: "JavaScript" },
{ name: "Java" },
{ name: "ReactJS" },
{ name: "AngularJS" },
];
}
}
|
Output:

Example 2: In this example, we will make a dynamic listBox Group.
app.component.html
<h2>GeeksforGeeks</h2>
<h5>PrimeNG ListBox Component</h5>
<p-listbox [options]="gfg" [checkbox]="true"
[filter]="true" [multiple]="true"
optionLabel="name">
</p-listbox>
|
app.module.ts
import { NgModule } from '@angular/core';
import { BrowserModule } from '@angular/platform-browser';
import { FormsModule } from '@angular/forms';
import { HttpClientModule } from '@angular/common/http';
import { BrowserAnimationsModule }
from '@angular/platform-browser/animations';
import { AppComponent } from './app.component';
import { ListboxModule } from 'primeng/listbox';
import { ButtonModule } from 'primeng/button';
@NgModule({
imports: [BrowserModule,
BrowserAnimationsModule,
ListboxModule, FormsModule],
declarations: [AppComponent],
bootstrap: [AppComponent]
})
export class AppModule {}
|
app.component.ts
import { Component } from '@angular/core';
import { PrimeNGConfig } from 'primeng/api';
interface Course {
name: string;
}
@Component({
selector: 'my-app',
templateUrl: './app.component.html'
})
export class AppComponent {
gfg: any[];
constructor(private primengConfig: PrimeNGConfig) {
this.gfg = [
{ name: 'AngularJS' },
{ name: 'ReactJS' },
{ name: 'Java' },
{ name: 'JavaScript' },
{ name: 'HTML' },
{ name: 'PrimeNG' },
{ name: 'Bootstrap' }
];
}
ngOnInit() {
this.primengConfig.ripple = true;
}
}
|
Output:

Reference: https://primefaces.org/primeng/showcase/#/listbox
Like Article
Suggest improvement
Share your thoughts in the comments
Please Login to comment...