Creating and Configuring Wi-Fi Hotspot in Ubuntu
Last Updated :
11 Jul, 2022
Below are some steps to create a Wi-Fi hotspot in Ubuntu:
Step 1) Make sure that the wireless device is turned ON in your system or not. If not, then turned it ON.
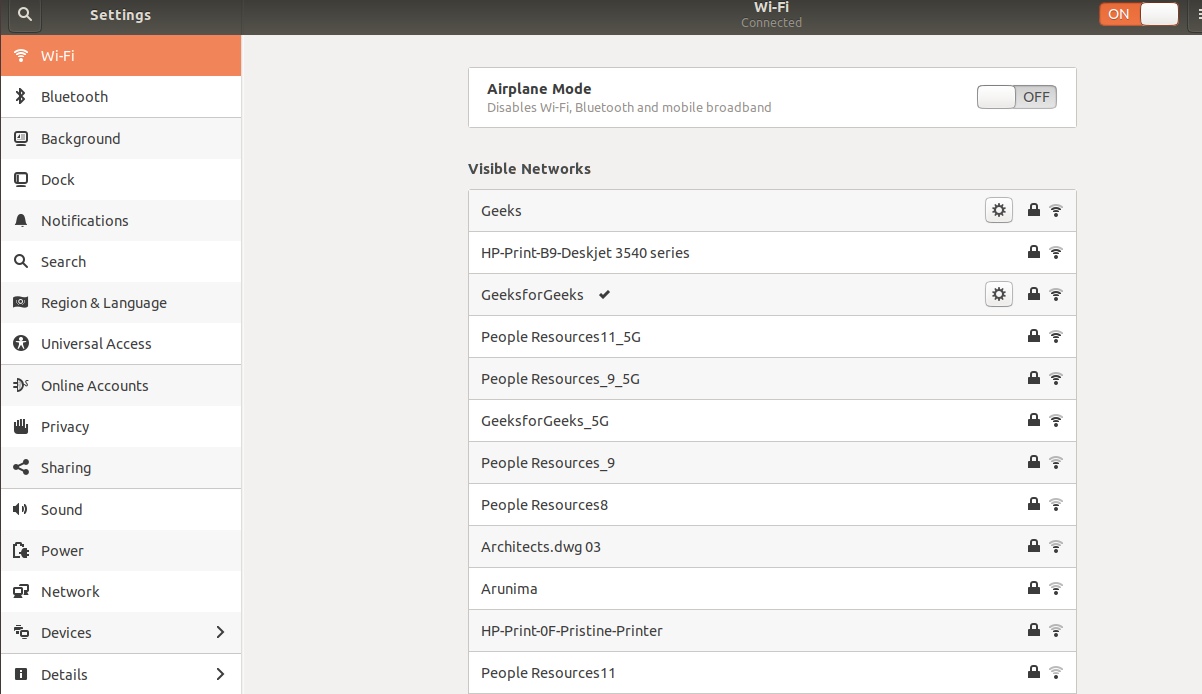
Step 2) Go to Settings and click the Wi-Fi tab in the top left pane.
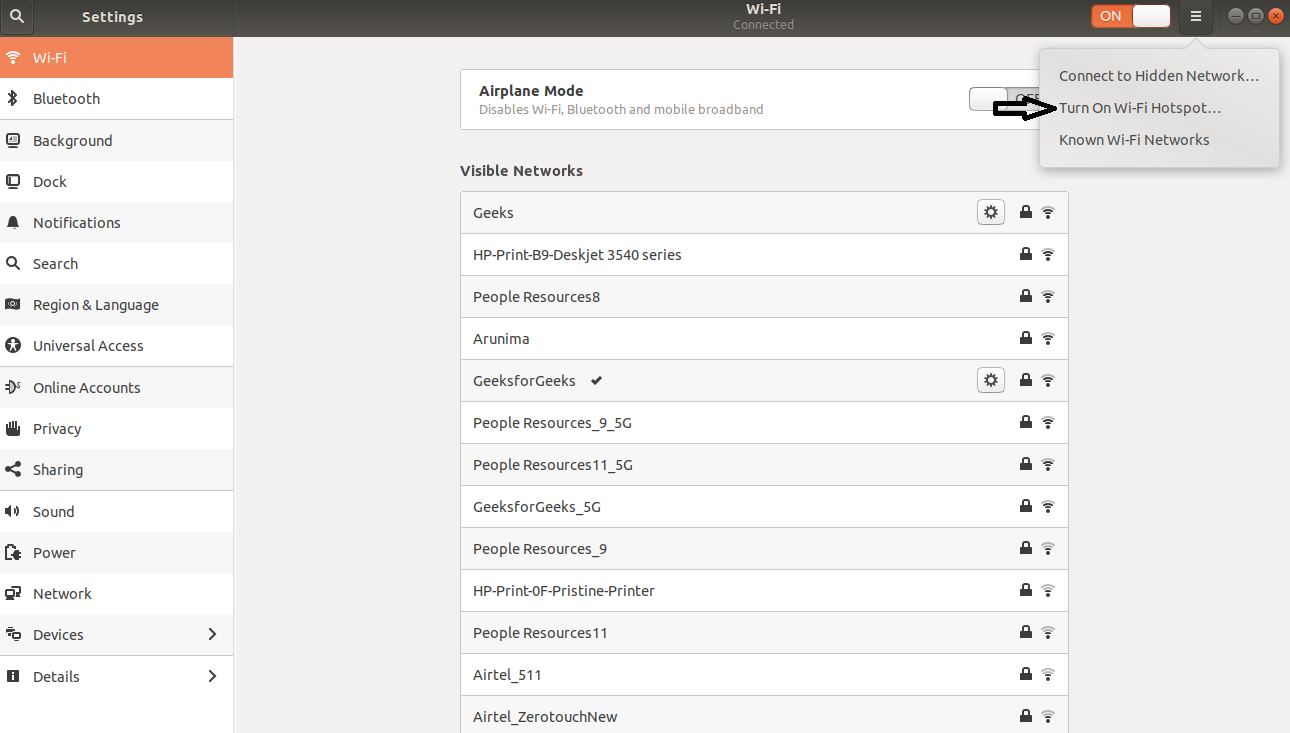
Step 3) In the top right corner you can see a tribar icon of the Settings app. Click on it and choose the second option i.e Turn ON Wi-Fi Hotspot.
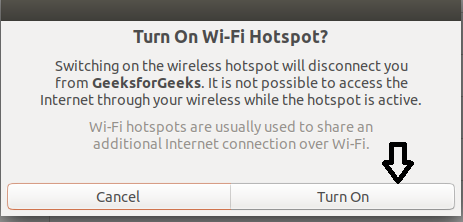
Step 4) It will give a warning. You have to just click Turn On.
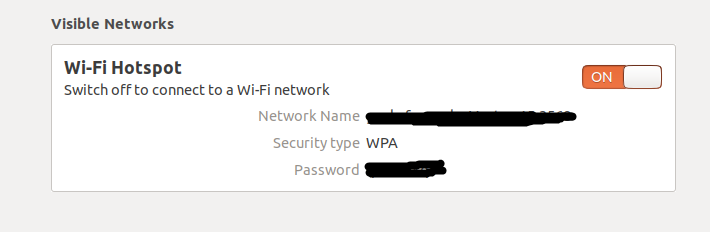
Step 5) Now you can see the Name and password of the hotspot.
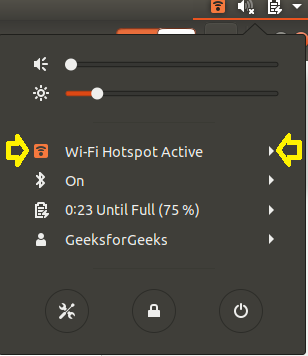
Step 6) To check for the active hotspot you can click on the quick settings menu as shown below:
Configuring Wi-Fi Hotspot in Ubuntu: Many have a problem in changing Wi-fi Hotspot password in Ubuntu as it is not easy as in Windows OS. When you turn on the hotspot in Ubuntu you are able to see name and password but there is no option to change the password. There are two ways for changing the Hotspot password. One is through the terminal and the other using editor.
- Using Commands on Terminal: Open the terminal and type the below command. Replace mypassword with your desired password. Make sure that the password has at least 8 characters.
$ nmcli connection modify Hotspot 802-11-wireless-security.key-mgmt wpa-psk 802-11-wireless-security.psk mypassword
- Using Editor:
- Open the terminal and type the below command. It will open a tab as shown in the screenshot.
$ nm-connection-editor
- Network Connections window will open which looks like:

- Double click on the Hotspot which is shown under Wi-Fi category. Another window will open.

- Go to Wi-Fi security and change the password and press save button.
Like Article
Suggest improvement
Share your thoughts in the comments
Please Login to comment...