Deno.js | Introduction
Last Updated :
18 Dec, 2021
Introduction: DenoJS is a Secure runtime for JavaScript and TypeScript based on the V8 JavaScript Engine (developed by The Chromium Project, Google), Rust Programming Language and Tokio which is an asynchronous runtime for Rust. NodeJS is also a JavaScript runtime which uses the V8 engine. DenoJS 1.0.0 was released on May 13th, 2020 and is created by Ryan Dahl, who is also the creator for NodeJS.
DenoJS aims to be a productive and secure scripting environment to provide an easy experience for the modern age developers. The creators of NodeJS had expressed several concerns over the functioning of NodeJS. They had expressed concerns over the security of Node, how Node handled packages and other legacy APIs within Node which will never change, among other things. Node was released in 2009 and since then JavaScript has changed a lot. They wanted to make a better version of NodeJS with modern JavaScript tools and APIs. They also wanted something compatible with the Browser and Server Environments and hence came the realization of DenoJS.
Advantages and Features of DenoJS:
- Secure by Default: One of the biggest advantages of DenoJS is that it is Secure by Default. It runs in a Sandbox environment and unless specifically permitted, Deno isn’t allowed to access files, the environment, or the network which is not the case in NodeJS. To access the environment or the network we explicitly need to add Security flags and Permissions when executing a Deno application. If the respective flags are not added, It will give a PermissionsDenied error when running the application. The list of Security flags are provided below
- –allow-write: Allow Write Access
- –allow-read: Allow Read Access
- –allow-net: Allow Network Access
- –allow-env: Allow Environment Access
- –allow-plugin: Allow loading External Plugins
- –allow-hrtime: Allow High Resolution Time Measurement
- –allow-run: Allow Subprocesses to run
- -A: Allow all Permissions
- Typescript: DenoJS supports Typescript out of the Box. We can use TypeScript or JavaScript while developing Deno applications since the TypeScript compiler is also included within Deno. Hence we can simply create a new .ts file and it will be successfully compiled and executed with Deno.
- Single Executable File: DenoJS ships as a single executable with no dependencies. Deno attempts to provide a standalone tool for quickly scripting complex functionality. Like a web browser, it knows how to fetch and import external code. In Deno, a single file can define complex behaviour without any other tooling. Given a URL to a Deno program, it is runnable with nothing more than the 15 MB of memory. Deno explicitly takes on the role of both a runtime and package manager.
- De-centralized Packages: One of the major drawbacks of NodeJS is how the dependencies are handled with NPM packages. For example, If we want to use Express with NodeJS, we would simply install using npm and the dependency would go to node_modules folder. The problem is that when Express is installed, it simply isn’t the Express package. It also includes the dependencies of Express. Hence we end up with lots of folders within node_modules, making the process of handling external packages extremely difficult as well as increasing the size of the application. DenoJS offers De-centralized Packages i.e. Deno does not use npm. There are no NPM packages for Deno and there is no package.json file and no node_modules dependencies folder. It uses a standard browser-compatible protocol for loading modules via URLs. It imports modules which are referenced via URLs or file paths from within the application. If we want to import and use an external module, we can simply Import it from the URL:
https://deno.land/x/[Package_Name]
- Browser Compatibility: DenoJS was designed to be Browser Compatible. The set of Deno scripts which are written completely in JavaScript and do not use the global Deno namespace can also be executed using Deno in a modern web browser without any code change. Deno also follows the standardized browser JavaScript APIs. Since Deno is browser compatible, we have access and can use JavaScript APIs like fetch. We also have access to the global JavaScript window object.
- ES Modules: Unlike NodeJS, Deno incorporates modern JavaScript syntax. Deno uses ES Modules (the import Syntax) and does not support the common JavaScript require Syntax used in NodeJS. All External ES modules are imported via URLs just like in GoLang, for example:
import { serve } from "https://deno.land/x/http/server.ts"
This Import is used to create a simple HTTP Server in Deno. Another Key feature of Deno is that after this module is imported, it is cached to the Hard drive on load. Remote code which is fetched will be cached to the Hard drive when it is first executed, and it will never be updated until the code is run with the –reload flag. According to official DenoJS documentation, modules and files loaded from remote URLs are intended to be immutable and cacheable.
- Standard Modules: Deno has an extensive set of Standard Library Modules that are audited by the Deno team and are guaranteed to work with Deno. These standard modules are hosted here and are distributed via URLs like all other ES modules that are compatible with Deno. Some of these standard libraries are fs, datetime, http, etc much like the NodeJS modules. Deno can also import modules from any location on the web, like GitHub, a personal webserver, or a CDN (Content Delivery Network). There are more number of standard modules as well as external modules being added to Deno everyday.
- Top Level Await: Another Core and important feature of Deno is top-level/First Class Await Syntax. In Deno, we can use the Await Syntax in the global Scope without having to wrap it in the Async Function. Also all async actions in Deno return a Promise which can remove/avoid the Callback Hell that Node can lead to due to nested callbacks.
- Utilities: Deno provides built-In Testing and has built-in utilities like a dependency inspector (deno info) and a code formatter (deno fmt). Deno also allows direct execution of WebAssembly WASM Binaries. NodeJS is known for its HTTP and Data Streaming capabilities, however Deno is able to serve HTTP more efficiently than Node.
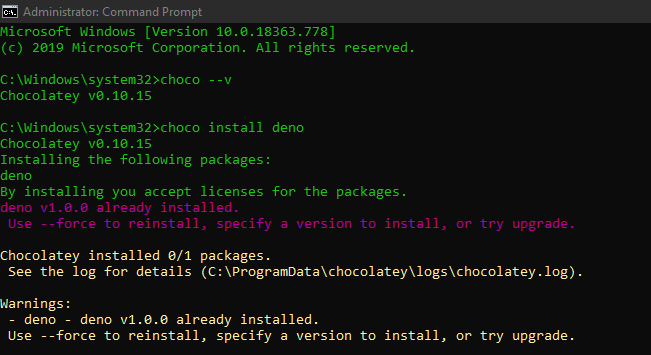
Installation of DenoJS: For the different ways on Installing DenoJS, Refer to this link. We will be Installing Deno using Chocolatey for Windows. For Installing Deno using Chocolatey, run the following command:
choco install deno
This will install Deno on the local System to the default $HOME/.deno directory. This is the default Deno’s Base directory and is referenced via the environmental variable DENO_DIR.
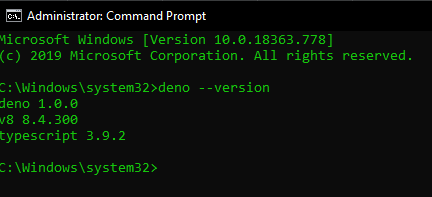
Getting Started: To check DenoJS Installation, run the command:
deno --version
This should provide you with the version of TypeScript, V8 Engine and Deno.
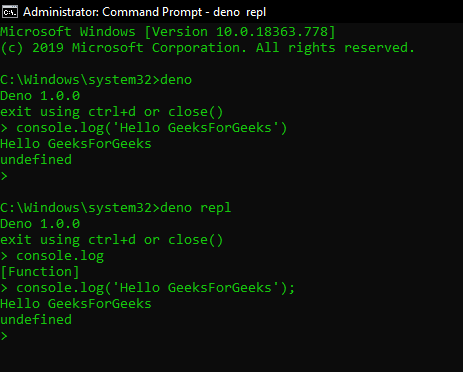
If we simply execute the command:
deno
It runs the command:
deno repl
Which opens up the REPL interface that stands for READ EVAL PRINT LOOP which means that we can type in basic JavaScript code from within the Command-line and it will compile, executes and prints the result.
We will execute a simple Deno Script in our local, located at the standard deno.land/std/ URL. We can directly run this Script from the remote URL by using the Command:
deno run https://deno.land/std/examples/welcome.ts
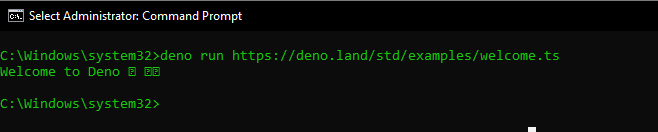
This is the link to the welcome.ts script in the official Deno docs Examples. We can view the Source code by simply navigating to that URL. The deno run command compiles the Script and executes the Script to display the result in your console. Deno Automatically knows whether we are running this script via the URL or just viewing it in the Browser.
To install the script on the local machine, we can run the command:
deno install https://deno.land/std/examples/welcome.ts
This will install the welcome.ts script to the $Home/.deno/bin directory. The file will be downloaded as a .cmd file on Windows. In case the Installation already Exists, we need to explicitly overwrite it.
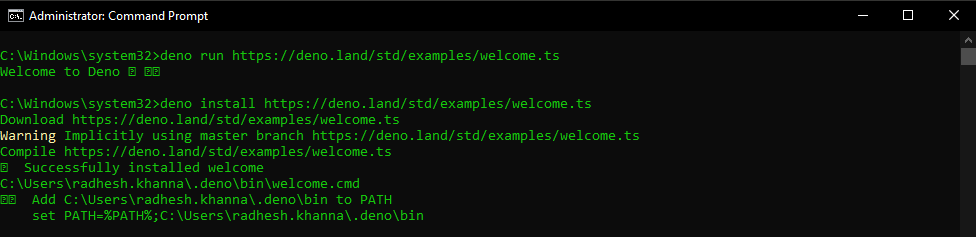

Note: Run CMD with Administrator Privileges to avoid unnecessary errors with Deno.
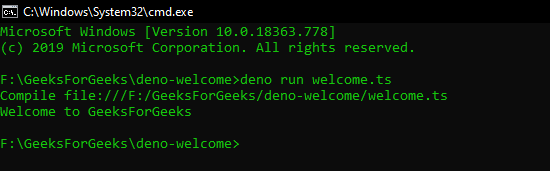
We will create a welcome.ts file on the local machine and execute it with Deno.
welcome.ts
Javascript
console.log("Welcome to GeeksForGeeks");
|
To execute this file, Run the command:
deno run welcome.ts
Output:
Share your thoughts in the comments
Please Login to comment...