Different Ways to fix “Default Activity Not Found” Issue in Android Studio
Last Updated :
09 Mar, 2021
This is the most common issue faced by so many developers when creating a new Android Studio Project. This issue occurs because Android Studio was not able to detect the default MainActivity in your Android Studio Project. In this article, we will take a look at four different ways with which we can fix this error in your Android Project.
Pre Requisites: You should be having your Android Studio project build which is showing this type of error as Default Activity not found.
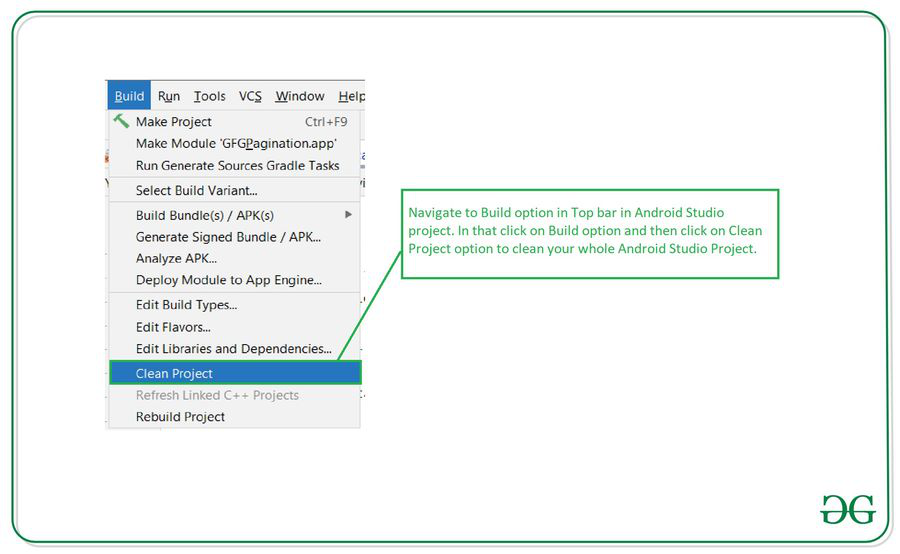
Method 1: Cleaning your project
In this method, we will be cleaning our whole project and sync all the Gradle files because Android Studio sometimes doesn’t detect the Activity. So we will be cleaning the tour project in this method. For cleaning our Android Studio project. Navigate to the Build option in the top bar and then click on it and after that, you will get to see an option to Clean your Project. Click on that option to clean your project. The option is shown below screenshot.
Method 2: Cleaning and Rebuilding your Project
In this method, we will be cleaning as well as rebuilding our project. After cleaning our project sometimes our files in the Android Studio project are rearranged. So to arrange these files in a proper manner we have to rebuild our project. In this project first of all we have to clean our project as shown in Method 1 and then after Rebuild your project. For Rebuilding your project click on the Build option in the top bar and then click on the Rebuild Project option to rebuild your project. The screenshot is shown below for these options.

Method 3: Restarting your project using Invalidate Caches and Restart option
In this method, we will be restarting our project using Invalidate Caches and Restart option. For using this option navigate to the File option and then click on Invalidate Caches and Restart option you will get to see this option in the below screenshot.
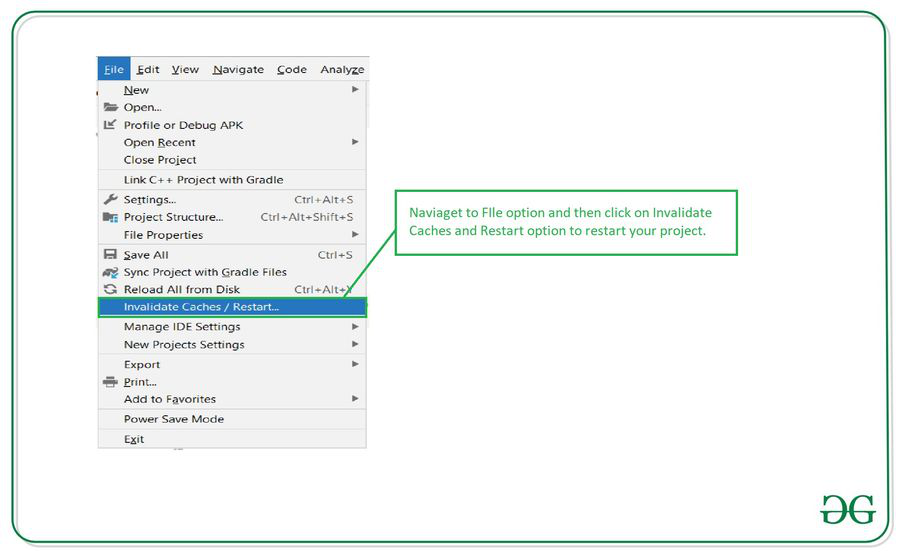
After clicking on this option you will get to see the below screenshot. In this click on Invalidate Caches and Restart option to Restart your Android Studio project.

Method 4: Check the Manifest file for your launcher Activity
In this method, we will verify if our Activity name is declared in our Manifest file or not. For checking this we simply have to Navigate to the Manifest file and check your Manifest file if your Activity name is mentioned in that file or not. The code for a sample Manifest file is given below. Comments are added in the code to get to know in detail.
XML
<?xml version="1.0" encoding="utf-8"?>
package="com.example.gfgpagination">
<uses-permission android:name="android.permission.INTERNET" />
<application
android:allowBackup="true"
android:icon="@mipmap/ic_launcher"
android:label="@string/app_name"
android:roundIcon="@mipmap/ic_launcher_round"
android:supportsRtl="true"
android:theme="@style/Theme.GFGPagination">
<activity android:name=".MainActivity">
<intent-filter>
<action android:name="android.intent.action.MAIN" />
<category android:name="android.intent.category.LAUNCHER" />
</intent-filter>
</activity>
</application>
</manifest>
|
After updating the code for your AndroidManifest.xml file. Now run your app and it will work properly.
Like Article
Suggest improvement
Share your thoughts in the comments
Please Login to comment...