Distraction-Free Development in Android Studio
Last Updated :
13 May, 2021
You can use the Distraction Free Mode of Android Studio to remove the editor tabs and tool-windows buttons. By doing that, your eagle eyes could only focus on the bug at line #108, and don’t miss any hiding spot! Sounds Indulging? Let’s Begin! If you’re like us who prefers to remain focused on code and everything aside from code feels bothering, you’re likely to seek out something helpful here. These particular tips are some things, asked tons when someone looks at my IDE and realizes that it’s Android Studio, not Visual Studio Code.
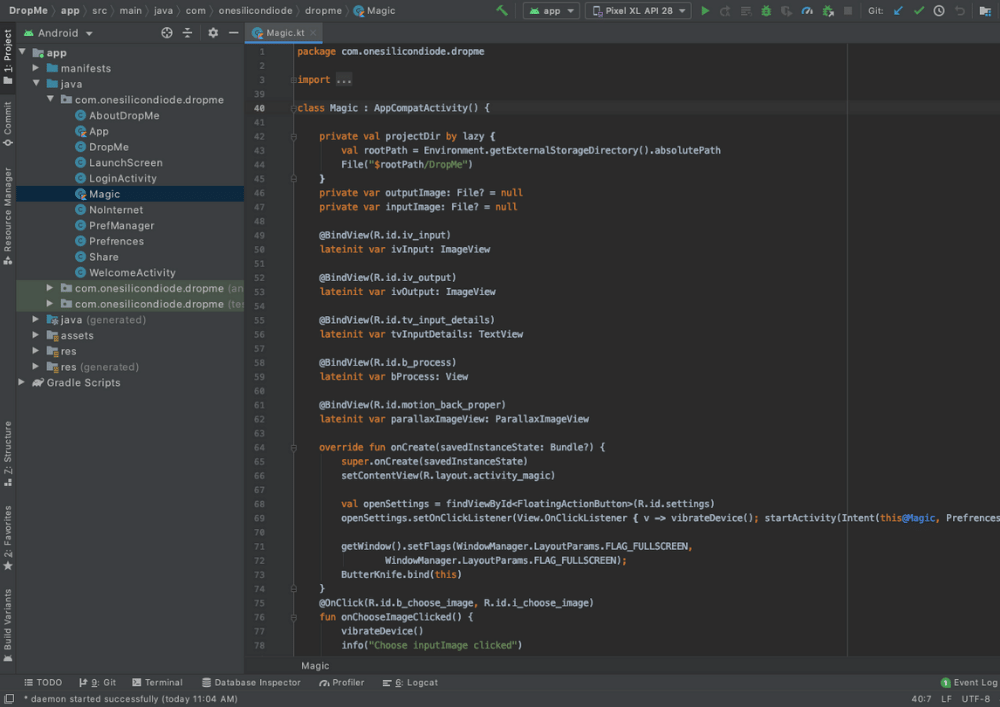
JetBrains IDEs is highly customizable yet sometimes too cluttered with tools and panels. One nice thing is that there’s a “Distraction Free Mode”. It helps you remain focused on the present file and mainly useful during presentations. However, once we actually start working within the Distraction Free mode with multiple tabs and panels, it starts getting a touch confusing and inconvenient to manage. Wouldn’t it’s great if we could tweak this beautiful Android Studio IDE to form it look something like this?
Plain Old Sight
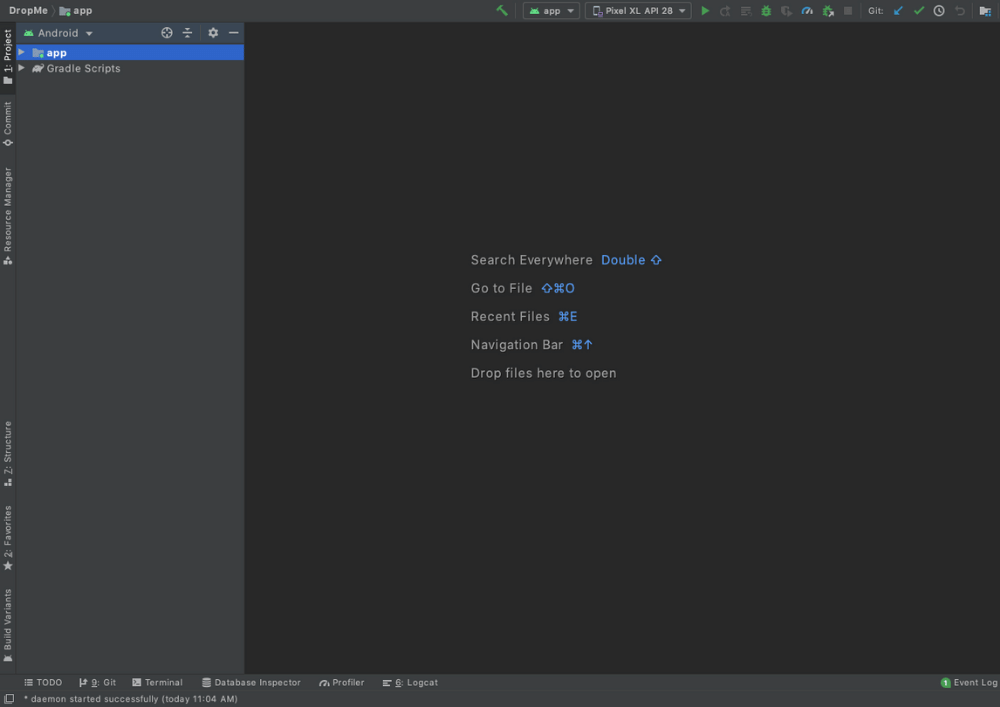
No more toolbar, sidebar, status bar, or maybe the menu bar. Just plain old distraction-free environment to remain focused and productive while still having the ability to modify tabs and convey up panels as required (???? ⌘+Number toggles panels. Ex: ⌘+1 to toggle the project panel). For the attitude, here’s what it’s like by default by the way:
Default View
The solution is simple: we would like to make a macro and assign a shortcut thereto. Here is how:
Step 1. Create a Macro
To get the above screenshot, just create this Macro:
Here are the actions during this Macro:
View > Toggle “Toolbar”
View > Toggle “Tool Buttons”
View > Toggle “Status Bar”
View > Toggle “Navigation Bar”
View > Active Editor > Toggle “Show Gutter Icons”
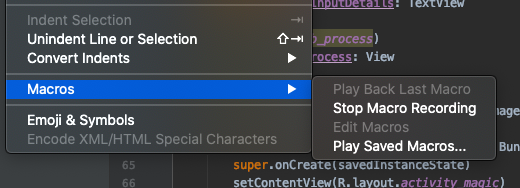
In case this is often your first time creating a Macro, here is the way to create one:
From Edit Menu > Macros > Select “Start Macro Recording”.
Perform all the actions that we might like this macro to. Since this particular macro only involves toggling a bunch of options under the View menu, we’ll just be opening View and hitting the choice we would like to toggle. Once we are through with all 5 Actions, stop recording the Macro from Edit > Macros > Stop Macro Recording. That’s it. Name this macro and that we are done.
Step 2. Assign a Keyboard Shortcut
It would be pretty inconvenient if we had to run this macro from the Edit menu whenever we would like to toggle, right? There’s a simple thanks to solve this: Assign a shortcut to a menu item.
Enabling Macros
Here is How?
As shown within the screenshot, open preferences > look for the name of our macro.
Now we will add a shortcut to our Menu item “Macro > Distraction Free” by double-clicking thereon menu and assigning a shortcut.
As you’ll see, I assigned ⌘+ Shift+0 to my macro.
That’s it. Our distraction Free mode is now ready. Keep hitting ⌘+Shift+0 and have fun!
Using Logcat and other panels like file browser, Debug window, etc are far more convenient during this mode
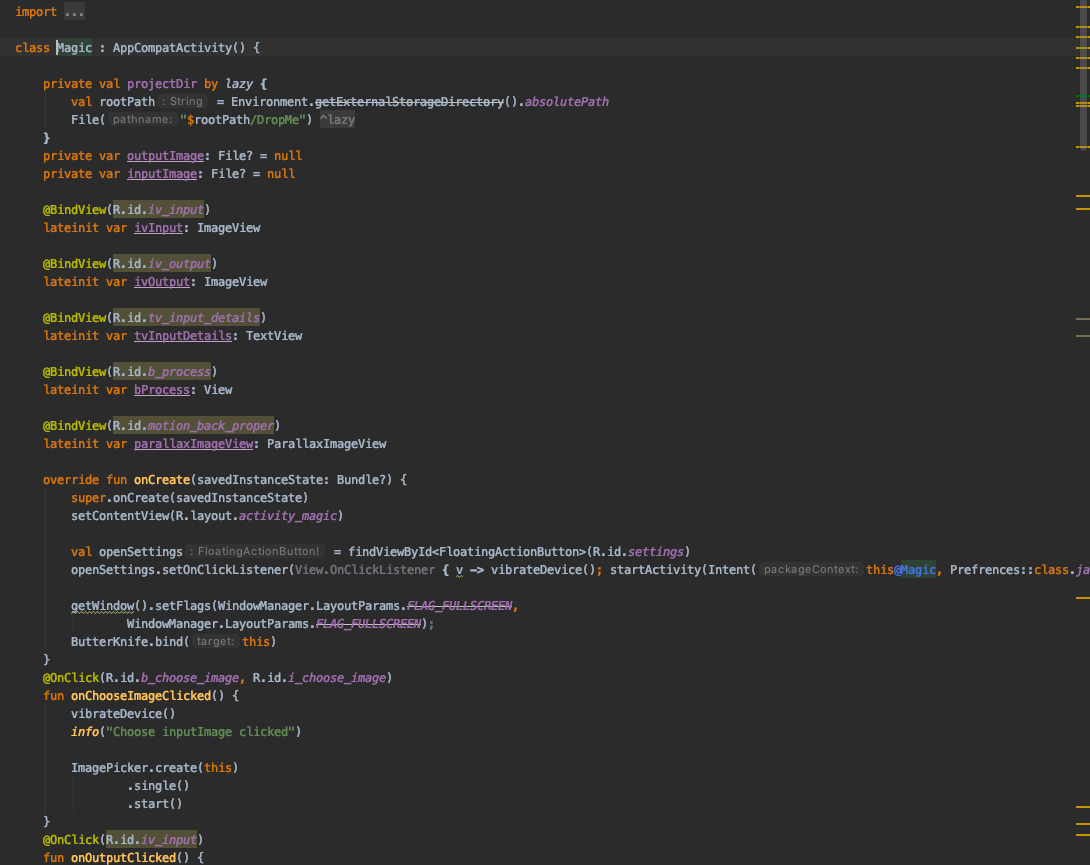
Finally Distraction Free!
Conclusion
Android Studio is a great feature-packed IDE indeed, period. But it has certain features that some people don’t need to use on an everyday basis, hiding those and making the working place clutter-free not only eases the view but also makes you more productive as there are fewer things coming between your razor-sharp eyes and the bug on line #108.
Like Article
Suggest improvement
Share your thoughts in the comments
Please Login to comment...