Docker – Working With Kubernetes
Last Updated :
09 Jun, 2022
Docker is a tool designed to make it easier to create, deploy and run applications by making use of containers. Docker can execute image files too. Docker allows you to separate applications from infrastructure so that Docker containers can deliver projects in a faster manner. It makes use of OS-level virtualization in order to deliver the application.
Docker Container Advantages:
- Size is small, they are very fast.
- Lightweight and portable.
- Less RAM and space.
- Process-isolated, if one container gets affected other doesn’t get affected.
Kubernetes is an open-source system for the automation, deployment, and scaling of containerized applications. It is used for building modern applications. You can use Kubernetes for cloud deployments. When used in combination with AWS, you use Kubernetes to manage clusters of Amazon Elastic Compute Cloud (EC2) instances that host your containers.
Kubernetes Advantages:
- Scalability
- Flexibility
- Portability
Key Terminologies in Docker:
- Container: The container allows a developer to package up an application with all parts it needs such as libraries, tools, code, and other dependencies which are used to run a service and deploy it as one single package. It consists of container engines that help in building up containers.
- Docker Engine: Docker Engine is an open-source containerization innovation that is used for building and containerizing your applications.
- Docker file: Docker image is created by making use of Docker file. This file contains data in the form of commands which in turn helps in the creation of the Docker image.
- Docker Image: A Docker image is a perused format that contains a bunch of directions for making a container that can run on the Docker portal.
Prerequisites:
- Docker Desktop
- Kubernetes CLI
- Minikube
Installation:
1. Install Docker Desktop: Docker can fabricate pictures naturally by perusing the guidelines from a Dockerfile. A Dockerfile is a book archive that contains every one of the orders a client could approach the order line to gather a picture. Utilizing docker assemble clients can make a robotized fabricate that executes a few order line guidelines in progression.
To install docker desktop for windows you can refer to this link.
Docker Desktop
2. Enable Kubernetes: Once the docker is installed, you have to enable Kubernetes. Click on Settings, it will lead you to the following place:
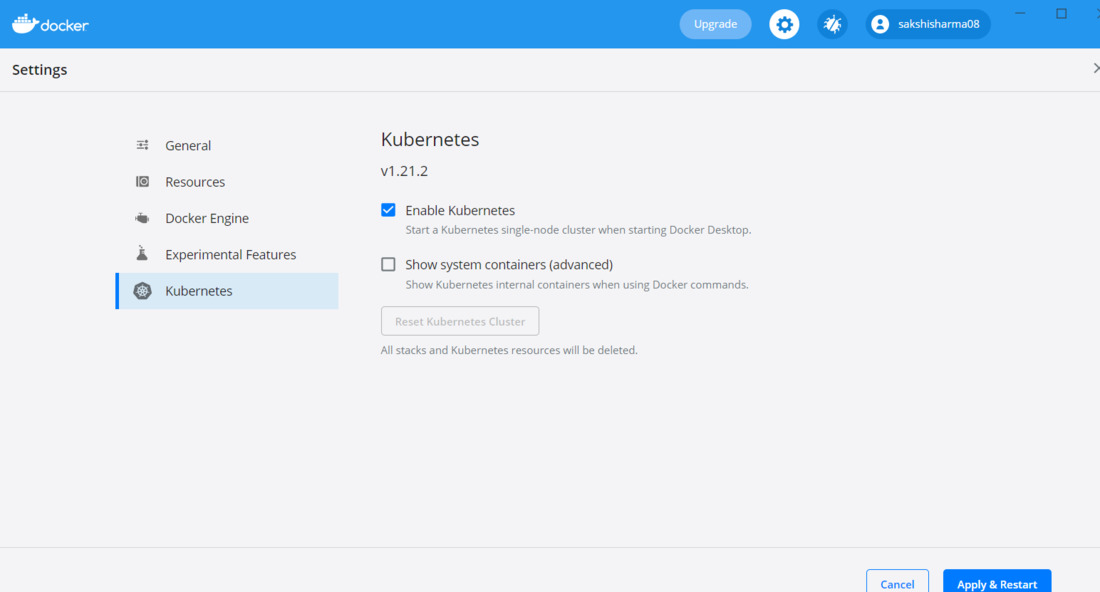
Enable kubernetes cluster
3. Install Kubernetes CLI: For running the Kubernetes cluster, Kubernetes command-line interface (CLI), kubectl is used.
To download Kubernetes CLI refer to this link.

4. Install Minikube : Minikube is called as “Local Kubernetes engine”. Minikube is a device that allows you to run Kubernetes locally. Minikube runs a solitary hub Kubernetes bunch on your PC.
To install refer to this link.

5. Once all the installation process has been done we will now make a simple app on any editor.
- Make a folder(here hello-minikube) on your desktop.
- Open that folder in your Visual Studio Code(you can use the editor of your choice). The Project Structure looks as follows:

- In app.py add the below python code:
Python3
from flask import flask, jsonify
import time
app = flask(_name_)
app.router("/")
def hello_minikubegfg():
return jsonify({"Time to Call":time.time()})
if _name_ == "_main_":
app.run(host='0.0.0.0',debug=True)
|
- In requirement.txt file-> Just add the required dependency( here I have added flask)
- In Docker file -> Pull the docker image from docker hub, and also copy all the files which are there in the directory as mentioned below:
FROM python:3.7
RUN mkdir /app
WORKDIR /app/
ADD . /app/
RUN pip install -r requirements.txt
CMD ["python", "/app/app.py"]
- In the terminal add the below-mentioned commands:
docker build -t hello-minikube . (Press Enter)
docker images (Press Enter)
After the execution of the above commands you’ll be able to see Image id as follows:

Docker images
- Now add a new file name it ‘deployment.yaml‘ and add the below-mentioned code:
apiVersion: v1
kind: Service
metadata:
  name: test-service
spec:
  selector:
    app: test-app
  ports:
  - protocol: "TCP"
    port: 6000
    targetPort: 5000
  type: LoadBalancer

---
apiVersion: apps/v1
kind: Deployment
metadata:
  name: hello-minikube-test-app
spec:
  selector:
    matchLabels:
      app: hello-minikube-test-app
  replicas: 5
  template:
    metadata:
      labels:
        app: hello-minikube-test-app
    spec:
      containers:
      - name: hello-minikube-test-app
        image: hello-minikube
        imagePullPolicy: IfNotPresent
        ports:
        - containerPort: 5000
h. In the terminal add commands as follows for the deployment purpose:
minikube start (Press Enter)
kubectl apply -f deployment.yaml (Press Enter)
minikube dashboard (Press Enter)
i. Once the above commands are executed you will see your docker app has been deployed to Kubernetes and minikube dashboard will be opened on the browser.
Output: Therefore the docker app has been deployed to Kubernetes successfully.
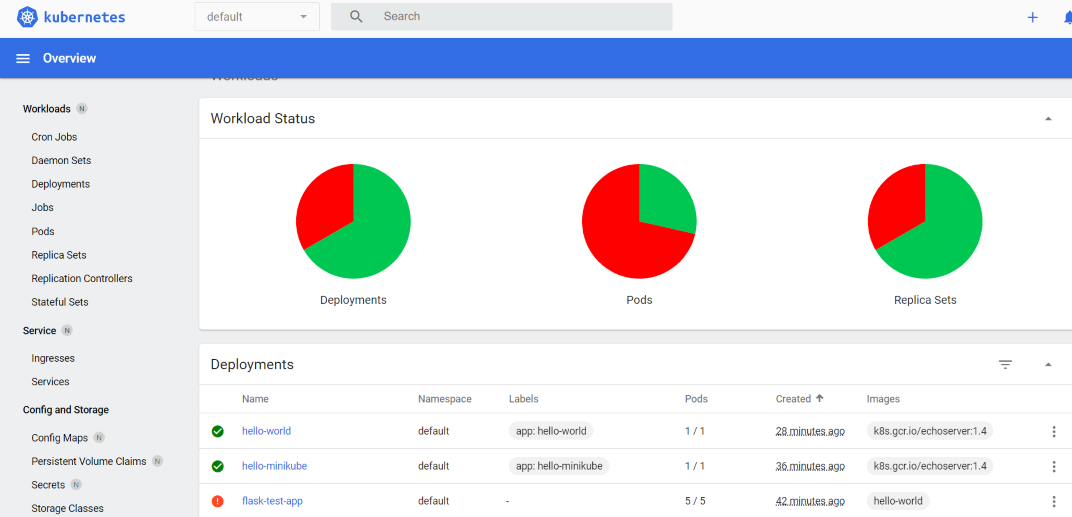
Docker app deployed to Kubernetes
Like Article
Suggest improvement
Share your thoughts in the comments
Please Login to comment...