Explain passport in Node.js
Last Updated :
14 Dec, 2021
Passport is very easy to integrate NodeJs package, which is used for adding authentication features to our website or web app.
For showing the use of Passport in Nodejs, we are starting with creating a very simple Node app.
Creating a simple Node App using express:
Step 1: Create a new folder(I have named the folder “NODEAPP”), and create a new file named “Server.js” inside it.
Step 2: Initializing npm using the command “npm init -y”. Package.json file will get added to your project folder.
npm init-y

Command used to initialize npm
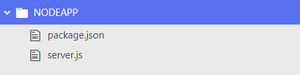
Project Structure after running the command “npm init -y”
Step 3: Install all the necessary packages, i.e, express, body-parser(will be used to fetch HTML form data later), mongoose(used to connect to our MongoDB database), using the command:
npm install express body-parser mongoose

The above command is to be executed to install the required packages.
1 file, named “package-lock.json” will get added to your project structure, and 1 folder named “node_modules” will get added to your project structure after executing the above command.
Project Structure: The final project structure should look like this:
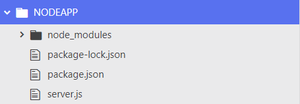
Final project structure
Step 4: Adding basic code to our Server.js file.
Server.js
var express = require('express');
var app = express();
const mongoose = require("mongoose");
const bodyParser = require("body-parser");
mongoose.connect(
useNewUrlParser: true,
useUnifiedTopology: true
});
app.get("/", function (req, res) {
res.send("This is the home route");
});
app.listen(3000, function () {
console.log("server started successfully");
})
|
Step 5: You can also check by opening the browser and typing http://localhost:3000. You should see a white page with the following response.
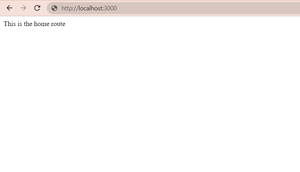
The response you should get after you type “http://localhost:3000” in your browser.
Creating basic Node app and checking whether everything is fine till now.
Step 6: Adding authentication to our website. One simple way to add an authentication feature to our website is taking the email and password input from the user and directly saving them in the database. Similarly, when the user wants to log in, ask for his/her email and password, and if any record matches the entered email and password, then the user is authentic and the login is successful.
Server.js
var express = require('express');
var app = express();
const bodyParser = require("body-parser");
app.use(bodyParser.urlencoded({extended:true}));
mongoose.connect(
useNewUrlParser: true,
useUnifiedTopology: true
});
const userSchema = new mongoose.Schema({
email: String,
password: String
});
const User = new mongoose.model("User", userSchema);
app.get("/", function (req, res) {
res.sendFile(__dirname + "/index.html");
})
app.get("/login", function(req, res) {
res.sendFile(__dirname + "/login.html");
})
app.post("/register", function(req, res){
console.log(req.body);
var email = req.body.username;
var password = req.body.password;
var newuser = new User({
email : email,
password : password
})
newuser.save();
console.log("saved successfully");
res.send("saved successfully");
})
APP.post("/login", function(req, res) {
console.log(req.body);
var emailEntered = req.body.username;
var passwordEntered = req.body.password;
User.findOne({email : emailEntered},
function(err, data){
if(data) {
console.log(data);
if(data.password == passwordEntered){
res.send("login successful!");
}
else {
res.send("Incorrect Password");
}
}
else {
console.log(err);
}
});
})
app.listen(3000, function () {
console.log("server started successfully");
})
|
Index.html
<!DOCTYPE html>
<html>
<head>
<title>Page Title</title>
</head>
<body>
<form class="" action="/register"
method="post">
<input type="email" name="username"
placeholder="Name" value="">
<input type="password" name="password"
placeholder="Password" value="">
<button type="submit" name="button">
Submit
</button>
</form>
</body>
</html>
|
Login.html
<!DOCTYPE html>
<html lang="en" dir="ltr">
<head>
<meta charset="utf-8">
<title></title>
</head>
<body>
<form class="" action="/login" method="post">
<input type="email" name="username"
placeholder="Name" value="">
<input type="password" name="password"
placeholder="Password" value="">
<button type="submit" name="button">
Submit
</button>
</form>
</body>
</html>
|
But there are a few limitations in using this simple method of authentication.
- The passwords entered by the user in the registering process are left exposed to everyone in the database, i.e., anyone in the organization who has the access to the database can see any user’s password. But, the passwords cannot be left exposed and we need strong encryption so that we can store our passwords safely in the database.

The password is exposed to everyone who is looking into the database.
- Every time(maybe 20-25 times each day or even more than that) we want to use this web app or website, we have to re-enter our email and password, which becomes very time-consuming.
- We can not add social networking sign-in feature using this simple authentication code.
Passport eliminates all of these limitations for us. If we use Passport, then:
- We don’t have to leave our passwords exposed. The whole encryption and decryption procedure is done by Passport including the hashing and encrypting of passwords.
- Passport allows us to create and maintain sessions. For example, when you visit any social media website or mobile app, you do not have to log in, again and again, each time you want to use Instagram or Facebook. Rather, the information is saved, which means you don’t have to log in each time you want to use the website. In technical words, a session has been created, and it will be maintained for the next few days, or a few weeks, or a few months.
- Passport also allows us to easily integrate authentication using Google, Facebook, LinkedIn, and various other social networking services.
Step 7: For using passport, we have to install 4 npm packages, namely “passport“, “passport-local“, “passport-local-mongoose” and “express-session“(make sure that you download “express-session” and not “express-sessions”).
In the command line, write the following command to install all the four packages:
npm install passport passport-local passport-local-mongoose express-session

Following command will install the required packages.
Once you have installed, you need to add the following code at the top of the Server.js file to include the passport module.
Server.js
const session = require("express-session");
const passport = require("passport");
const passportLocalMongoose = require("passport-local-mongoose");
app.use(express.static("public"));
app.use(bodyParser.urlencoded({extended:true}));
app.use(session({
secret : "any long secret key",
resave : false,
saveUninitialized : false
}));
|
Step 8: Initializing Passport and starting the Session. For initializing Passport and starting the session, write the following code just below the session declaration code.
Server.js
app.use(session({
secret: "any long secret key",
resave: false,
saveUninitialized: false
}));
app.use(passport.initialize());
app.use(passport.session());
const userSchema = new mongoose.Schema({
email: String,
password: String
});
userSchema.plugin(passportLocalMongoose);
|
Step 9: Now, we want that we remain logged in for some time even if we close the browser window, i.e., we want a session to be established. The session uses a Cookie to store the data and messages and allows the server to provide correct session data to the User. Process of creating Cookies and storing messages into it: Serializing Process of crumbling Cookies and extracting messages from the Cookies so that right data should be served to user:
Server.js
const User = new mongoose.model("User", userSchema);
passport.use(User.createStrategy());
passport.serializeUser(User.serializeUser());
passport.deserializeUser(User.deserializeUser());
|
Step 10: Now, we are all set to add authentication to our website. We had installed the required packages, configured the session, initialized Passport and session, and told passport to use and manage cookies.
Handling the get requests:
Server.js
app.get("/", function (req, res) {
if(req.isAuthenticated()) {
res.send("
You have already logged in. No need to login again");
}
else{
res.sendFile(__dirname + "/index.html");
}
})
app.get("/login", function(req, res) {
if(req.isAuthenticated()){
res.send("
You have already logged in. No need to login again");
}
else{
res.sendFile(__dirname + "/login.html");
}
})
|
Step 11: Now, in the register route, we have to add simple code that will allow us to register any new user.
Server.js
app.post("/register", function(req, res){
console.log(req.body);
var email = req.body.username;
var password = req.body.password;
User.register({ username : email },
req.body.password, function (err, user) {
if (err) {
console.log(err);
}
else {
passport.authenticate("local")
(req, res, function() {
res.send("successfully saved!");
})
}
})
})
|
And the similar code is to handle login requests. Following is the code for handling the post request on the /login route.(The login.html file will be the same as that used in the earlier method of authentication )
Server.js
app.post("/login", function (req, res) {
console.log(req.body);
const userToBeChecked = new User({
username: req.body.username,
password: req.body.password,
});
req.login(userToBeChecked, function (err) {
if (err) {
console.log(err);
res.redirect("/login");
} else {
passport.authenticate("local")(
req, res, function () {
User.find({ email: req.user.username },
function (err, docs) {
if (err) {
console.log(err);
} else {
console.log("credentials are correct");
res.send("login successful");
}
});
});
}
});
});
|
You just have to install all the packages, write the following code, start the server(using “node server.js/node app.js” command) and you are ready to Authenticate your Users using Passport.
Index.html
<!DOCTYPE html>
<html>
<head>
<title>Page Title</title>
</head>
<body>
<h1>REGISTER</h1>
<form class="" action="/register" method="post">
<input type="email" name="username"
placeholder="Name" value="">
<input type="password" name="password"
placeholder="Password" value="">
<button type="submit" name="button">
Submit
</button>
</form>
</body>
</html>
|
Login.html
<!DOCTYPE html>
<html lang="en" dir="ltr">
<head>
<meta charset="utf-8">
<title></title>
</head>
<body>
<h1>LOGIN</h1>
<form class="" action="/login" method="post">
<input type="email" name="username"
placeholder="Name" value="">
<input type="password" name="password"
placeholder="Password" value="">
<button type="submit" name="button">
Submit
</button>
</form>
</body>
</html>
|
Server.js
var express = require('express');
var app = express();
const mongoose = require("mongoose");
const bodyParser = require("body-parser");
const session = require("express-session");
const passport = require("passport");
const passportLocalMongoose =
require("passport-local-mongoose");
app.use(bodyParser.urlencoded({ extended: true }));
app.use(session({
secret: "long secret key",
resave: false,
saveUninitialized: false
}));
app.use(passport.initialize());
app.use(passport.session());
mongoose.connect(
useNewUrlParser: true,
useUnifiedTopology: true
});
const userSchema = new mongoose.Schema({
email: String,
password: String
});
userSchema.plugin(passportLocalMongoose);
const User = new mongoose.model("User", userSchema);
passport.use(User.createStrategy());
passport.serializeUser(User.serializeUser());
passport.deserializeUser(User.deserializeUser());
app.get("/", function (req, res) {
if (req.isAuthenticated()) {
res.send(
"You have already logged in. No need to login again");
}
else {
res.sendFile(__dirname + "/index.html");
}
})
app.get("/login", function (req, res) {
if (req.isAuthenticated()) {
res.send(
"You have already logged in. No need to login again");
}
else {
res.sendFile(__dirname + "/login.html");
}
})
app.post("/register", function (req, res) {
console.log(req.body);
var email = req.body.username;
var password = req.body.password;
User.register({ username: email },
req.body.password, function (err, user) {
if (err) {
console.log(err);
}
else {
passport.authenticate("local")
(req, res, function () {
res.send("successfully saved!");
})
}
})
})
app.post("/login", function (req, res) {
console.log(req.body);
const userToBeChecked = new User({
username: req.body.username,
password: req.body.password
});
req.login(userToBeChecked, function (err) {
if (err) {
console.log(err);
res.redirect("/login");
}
else {
passport.authenticate("local")
(req, res,function () {
User.find({ email: req.user.username },
function (err, docs) {
if (err) {
console.log(err);
}
else {
console.log("credentials are correct");
res.send("login successful");
}
});
});
}
})
})
app.listen(3000, function () {
console.log("server started successfully");
})
|
Using this code and adding authentication using Passport, we have eliminated the three major problems:
- Once we login, a session is created. This means whenever we open the site again, we need not to log in once more. Cookies got stored in the browser(when you logged in for the first time) and they will be used as and when you come back again. (req.isAuthenticated() checks whether a session is already running or not).
- Our Users’ Passwords are safe. They are not left exposed in our database. We have delegated all the encryption/decryption task to Passport and that’s it.
Passwords are encrypted and are not visible to anyone.
- We can see that now, there is no column for “password”. Our passwords are encrypted by Passport. And whenever they are needed for log in purpose, Passport can again decrypt the passwords and use them.
- We can also add authentication using Google, Facebook, LinkedIn, and various other Social Networking Services using Passport only.(We have not discussed it here but the code is similar to this)
Output:

Like Article
Suggest improvement
Share your thoughts in the comments
Please Login to comment...