Flutter – Installation on macOS
Last Updated :
14 Mar, 2023
In this article, we are going to take a look at Flutter installation of macOS. In this article, we will see what are the system requirement for it to work with flutter, how to set an environment variable, and how to install flutter SDK and Dart SDK. We will understand how to use flutter doctor, how to install Xcode and Android Studio, accept Android licenses, move to the desired flutter channel, and finally create our first flutter project.
System Requirements
To install and run Flutter SDK, on a macOS system it must fulfill these minimum requirements.
- Operating System: macOS (64-bit)
- Disk Space: 3.5 Gb
- Tools: Git, IDE (Xcode includes git)
1. Download Flutter SKD
First, we will create a new folder in our home directory, here I will name it tools. In the tools folder, we will clone flutter from the Github repository. And to do that we will open the terminal in that folder and execute the following command:
git clone https://github.com/flutter/flutter.git
This command will take some time to execute as it will download the flutter SDK in our system. After it gets executed you will see that it contains a flutter directory, and if you open it you will find a bunch of other folders and one among them in bin folder. You can take a note of its location as it will be required in the next step.
2. Updating Path Variable and Downloading Dart SDK
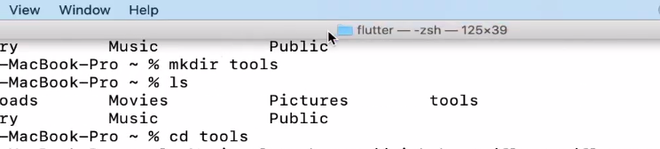
The problem with our flutter installation is that it will just execute the export path and append the path to the flutter repository that we just downloaded. So if we open a terminal in another directory flutter won’t work. And to make it work we will have to update path variables. For this first we need to identify which terminal we are using, so you can open the terminal and take a look at the title bar, here in the image below you can see zsh written, so this is Z shell.
The other one is the bash terminal. So if you are using the Zsh terminal we have to create a file in the home repository which will be named .zshrc and for the bash terminal, the file will be named .bashrc . So this file is going to hold a script that will get executed whenever the terminal opens. To do that we will have to open this file in any text editor from the finder as this will be invisible into the terminal. And once this is open we will paste the below code in the file and replace the PATH_TO_FLUTTER_GIT_DIRECTORY with the path of the bin folder in the flutter directory and save the file.
export PATH="$PATH:[PATH_TO_FLUTTER_GIT_DIRECTORY]/flutter/bin"
After all, this is we will restart the system and run the command flutter in the terminal, which will install dart SDK (dart SDK is mandatory for flutter to work).
Verify the set path variable.
“`vim .zshrc “`
You should be able to the set path.
“`:wq (Press Enter)“`
Note: The path should not be enclosed inside double quotes, for example:
“`export PATH=/Users/Library/Android/sdk/platform-tools:~/flutter/bin“`
3. Flutter Doctor
Flutter doctor command checks the system environment and reports the output to the terminal, it shows if something is missing or not working or if something needs to be updated for flutter to work. Now we will run the flutter doctor command in the terminal. It will show output similar to this.
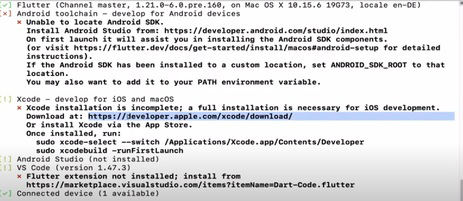
It says that Android Studio is not installed, Xcode is not installed and some other dependencies need to be installed or fixed. We have to deal with all of that to work with flutter.
4. Installation of XCode
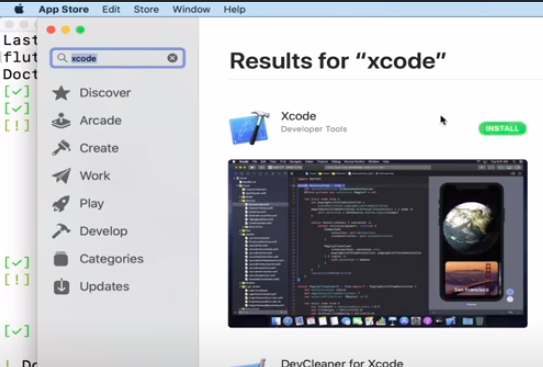
Now we will install Xcode, and to do so you need to go to the app store and search for Xcode, and hit the installation button. It will take a while to get installed.
After it is installed we need to run the two commands in the terminal.
1. sudo xcode-select --switch /Applications/Xcode.app/Contents/Developer
2. sudo xcodebuild -runFirstLaunch
5. Installation of Android SDK
Now to fix the issues with the Android Studio and Android Toolchain we will install android studio.
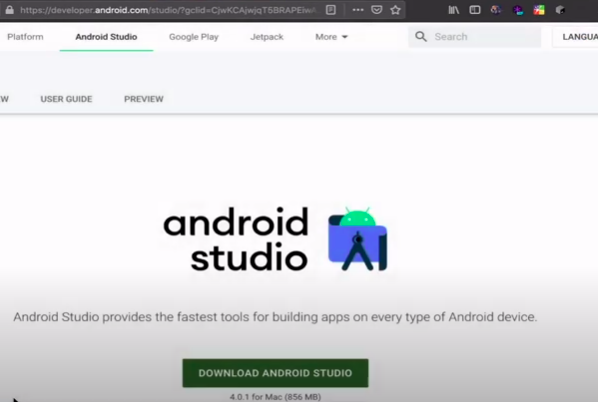
First, we will download the Android Studio DMG file from the official website. After it is downloaded launch the DMG file and copy the Android Studio into the application folder. And then we can go through all the default settings in the Android Studio setup wizard to install Android Studio.
After the Android Studio is installed we will launch it and click on the configurations button and go to plugins. Here we will search for flutter plugin and install it which will install the dart plugin automatically. And after this, you can restart the system.

6. Android Licenses
Now, if we run the flutter doctor in the terminal once again we will see both the Xcode and Android Studio are installed but we need to accept android licenses.

And to resolve this problem we will run the below command in the terminal. It will ask for your content to approve all the licenses.
flutter doctor --android-licenses
And if you run flutter doctor everything will be sorted except VS code not installed and no connected device. If you want you can install vs code by it is not mandatory and we can always connect a device while making our first flutter project.

7. Flutter Channels
If you run the command flutter channel you will see that we are currently in the master channel by default. If you want to make a production-ready application you should switch to the stable channel, and to do that you can run the command flutter channel stable. But because we are going to make a macOS desktop app we will use the master channel only. To create a macOS desktop app we need to enable macOS desktop and to do this we will run this command flutter config –enable-macos-desktop.
8. Setup First Flutter Project
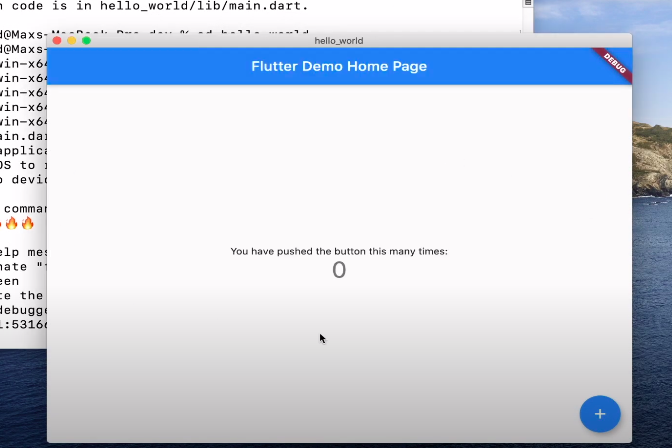
Now we are all set to create our first project in flutter. For we will create a folder with any desired name and open a terminal in that folder and run the command flutter create hello_world. This command will create a flutter project with the name hello_world inside that folder. And to run this project we go inside the project folder with the command cd hello_world and run the command flutter run. This command will execute our hello_world project and open that in a new window. Here you will see a counter app, which is always the demo app of flutter. And if you want to edit the code you can always open the hello_world folder with the IDE of your choice.
With this, we are all ready to have a deep dive in the world of flutter and make some amazing applications!
Like Article
Suggest improvement
Share your thoughts in the comments
Please Login to comment...