How to create a reporting app with Vue 3 and Composition API ?
Last Updated :
27 Jan, 2023
Vue is an open-source JavaScript front-end framework for building the UI for websites and apps. The main features are an incrementally adaptable architecture that focuses on declarative rendering and component composition. Not long time ago Vue has released new version – Vue 3. The updated framework has some new features, in particular Composition API.
Approach: In this article, we will create a reporting app with Vue 3 and Composition API. For a project, we will use Flexmonster Pivot Table & Charts and Highcharts libraries as they have an integration with Vue 3. Flexmonster team has created a special sample project on GitHub where you can check the usage of their component with both 2 and 3 versions of Vue.js as well as Highcharts integration. This project also contains examples of Composition and Options API’s usage.
First of all, we will create the Vue project by entering CLI command. Then we will add a Flexmonster instance to the web page, connect it to the charting library and then add the charts.
Now let’s see the step-by-step implementation on how to create an app in Vue 3.
Prerequisite: To work with Vue, you will need Node.js and npm. To check their presence on your machine run the following command in the command line:
node -v
npm -v
If they are absent, install them.
Use this command to install Vue CLI:
npm install -g @vue/cli
Another required tool is Flexmonster CLI. You can install it using npm:
npm install -g flexmonster-cli
Then install Highcharts via npm:
npm i --save vue3-highcharts
Step 1: Create a simple Vue app.
vue create first-project
cd first-project
After this, you will be able to choose a preset for your project. We will choose the default one.
The project structure should look like this:

Step 2: install the Flexmonster Vue module by running this CLI command from the folder with package.json.
flexmonster add vue-flexmonster
Now will locally register vue-flexmonster. To do it, I add the following code in the <script> section of the component where you need the pivot table:
App.vue
import Pivot from "vue-flexmonster/vue3";
import 'flexmonster/flexmonster.css';
import { defineComponent, ref } from 'vue';
export default defineComponent({
setup() {
let pivot = ref(null);
return {
pivot,
}
}
});
|
Add the pivot table instance to a Vue component by including the Pivot module in the <template> section of the chosen component:
App.vue
<template>
<div id="app">
<Pivot
ref="pivot"
toolbar
v-bind:height="600"
v-bind:report=
v-bind:reportcomplete="reportComplete"
// license key parameter for charts integration
v-bind:licenseFilePath=
</Pivot>
</div>
</template>
|
Step 3: Import charts into the Vue 3 app and add a special connector and several methods to the script that will help with communication between charts and pivot grid.
App.vue
import Highcharts from "highcharts";
import "flexmonster/lib/flexmonster.highcharts";
methods: {
drawChart: function () {
this.$refs.pivot.flexmonster.highcharts.getData(
{
type: "bar",
},
function (data) {
Highcharts.chart("highcharts-container", data);
},
function (data) {
Highcharts.chart("highcharts-container", data);
}
);
},
reportComplete: function () {
this.$refs.pivot.flexmonster.off("reportcomplete");
this.drawChart();
},
}
|
To display the charts on the page we will put a container with Highcharts under the pivot table in the template tag so it looks like this:
App.vue
<template>
<div>
<Pivot
ref="pivot"
toolbar
v-bind:height="600"
v-bind:report="
v-bind:reportcomplete="reportComplete"
v-bind:shareReportConnection="{
}"
v-bind:beforetoolbarcreated="customizeToolbar"
v-bind:licenseFilePath="
</Pivot>
<div class="chart-container">
<div id="highcharts-container"></div>
</div>
</div>
</template>
|
Step to run the application: Open the terminal and run the project using the command.
npm run serve
Output: The result will be seen on http://localhost:8080/ in your browser.
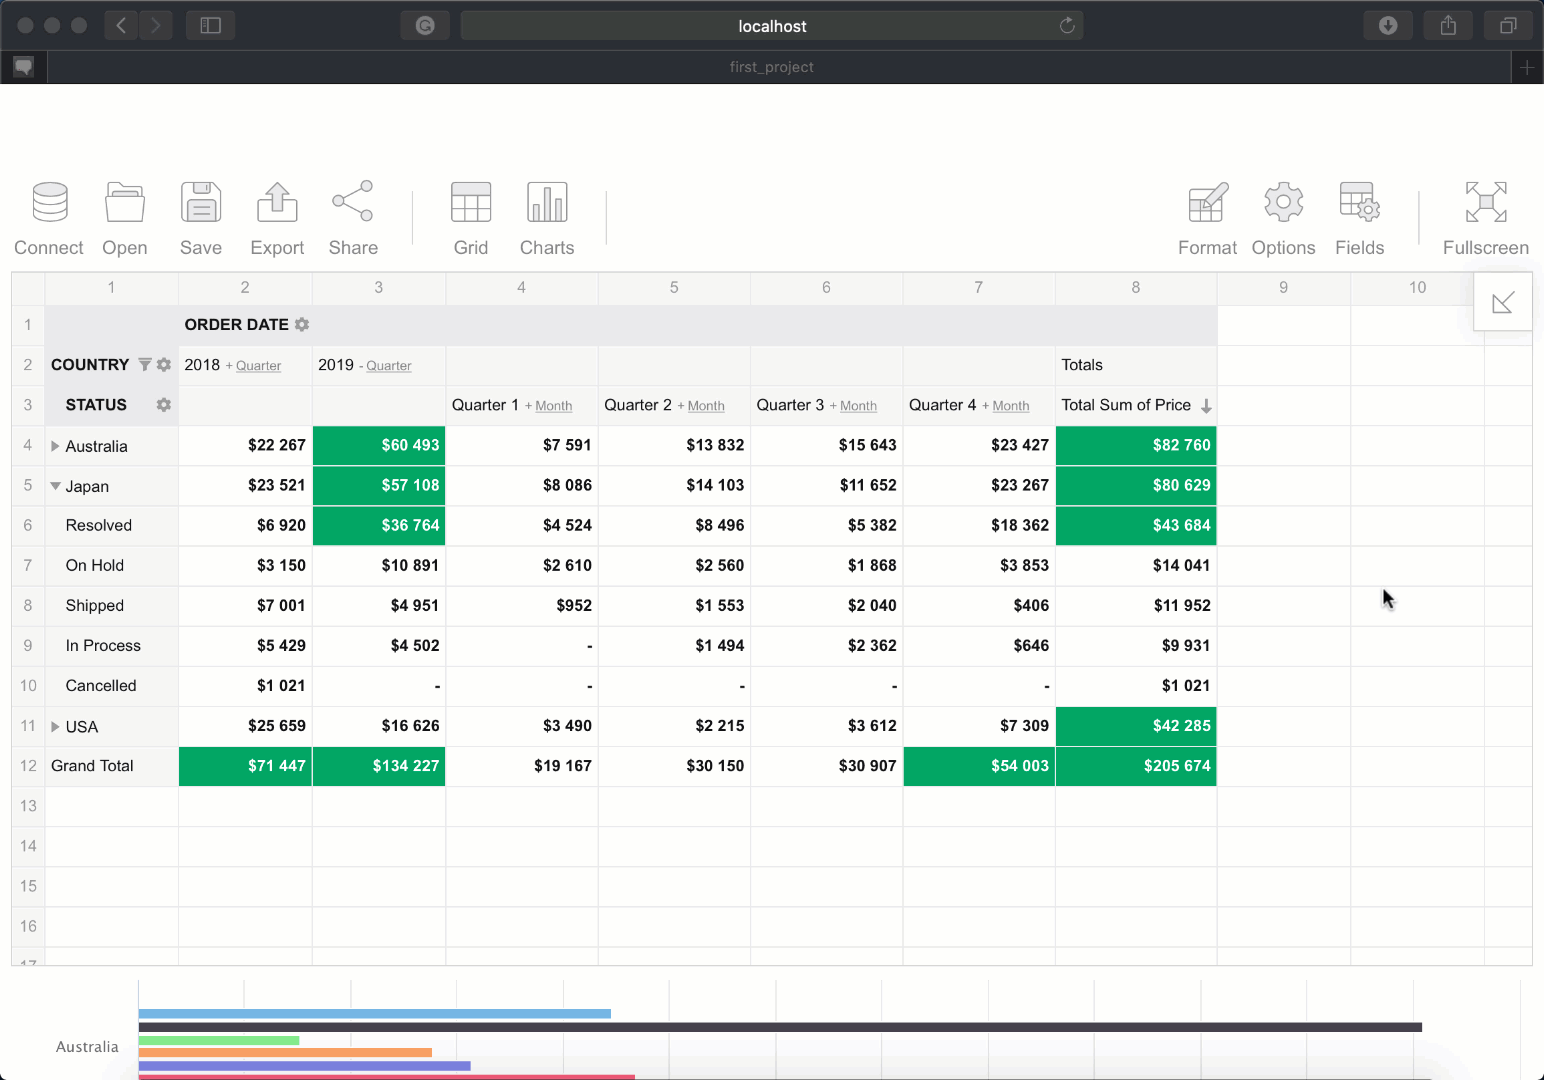
Example of a reporting app with Vue 3
Like Article
Suggest improvement
Share your thoughts in the comments
Please Login to comment...