How to Deobfuscate an Android Stacktrace using a Mapping File?
Last Updated :
19 Nov, 2021
In general, the stack traces we do receive can be of ANR (Application not responding) issues, Android services logs for e.g. broadcast receivers, Intent services, and many more. On the development side, tracing those error logs will be a major burden. In this article, we go through some specific techniques for retracing stack traces obtained from Google Play crash reports, Firebase crash reports, or any crash report analytics tool. So we’ll start with the steps below to retrace it.
- Recognize the stack trace error report
- Examine the mapping file
- To retrace it, use the (proguardgui) tool
Step by Step Implementation
Step #1: Reading the Stack-trace
So let’s commence this article by checking a sample stacktrace, to help understand better how it really works!
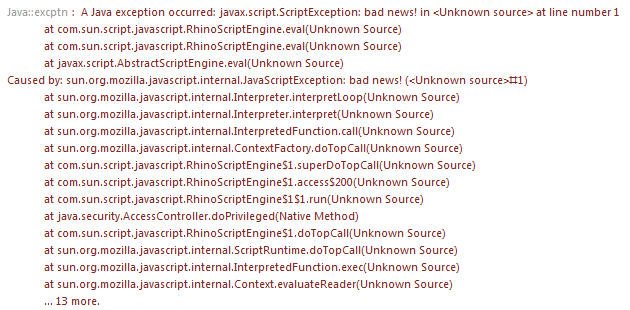
Image #1. Looking on the Stacktrace.
Step #2: Reading the Map File
Now the next step is to get the mapping file, to do that follow the steps below:
<your_project_name_here>app/build/outputs/mapping/FLAVOR/release/mapping.txt
Step #3: Opening the Gradle GUI
Once you have completed the previous steps, now you have to open the gradle GUI, to do that browse to
<your_system_name>/AppData/Local/Android/SDK/tools/proguard/lib
and then find an executable, named ‘proguardgui.exe’, double click that to open it, a window like this would open:
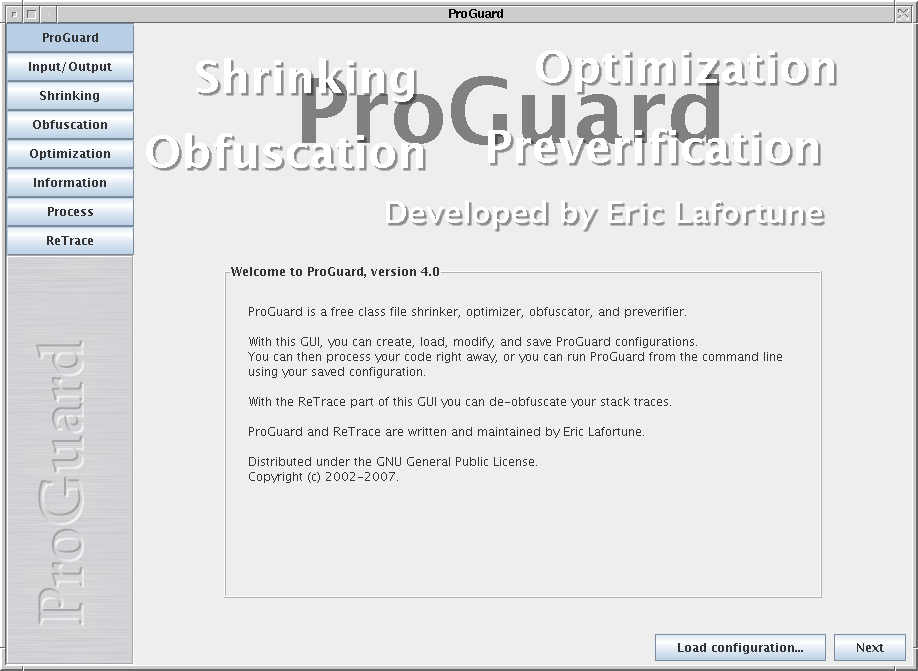
Image #2. The Proguard GUI window.
When you arrive at this window, just browse your mapping.txt file from the above URL indicated in Step 01, put your stack trace error logs in the obfuscated stack trace window, and lastly click on the ReTrace button to receive the DeObfuscated error report.
Step #4: Using Play Store Developer Console
- Log in to your Play Developer Account using your login credentials.
- Choose an app.
- Select Android vitals > Deobfuscation files from the left menu.
- Click Upload next to a version of your software.
- Upload the ProGuard mapping file for your app’s version.
Step #5: Using The Terminal on the Mac
If you are using the terminal on the mac, the whole process gets easier, you simply need to do the following:
java -jar /Users/<your computer name>/Library/Android/sdk/tools/proguard/lib/proguardgui.jar
All of the preceding processes are carried out locally on your development side and they necessitate some work, and that brings us to the end of this Geeks for Geeks article, hope this helps you deobfuscate your code with ease!
Like Article
Suggest improvement
Share your thoughts in the comments
Please Login to comment...