Docker is an open-source containerization tool used for building, running, and managing applications in an isolated environment. A container is isolated from another and bundles its software, libraries, and configuration files. In this article, to dockerize a Spring Boot application for deployment purposes, we will learn how to create a spring boot app, and how to create a docker image for the spring boot app and we will run it on the docker container.
Prerequisites: Before continuing any further, please ensure that node and docker are installed on your machine. If required, visit the Java Installation Guide or the Docker Installation Guide.
Dockerize a Standalone Spring Boot Application
Standalone Spring Boot Application: A Standalone Spring Boot Application is a Java application utilizing the Spring Boot framework, capable of running independently without external server software. It embeds an application server and can be executed as a standalone JAR file, simplifying deployment and reducing dependencies.
To dockerize a spring boot application, we need to first create a simple spring boot application. Then we need to add the maven plugin to our XML file, and after that, we can create an executable jar file.
Setting up a spring boot application
Follow the steps mentioned below to dockerize the spring boot application.
Step 1: Create a skeleton application using https://start.spring.io.
Step 2: Now create a maven project with the following configuration. After entering all the details, click on the ‘GENERATE’ button to download the project.

Step 3: Extract the zipped file.

Now, open it in an IDE of your choice.

Spring Boot buildpacks
Dockerfiles and manual configuration are not required when pack the Spring Boot apps into the container images thanks to Spring Boot buildpacks. It allow developers to take advantage of automatically image generation specific to their Spring Boot projects, freeing them up to concentrate on writing. These buildpacks automatically identify the prerequisites for the application, including runtime parameters and dependencies, and put everything together to make a container image that is suitable for production. This increases developer productivity, streamlines the containerization process, and improves consistency between deployments.
Step 4: Below one is the dependency to create docker image with the buildpacks. Now we need to add below Maven plugin in our pom.xml file.
<build>
      <plugins>
              <plugin>
                      <groupId>org.springframework.boot</groupId>
                      <artifactId>spring-boot-maven-plugin</artifactId>
              </plugin>
       </plugins>
</build>
Step 5: Open the base java file of the project and add a new controller to the base class of the application.

@RequestMapping("/")
public String home() {
    return "Dockerizing Spring Boot Application";
}
Step 6: Now, add the @RestController annotation and import the required packages. In the end, your Application.java file should look like this.
Java
package com.docker.spring;

import org.springframework.boot.SpringApplication;
import org.springframework.boot.autoconfigure.SpringBootApplication;
import org.springframework.web.bind.annotation.RequestMapping;
import org.springframework.web.bind.annotation.RestController;

@SpringBootApplication
@RestController
public class Application {

    @RequestMapping("/")
    public String home() {
        return "Dockerizing Spring Boot Application";
    }

    public static void main(String[] args) {
        SpringApplication.run(Application.class, args);
    }

}
Step 7: Now start the application by running the following command,
$ ./mvnw spring-boot:run


Step 8: Navigate to http://localhost:8080 to test the application.

Project Structure
This is how the project structure should look at this point,

Dockerizing Our Application
Generate a .jar file
- Next, let’s generate the .jar file by executing the command ./mvnw clean package in your IntelliJ terminal. This command compiles the project, runs any necessary tests, and packages the application into a .jar file.
- Once the process is complete, navigate to the target folder within your project directory. You’ll find the generated spring-0.0.1-SNAPSHOT.jar file there.
Now create a new jar file using maven builder.
$ ./mvnw clean package
The above command will build our docker image. Below image refers to generate the jar file by executing the above command. Refer the second image the build was success and jar file created.


A Basic Dockerfile
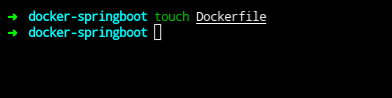
Run the following command at the root of our project to build a Dockerfile. This command will create an empty Dockerfile in the current directory. After creating the Dockerfile, you can proceed to define the necessary instructions for building your Docker image as mentioned in below steps.
$ touch Dockerfile
Add configuration to dockerize the Spring Boot application
Now we have a working Spring Boot Application, To dockerize an application, now paste the following content into the Dockerfile:
FROM openjdk:18
WORKDIR /app
COPY ./target/spring-0.0.1-SNAPSHOT.jar /app
EXPOSE 8080
CMD ["java", "-jar", "spring-0.0.1-SNAPSHOT.jar"]
The above file contains the following information:
FROM openjdk:18: This line specifies the base image for the Docker container. In this case, it uses the official OpenJDK image tagged with version 18. This image provides a runtime environment for Java applications.
WORKDIR /app: This line sets the working directory inside the container to /app. All subsequent commands will be executed relative to this directory.COPY ./target/spring-0.0.1-SNAPSHOT.jar /app: This command copies the Spring Boot application JAR file from the host machine’s ./target directory to the /app directory inside the container. It’s assuming that you’ve built the Spring Boot application and the JAR file is available in the specified location.EXPOSE 8080: This line informs Docker that the container will listen on port 8080 at runtime. However, it doesn’t actually publish the port. It’s merely a documentation of which ports the container is expected to use.CMD ["java", "-jar", "spring-0.0.1-SNAPSHOT.jar"]: This command specifies the default command to run when the container starts. It launches the Spring Boot application by executing the java -jar command with the Spring Boot JAR file as its argument.
Now create a docker image by using the docker build command:
$ docker build -t [name:tag] .
- -t: Name and tag for the image
- . : The context for the build process
Once the build process has been completed, you will receive the id and tag of your new image.

Run the Spring Boot Docker image in a container
Before running our image in a container, let’s ensure that we avoid any potential errors when attempting to map the container port to the localhost port. To do this, we need to specify the correct port binding configuration in our Docker command or Docker Compose file. This ensures that the container’s port is exposed and accessible from the host system.
Create a docker container by running following command:
$ docker run -d -p [host_port]:[container_port] --name [container_name] [image_id/image_tag]

- -d: Run the container while printing the container ID.
- -p: Mapping port for our container
- –name: Assign a name to the container
Verify whether the container has been created successfully by running below command:
$ docker container ps

How to change the base image
Modifying the base image in a Dockerfile is a simple procedure that can have a big effect on the size, security, and functionality of your container. Take these actions to modify the base image:
1. Select a fresh basis image.
It is important to do thorough research to get a suitable base image that meets the requirements of your application before making any changes. The operating system, picture size, security features, and compatibility with your application stack are important factors to take into account. Official images from Docker Hub or other reliable sources should be given priority in order to ensure reliability and compliance with security best practices. You can choose a base image that optimizes both speed and security and serves as a strong basis for your containerized application by carefully weighing these considerations.
2. Make Dockerfile updates.
Open a text editor and choose your Dockerfile. Look for the instruction “FROM” at the start of the file, which indicates the current base image. Replace the existing image with a new one, as demonstrated in the sample below.
FROM image:version #Change the image and version as per your requirement
3. Adjust dependencies and configuration
With the variations between the old and new basic images, it may be required to update either of the dependencies, configurations, or instructions in your Dockerfile. Ensure that all required tools, libraries, and packages are installed and configured on the new base image.
4. Verify your changes.
After making changes to the Dockerfile, re-create your Docker image using the `docker build` command:
docker build -t [name:tag] .
Check the project
Make sure the project structure complies with the standard procedures and has all the parts required for the Spring Boot application. Additionally, confirm that the application’s directory structure is logical and well-defined, and that all dependencies are configured correctly.

Check the application
Open your web browser and go to http://localhost:8080/ to examine the program. This will show you the local Spring Boot application running on your computer.
Dockerize the application in a Compose tool
DockerFiles and Docker commands work well for building single containers. Container management slows down if we wish to operate on an application’s shared network.
Docker offers a tool called Docker Compose to solve this problem. This utility has a unique build file format in YAML. Multiple services’ configurations can be combined into a single file called docker-compose.yml.
The Docker Compose File
Here is the example Docker Compose file is a basic configuration for orchestrating multiple services. It defines two services, “service1” and “service2”, each with specified Docker images, container names, exposed ports, and environment variables. The version we can modify the as per our requirements.
version: '3.8'

services:
  service1:
    image: your_image_name
    container_name: your_container_name
    ports:
      - "host_port:container_port"
    environment:
      - ENV_VARIABLE=value

  service2:
    image: your_image_name
    container_name: your_container_name
    ports:
      - "host_port:container_port"
    environment:
      - ENV_VARIABLE=value
Below is the command to build docker-compose file:
$ docker-compose config
For building an image and creating docker container we can use the below command:
$ docker-compose up --build
To stop the container, we should remove them from Docker. For this we can use the below command:
$ docker-compose down
Scaling Services
Scaling services in Docker Compose refers to the ability to increase or decrease the number of instances of a service defined in a Docker Compose file. This can be achieved by adjusting the “scale” property of a service to specify the desired number of containers to run for that service.
$ docker-compose --file docker-compose.yml up -d --build --scale service=1 --scale product-server=1
A single service one and a single product server will be spin up by this operation.
Conclusion
So, in this way we can publish the images to Docker container using Maven plugin. It is not preferrable to upload docker images to any registry using your local environment and it’s always the best practice to use CI/CD pipeline or any of the tools.
Dockerize a Spring Boot Application with Maven – FAQ’s
How do you Dockerize a Maven project?
Create a Dockerfile in the project root directory, copy the JAR file for the application into the Docker image, and provide the command to launch the application within the container in order to Dockerize a Maven project.
How can we set up a Spring Boot application with Maven?
Create a new Maven project and add the necessary dependencies, such as spring-boot-starter-parent and any other dependencies unique to your application’s requirements, to the pom.xml file to set up a Spring Boot application with Maven. Next, develop the classes and resources for your Spring Boot application by adhering to the recommended directory layout.
How to Dockerize Spring Boot Microservices?
Create a Dockerfile with the base image specified, copy the application JAR file, expose the necessary port, and describe the command to launch the application in order to dockerize Spring Boot microservices. Create the Docker image next, and use it to launch containers.
How do I Dockerize my project?
Make a Dockerfile that lists the base image, required libraries, and commands for building and executing the application in order to Dockerize your project.
What is Dockerize command?
An application can be packaged into a Docker container with the Dockerize command, making it simple to deploy and execute in a variety of contexts. Usually, it entails generating a Dockerfile, using docker build to generate the image, and docker run to launch the container.
Like Article
Suggest improvement
Share your thoughts in the comments
Please Login to comment...