How to Install Java Libraries?
Last Updated :
03 Jun, 2022
Java Library is the collection of classes that are written by some other programmers that we can use in our code by downloading those classes. Java library allows you to read and modify bytecode generated by an application. Some of the popular bytecode libraries in the Java world are “javassist” and “Cglib Nodep.” Eclipse is an open-source community rather than the best open source IDE whose projects are focused on building an extensible development platform, runtimes, and application frameworks for building, deploying and managing software across the entire software lifecycle.
Note: Here most users do tend to forget to set a path after installing libraries, so we will be covering it in two halves where we will be covering
- Installation of java libraries in first half
- Configuring build path
A. INSTALLATION OF JAVA LIBRARIES
Follow are the sequential steps to be followed in order to install java libraries.
Step 1: Download and extract the library from its website
Step 2: You need to locate the jar file(s) for the library and where the API documentation is stored. Once you know where the files are located, you can add a user library to Eclipse.
Step 3: Open the “Preferences” window in Eclipse. Navigate to “Java » Build Path » User Libraries” then on the left-hand side click on the “New” button, enter the file name and then click on the OK button.
Step 4: After that, you need to click the “Add External JARs” button to add the jar file. Browse the jar file(s) required for the library and click the “Open” button.
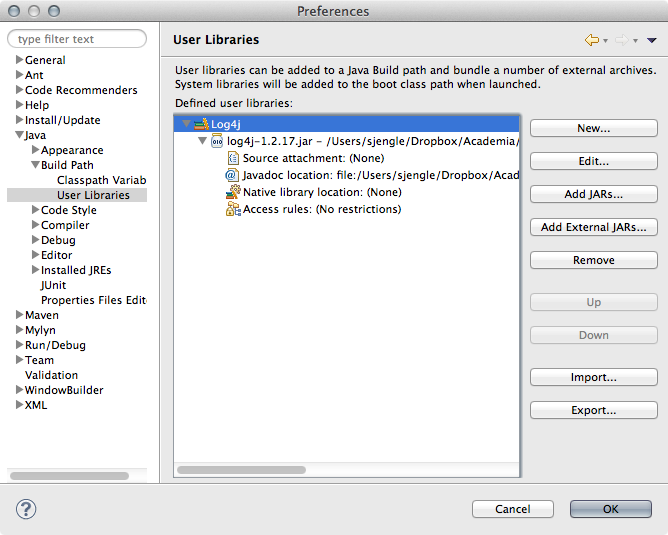
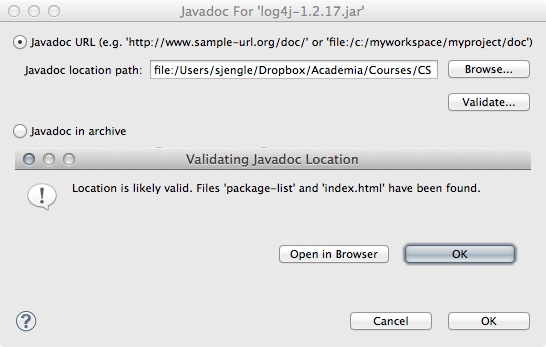
Step 5: Go and select the “Javadoc location” entry and click the “Edit” button.
Step 6: Browse to the folder or directory containing the API documentation and click the “Validate” button.
Step 7: Click “OK” until you exit the “Preferences” window entirely.
Note: Once you have successfully added the user library, you need to add the user library to your project’s build path.
B. CONFIGURING BUILD PATH
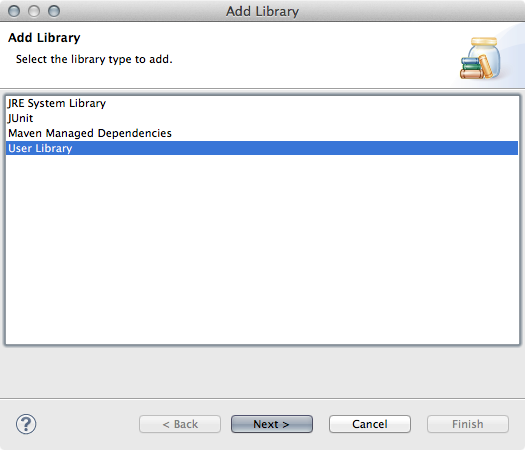
Step 1: Right-click the project and select “Build Path » Add Libraries…”.
Step 2: Dialog the window that pops up, select “User Library” and click the “Next” button.
Step 3: Select the user libraries you want to add and click “Finish”.
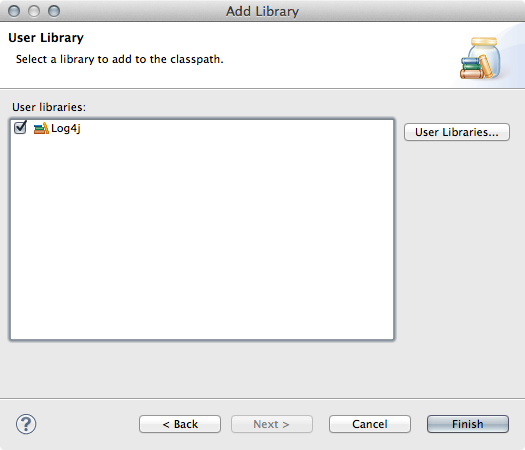
Now you can see the library listed in your project directory underneath the default Java class files.
Note: You need to do this for every project that needs this library.
Like Article
Suggest improvement
Share your thoughts in the comments
Please Login to comment...