How to Install Kali Linux in VirtualBox?
Last Updated :
14 Apr, 2023
Dual Booting a Windows Laptop with Kali Linux, Though increases the speed and efficiency of the OS, but we can not switch between Windows and Kali Linux instantly. To do so, we will have to install Kali Linux in Virtual Box or any other hypervisor. So, what is a hypervisor? Refer to this article Hypervisors. So now, whenever we want to switch between both operating systems, we will have to just change the active Window from the Virtual box to any other window and vice versa. Also, sometimes we came across situations like when we want to start learning Linux and command line stuff but using Linux as a main Operating System without having a basic idea of it is not a good option and here either dual-booting solves the problem or the virtual machine does the same.
The virtual box will provide some part of the hardware from the existing hardware in your PC to the Kali Linux at the time when you use it so that Kali Linux can operate.
Prerequisites
- 20GB free disk space on other OS
- Kali Linux ISO File which can be downloaded from here.
- Virtual Box on the System. Refer to the article – Installing Virtual Box
- Minimum of 5-10 GB free space in your hard disk
- A minimum of 8 GB RAM is recommended
Procedure:
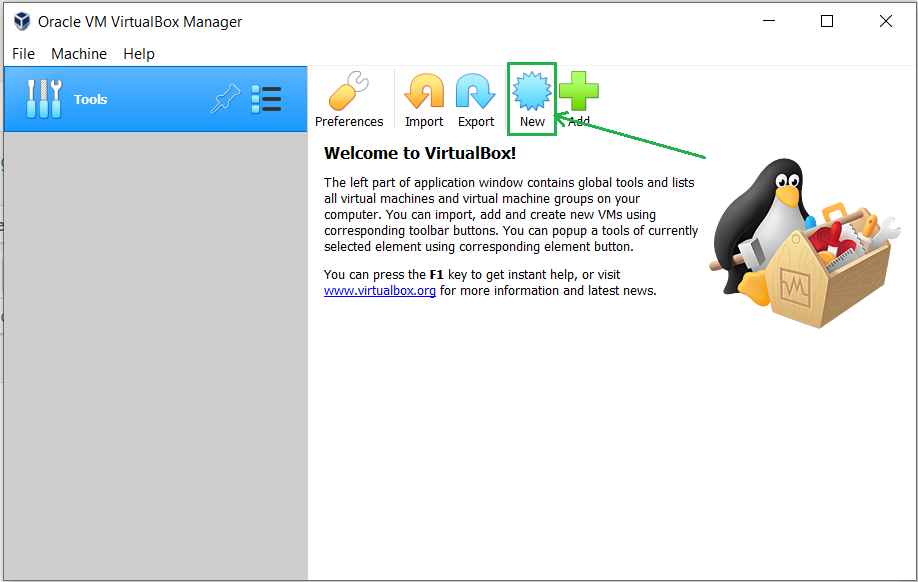
1. Open Virtual Box and then press the new button.
2. Write the name of the virtual machine and select it to Debian based 64bit Linux architecture.

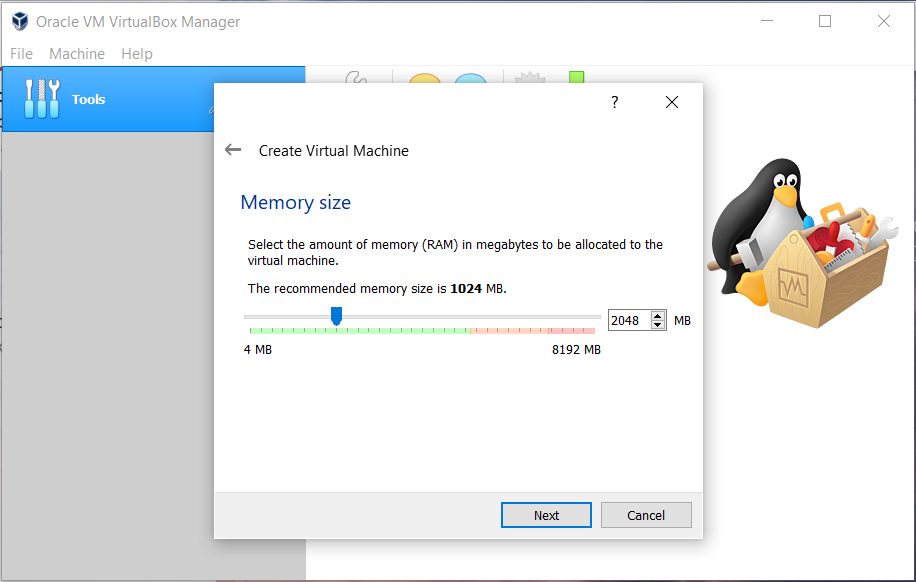
3. Allot the size of RAM memory you want to allocate to the Virtual Machine of Kali Linux. (2048 MB is recommended for normal usage)
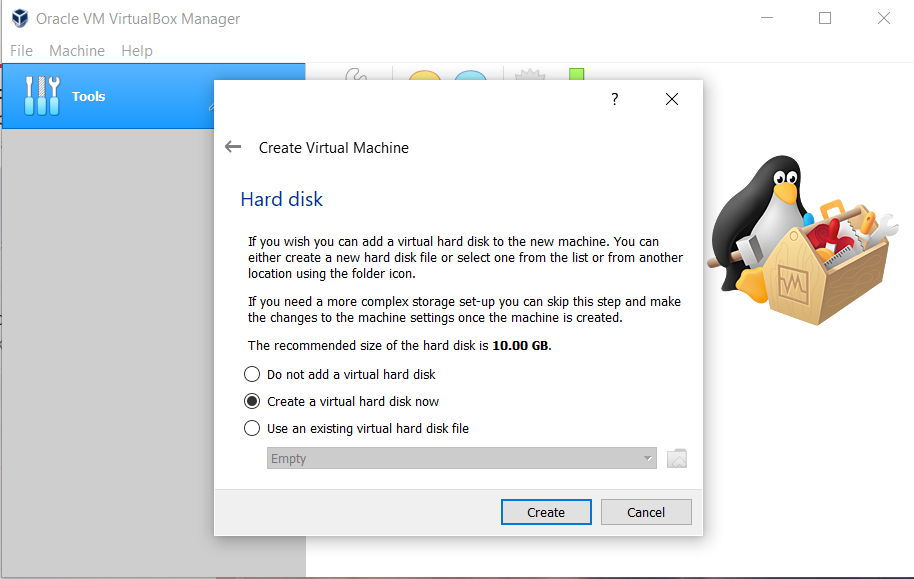
4. Select the option to create a virtual hard disk now and then click on the create button.
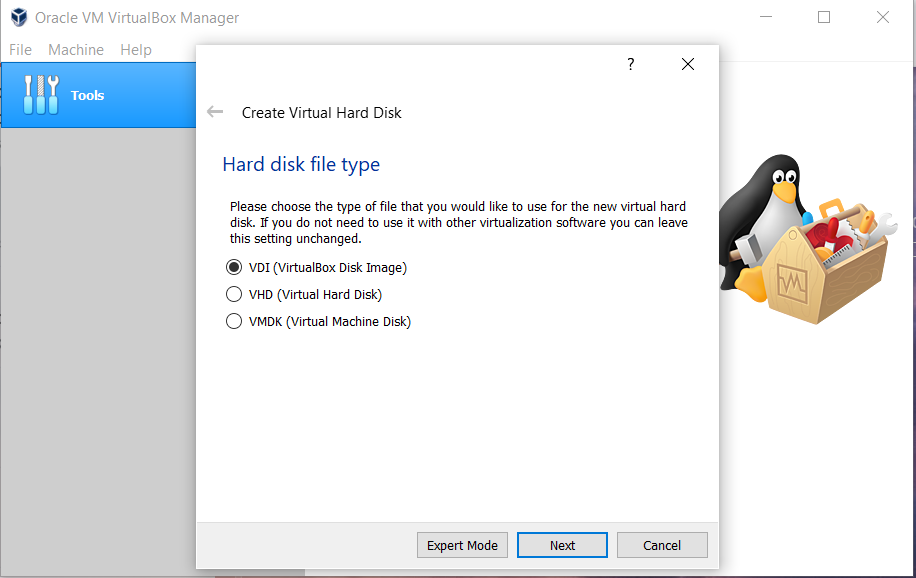
5. Now, Select the Hard Disk File type for Virtual Hard Disk. ( VDI is recommended for daily purposes)
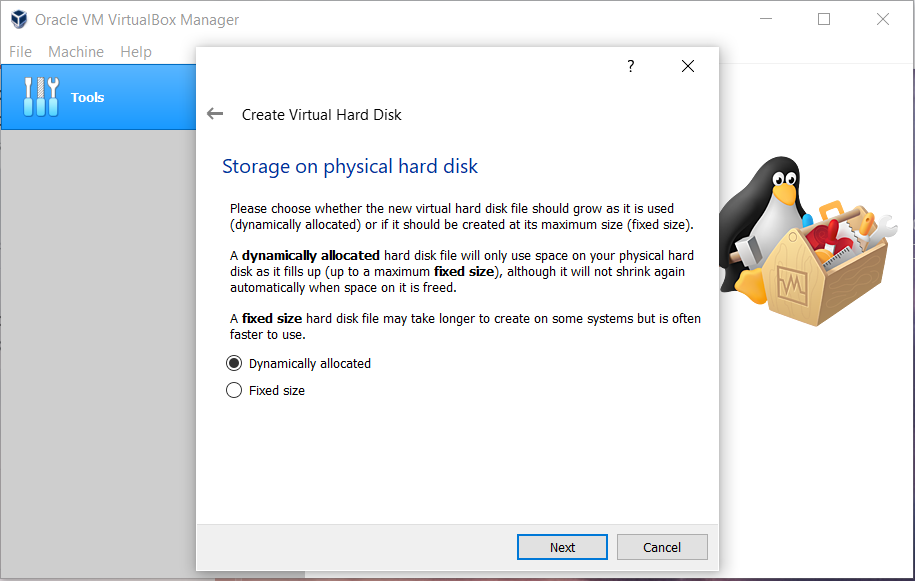
6. Now select the type of Physical Hard Disk Storage. (Dynamically Allocated is recommended for general purposes)
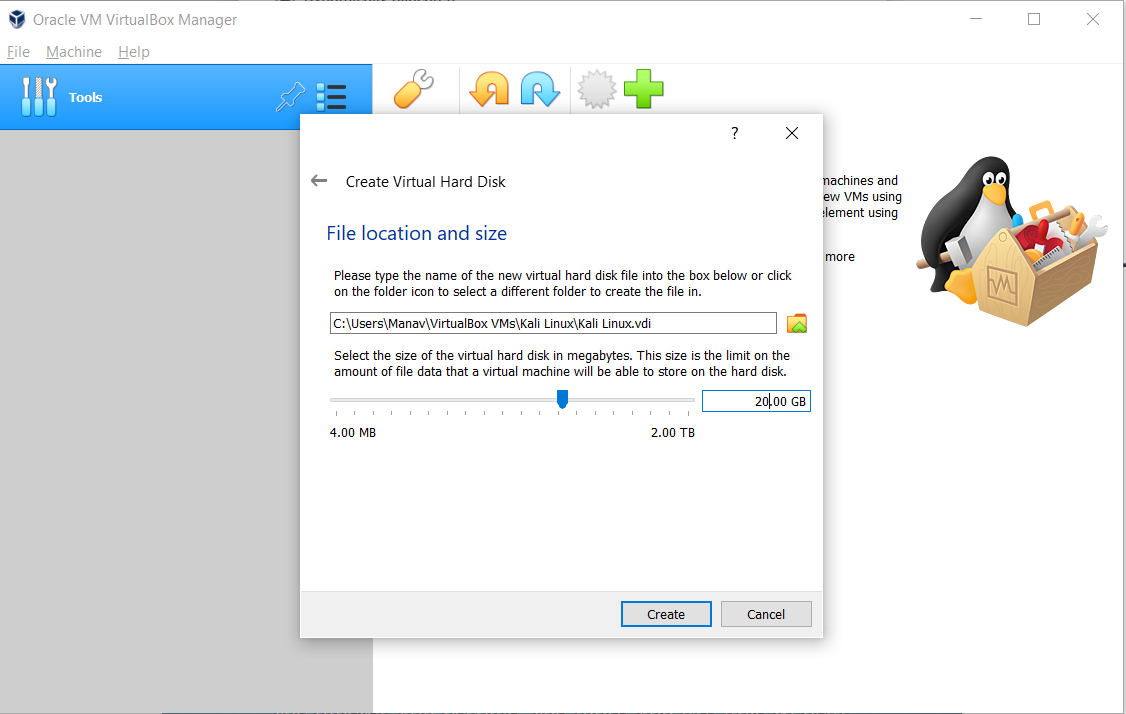
7. Select the size of your virtual hard disk and also the location where you want to save your machine and its files.
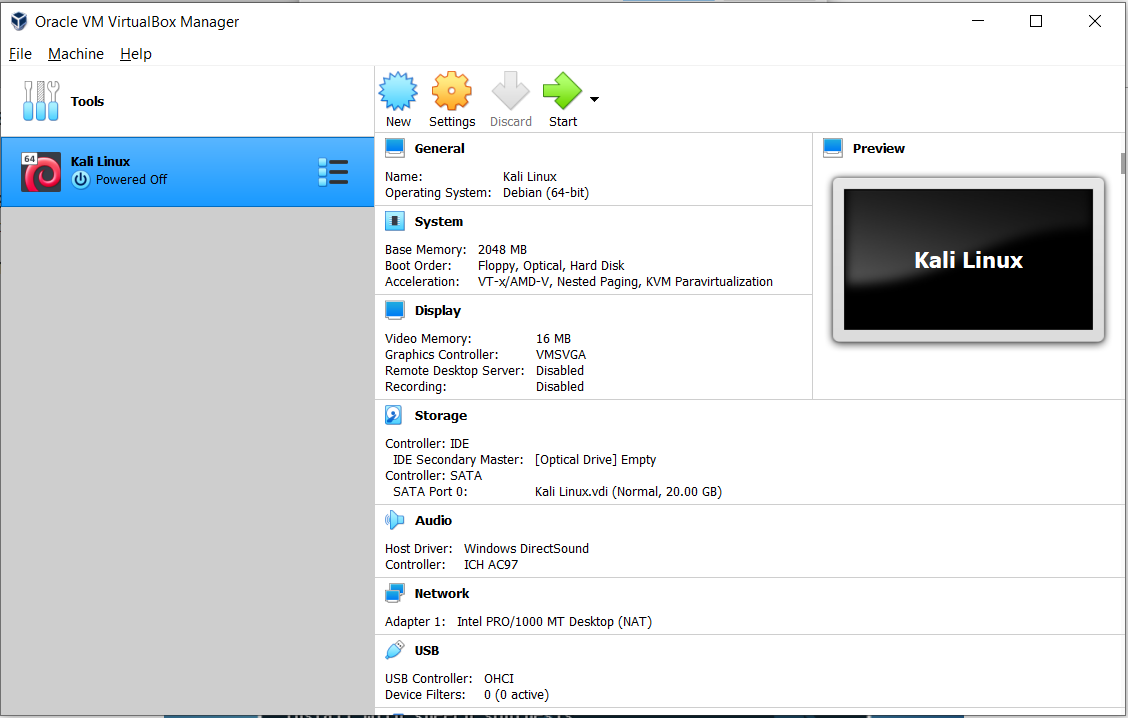
8. As soon as the processing is completed click on the Virtual machine name on the left panel and click on the start button from the top.
9. Now click on the Browse icon located just above the cancel button and select your downloaded Kali Linux ISO file and then click on the start button.

10. This will boot our virtual machine from the chosen Kali Linux ISO file. Select the Graphical Install button and hit enter.

11.The next option is to select a language, So select your desired language and hit enter.

12. The next step is to select a country, territory, or area, So select your respective one.

13. The next step is to configure your keymap. Confirm the keymap you want to use and click Next.

14. In the next step it is asking for a hostname, Enter the same and press the continue button.

15. The next step is to enter the domain name of your choice you may leave it blank if you don’t have any.

16. Enter a strong password for your Kali Linux OS and click continue.

17. The next step is to select a time zone of your choice which you want to use as a default time zone for the Kali Linux machine.
18. Now click on the “Manual” option and press continue to confirm.

19. Now select the Free Space and create a new partition with that and click continue. Also, it is recommended for new users to not use a separate partition for root, home, and swap areas.

20. Now click on create a new partition.

21. Now enter the partition size to be created.

22. Now select the partition type as “Logical”.
23. Now if you are new to Linux then use the following settings for the partition or you may also adjust them as per your need. And then click on “Done setting up the partition“

24. Now just click on finish partitioning and write changes to disk.

25. Now select the “no” option in order to continue.

26. Now in order to write changes to the disk select the “yes” option and then click on continue.

27. Now, wait for a few minutes for the Kali system to be installed into your Virtual Machine.

28. The next option is to select whether to install the GRUB boot loader to the master boot record or not. Click on yes to add the same.

29. Choose your respective hard disk to boot into, from the list of devices.

30. This will start installing the Kali Linux OS and will take a few minutes to completely install the same and will reboot after the successful completion of the installation.
31. Once the complete process is finished successfully, It will automatically restart the virtual machine and will boot the Kali Linux OS.
32. In order to close the Virtual Machine, Simply Shutdown the Kali Linux OS, this action will automatically terminate the Virtual Machine.
Like Article
Suggest improvement
Share your thoughts in the comments
Please Login to comment...