How to Make Put Request in Spring Boot?
Last Updated :
09 Jan, 2024
Java language is one of the most popular languages among all programming languages. There are several advantages of using the Java programming language, whether for security purposes or building large distribution projects. One of the advantages of using JAVA is that Java tries to connect every concept in the language to the real world with the help of the concepts of classes, inheritance, polymorphism, etc.
There are several other concepts present in Java that increase the user-friendly interaction between the Java code and the programmer such as generic, Access specifiers, Annotations, etc. these features add an extra property to the class as well as the method of the Java program. In this article, we will discuss how to request the spring boot.
Difference between PUT and POST request
Put request is generally used when we have to update the particular data whereas post request is used when we have to add new data which is not present in the database.
@PutMapping: This spring boot annotation is used for handling the incoming put request from the client side.
Note: First we need to establish the spring application in our project.
Spring Initializr is a web-based tool using which we can easily generate the structure of the Spring Boot project. It also provides various different features for the projects expressed in a metadata model. This model allows us to configure the list of dependencies that are supported by JVM. Here, we will create the structure of an application using a spring initializer.
Therefore, to do this, the following steps as depicted below media sequentially as follows:
Step 1: Go to Spring Initializr
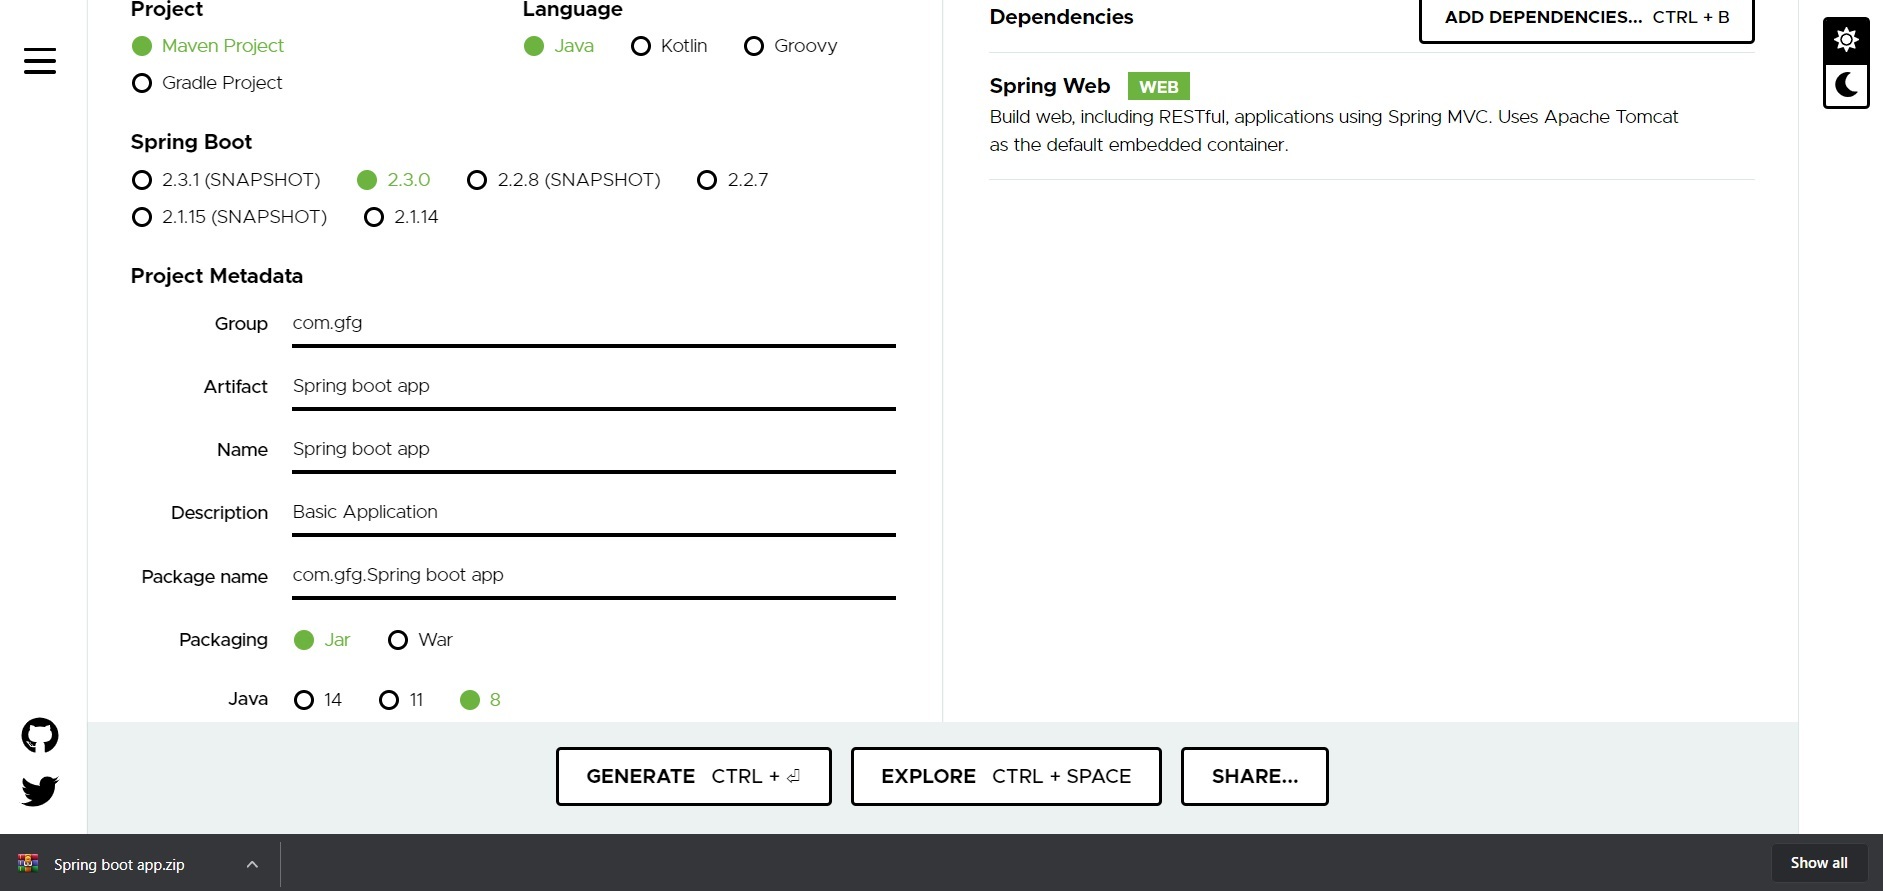
Step 2: Fill in the details as per the requirements. For this application:
Project: Maven
Language: Java
Spring Boot: 2.2.8
Packaging: JAR
Java: 8
Dependencies: Spring Web
Step 3: Click on Generate which will download the starter project.
Step 4: Extract the zip file. Now open a suitable IDE and then go to File->New->Project from existing sources->Spring-boot-app and select pom.xml. Click on import changes on prompt and wait for the project to sync.

Note: In the Import Project for Maven window, make sure you choose the same version of JDK which you selected while creating the project.
Step 5: Go to src -> main -> java -> com.gfg.Spring.boot.app, create a java class with the name Controller and add the annotation @RestController. Now create a put API as shown below:
Java
@RestController
public class Controller {
ArrayList<Integer>ans;
Controller() {
ans = new ArrayList<Integer>();
ans.add(1);
ans.add(2);
ans.add(3);
}
@PutMapping("/change/{id}")
void change(@PathVariable int id) {
System.out.println(ans);
ans.remove(id);
ans.set(id, 45);
System.out.println(ans);
}
}
|
This application is now ready to run. Run the SpringBootAppApplication class and wait for the Tomcat server to start.
Note: The default port of the Tomcat server is 8080 and can be changed in the application.properties file.
Step 6: Now go to the Postman and add URL address and make put request as depicted in below media as follows:

Output: Lastly output will be generated on terminal/ CMD
[1, 2, 3]
[1, 45, 3]
Like Article
Suggest improvement
Share your thoughts in the comments
Please Login to comment...