How to Set X-Axis Values in Matplotlib in Python?
Last Updated :
13 Sep, 2022
In this article, we will be looking at the approach to set x-axis values in matplotlib in a python programming language.
The xticks() function in pyplot module of the Matplotlib library is used to set x-axis values.
Syntax:
matplotlib.pyplot.xticks(ticks=None, labels=None, **kwargs)
xticks() function accepts the following parameters:
| Parameters |
Description |
| ticks |
- List of xticks locations.
- Optional
- Passing an empty list will remove all the xticks.
|
| labels |
- List of labels to place at given ticks location.
- Optional
|
| **kwargs |
Text properties used to control the appearance of labels. |
Returns: xticks() function returns following values:
- locs: List of xticks location.
- labels: List of xlabel text location.
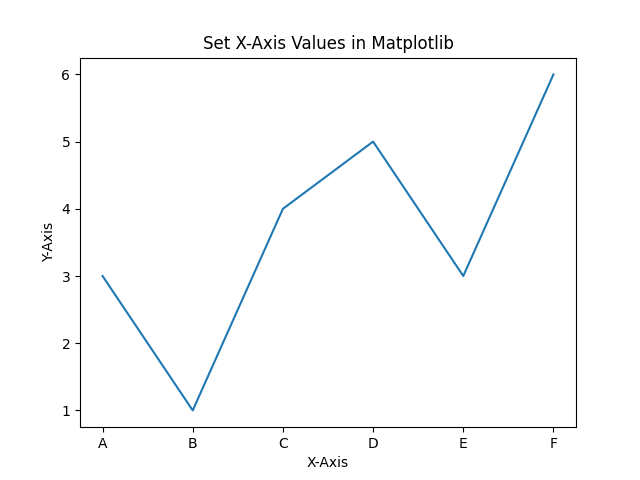
Example #1 :
In this example, we will be setting up the X-Axis Values in Matplotlib using the xtick() function in the python programming language.
Python3
import matplotlib.pyplot as plt
x = [1, 2, 3, 4, 5, 6]
y = [3, 1, 4, 5, 3, 6]
labels = ['A', 'B', 'C', 'D', 'E', 'F']
plt.plot(x, y)
plt.xlabel("X-Axis")
plt.ylabel("Y-Axis")
plt.title("Set X-Axis Values in Matplotlib")
plt.xticks(x, labels)
plt.show()
|
Output:
Example #2:
In this example, we will use the rotation argument to accept rotation value in degree and it will rotate labels in the clockwise direction by specified degree.
Python3
import matplotlib.pyplot as plt
x = [1, 2, 3, 4, 5, 6]
y = [3, 1, 4, 5, 3, 6]
labels = ['Label1', 'Label2', 'Label3', 'Label4', 'Label5', 'Label6']
plt.plot(x, y)
plt.xlabel("X-Axis")
plt.ylabel("Y-Axis")
plt.title("Set X-Axis Values in Matplotlib")
plt.xticks(x, labels, rotation=45)
plt.show()
|
Output:

Like Article
Suggest improvement
Share your thoughts in the comments
Please Login to comment...