OpenCV – Invert Mask
Last Updated :
03 Jan, 2023
In this article, we will learn how to invert a mask created on an image in OpenCV. Masking is a technique used to highlight a specific object from the image. It can be defined as setting certain pixels of an image to some null value such as 0 (black color) so only that portion of our image is highlighted where the pixel value is not 0.
Inverting a mask basically inverts the whole process, that is, the pixels in the highlighted portion become 0 and all other pixels remain non-zero. For this purpose, we perform bitwise not on each pixel to transpose(invert) its value.
For example, if we consider a mask:
[ 0 1 0
  0 0 0
  0 1 0 ]
Now to invert this mask, we perform bitwise not operation on each value, that is, 0 changes to 1 and vice versa:
[ 1 0 1
  1 1 1
  1 0 1 ]
To invert a mask in OpenCV, we use the cv2.bitwise_not() function, which performs bitwise not operation on individual pixels.
Syntax: cv2.bitwise_not(masked_image)
Parameters:
- masked_image: It is the image that is to be inverted.
- Return Value: It returns the inverted masked image.
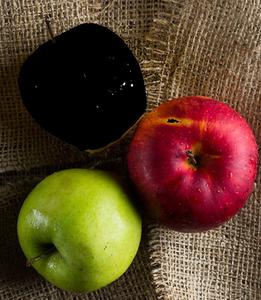
Used image:
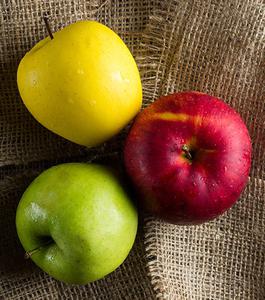
Original Image
Example 1: In this program, we begin with reading the image. Then we create a kernel of the unit matrix (5 X 5) of ‘int’ datatype. Now, we convert the image to HSV format as all the operations can be performed in HSV format only. We then perform Erosion, Morphing, and Dilation techniques on the image to create the mask. Now, to invert the mask, we use bitwise_not the method of cv2 library to flip the pixel values (0 ->1 and 1 ->0). Finally, we display this inverted masked image.
Python3
import cv2
import numpy as np
img = cv2.imread('rgy.jpg')
kernel = np.ones((5, 5), np.uint8)
hsv = cv2.cvtColor(img, cv2.COLOR_BGR2HSV)
Lower_hsv = np.array([20, 70, 100])
Upper_hsv = np.array([30, 255, 255])
Mask = cv2.inRange(hsv, Lower_hsv, Upper_hsv)
Mask = cv2.erode(Mask, kernel, iterations=1)
Mask = cv2.morphologyEx(Mask, cv2.MORPH_OPEN, kernel)
Mask = cv2.dilate(Mask, kernel, iterations=1)
Mask = cv2.bitwise_not(Mask)
cv2.imshow('Mask', Mask)
cv2.waitKey(0)
cv2.destroyAllWindows()
|
Output:
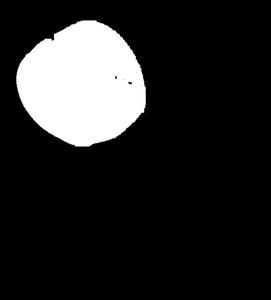
without inverting the mask
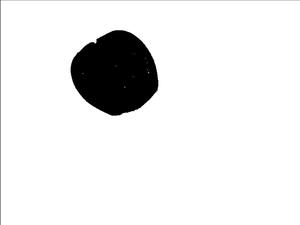
Inverted mask
Example 2: This program is similar to the one explained above. The only difference is that instead of converting the image to b/w, we directly we mask the yellow apple and then invert the created mask by using bitwise_not operation.
Python3
import cv2
import numpy as np
img = cv2.imread('rgy.jpg')
kernel = np.ones((5, 5), np.uint8)
hsv = cv2.cvtColor(img, cv2.COLOR_BGR2HSV)
Lower_hsv = np.array([20, 70, 100])
Upper_hsv = np.array([30, 255, 255])
Mask = cv2.inRange(hsv, Lower_hsv, Upper_hsv)
mask_yellow = cv2.bitwise_not(Mask)
Mask = cv2.bitwise_and(img, img, mask = mask_yellow)
cv2.imshow('Mask', Mask)
cv2.waitKey(0)
cv2.destroyAllWindows()
|
Output:
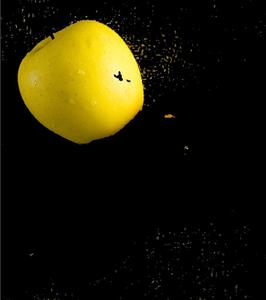
Without inverting the mask
Inverted mask
Like Article
Suggest improvement
Share your thoughts in the comments
Please Login to comment...