Python OpenCV – Super resolution with deep learning
Last Updated :
24 Jan, 2023
Super-resolution (SR) implies the conversion of an image from a lower resolution (LR) to images with a higher resolution (HR). It makes wide use of augmentation. It forms the basis of most computer vision and image processing models. However, with the advancements in deep learning technologies, deep learning-based super resolutions have gained the utmost importance. Almost all the deep learning models would make great use of super-resolution. Since Super Resolution mainly uses augmentations of data points, it is also called hallucination of the data points.
SR plays an important role in image improvement and restoration. The SR process is carried out as follows- First, a low-resolution image is taken as the input. Next, the image is upscaled and the resolution of the images are increased to a higher resolution and given as an output.
Need for Deep learning based Super Resolution
The traditional Super Resolution Model that does not make use of Deep learning lacks fine details. They fail to remove various defects and compression facts in the systems. All of these problems can be very efficiently addressed by using a deep learning-based SR model to get an image of a higher resolution keeping all the details intact.
Some commonly used conventional SR models are
- Structured illumination microscopy (or SIM)
- Stochastic optical reconstruction microscopy (STORM)
- Photo-activated localization microscopy (PALM)
- Stimulated emission depletion (STED)
Super Resolution using Deep Learning methods:
Interpolation
Interpolation refers to the distortion of pixels from one grid to another that mainly will help us alter the resolution of the image. A low-resolution(LR) image is interpolated by 2x or 4x of the grid size. There are various Interpolation models:
- Nearest Neighbour Interpolation: In this case, the nearest points of the pixel points are all interpolated
- Bilinear Interpolation: It interpolates a field size of 2×2. It performs the interpolation of 1 axis completely first and then goes to the second. It is much faster than Nearest Neighbour interpolation.
- Bicubic Interpolation: This carries out cubical interpolation of the size 4×4. It carries out the interpolation of 2 axes at a time. It is faster than the other two interpolation models.
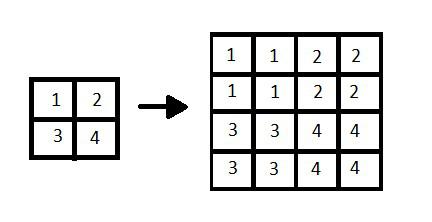
Interpolation of the image by 2x
- Noise amplification and Blurring are often the effects of the Interpolation of the image.
Pre – Upsampling Super Resolution
Upsampling is a technique that implies the doubling of a simple layer of the input layer. It is then followed by the convolution filtering. Generally, bicubic interpolation is used for the same.
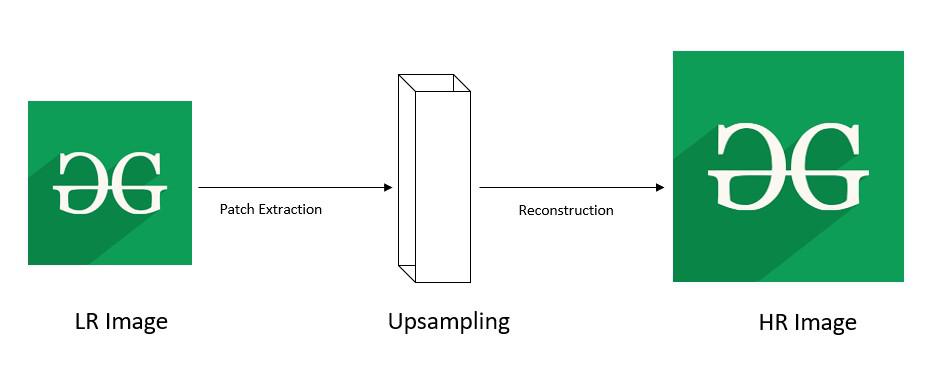
Pre-Upsampling Super Resolution
As we can see from the example above, the lower resolution (LR) image undergoes a patch extraction. Patch extraction is the process of extracting the dense features from the image and convolve it. In the upsampling model, the convolution filters are present. They help in non-linear mapping. Furthermore, the convolved patch is reconstructed resulting in the high resolution (HR) image.
Some of the common techniques, used for Upsampling an image, are:
- SRCNN (Super Resolution Convolutional Neural Network)
- VDSR (Very Deep Super Resolution)
Post Upsampling Super Resolution
The upsampling involves the usage of patch extraction. This can lead to a loss in certain features of the image that might be crucial for further processing. Hence, a post Upsampled convolution is needed to extract features.
In the post-upsampling technique, the process of upsampling is done in the end. This significantly reduces the complex computation by replacing the predefined upsampling with end-to-end learnable layers. The LR input images are given as inputs to CNN model without increasing resolution. And end-to-end learnable upsampling layers are applied at the end of the network.
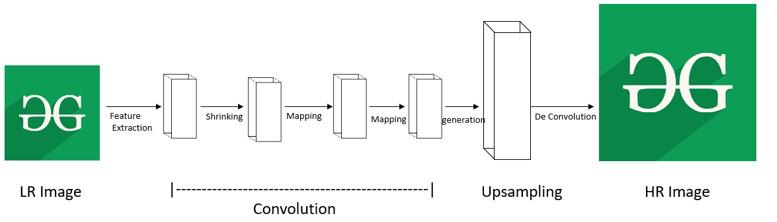
Post Upsampling Super Resolution
Some popular techniques that are used in Post Sampling SR are:
- FSRCNN (Fast Super-Resolution Convolutional Neural Network)
- ESPCN (Efficient Sub-Pixel Convolutional Neural Network)
Learning Techniques
Super Resolution (SR) pixel models make use of loss functions to optimize the model. Loss functions are also used to measure the reconstruction errors of the model. A variety of Loss functions are used by the SR Model to yield a result with better accuracy and lesser errors.
Some of the commonly employed Loss Functions are:
- Pixel-Wise Loss: This includes the loss of the pixels mean squared error calculated between each pixel value from the real image and each pixel value from the generated HR image. Pixelwise L1 loss is the absolute difference between the pixels of the HR image expected and the generated one. Pixelwise L2 loss is the mean squared difference between the pixels of the HR image expected and the generated one.
- Content Loss: This is the Euclidean distance between the features of the High-level output image and the target HR image. High-level features are obtained by using VGG and ResNet.
- Adversarial Loss: This loss function used to train the generator and discriminator models. This is also called the GAN loss function.
Residual Networks
Residual Neural Networks or ResNet for short, are a form of artificial Neural network. ResNet network design can be predominantly used in Super Resolution Models due to the availability of the SRResNet architecture.
EDSR (Enhanced Deep Residual Networks for Single Image Super-Resolution)
EDSR can handle specific super-resolution scales. It improves the performance of SR for single-scale architectures. Its architecture is based on SRResNet architecture, but it has no Batch Normalization layers because it normalizes the input, which results in limiting the range of the network, and the removal of BN results in an improvement in the accuracy of the model. The BN layers also consume 40% of the memory available. So, its removal results in memory reduction and makes the network training better. They make use of residual blocks as shown in the diagram below:
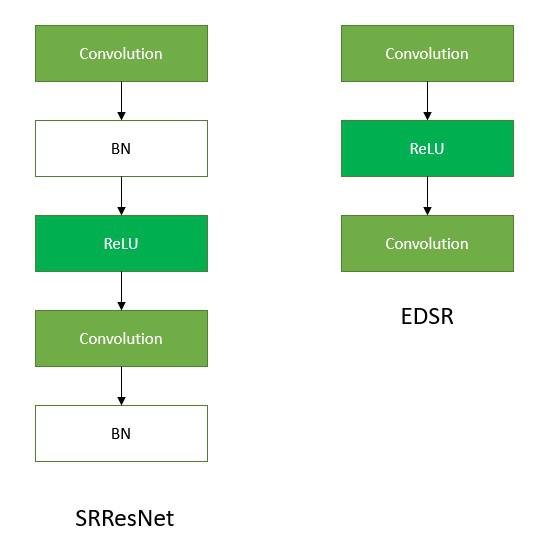
Comparison of SRResNet & EDSR
MDSR (Multi-scale Deep Super-Resolution system)
MDSR is an extension of the EDSR. It reconstructs various scales of high-resolution images in a single model. It has multiple input and output modules that give corresponding resolution outputs at 2x, 3x, and 4x. A larger kernel is used here as the pre-processing layers, which makes the network simple, while still attaining a high receptive field. The common shared residual blocks at the end of scale-specific pre-processing modules for all resolutions. After the upsampling, the depth of MDSR will reach 5 times as compared to single-scale EDSR. It can give comparable results to scale-specific EDSR combined model with lesser parameters.
Other Network Designs
Apart from Residual Networks, these are some other Network Designs that can be used in designing SR models:
- Recursive Network
- Dense Connection Network
- Group Convolution Network
- Local Multi-path Network
However, Residual Network is preferred because of the availability of residual blocks.
Generative Models (GAN)
Generative models (GAN) optimize the quality to produce images that are pleasant to the human eye because humans don’t distinguish images by pixel difference. The networks optimize the pixel difference between expected and output HR images.
Some commonly used GAN architectures are:
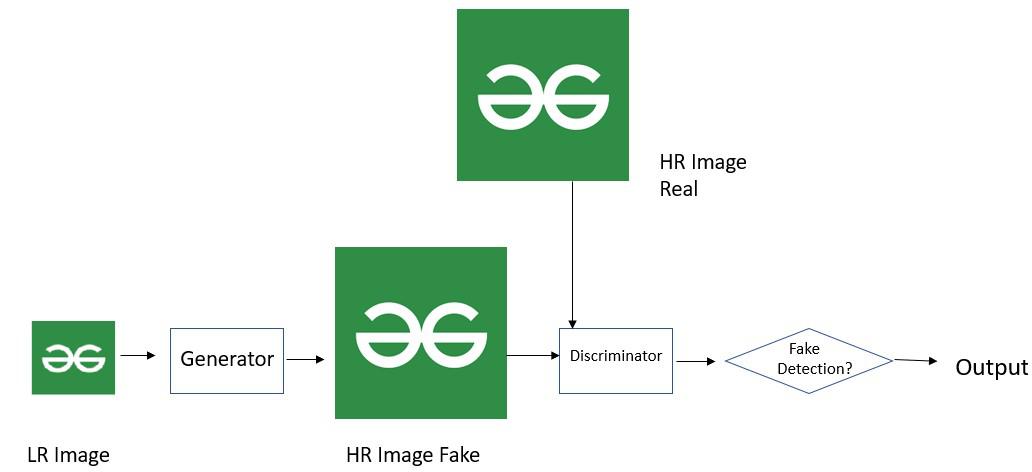
SRGAN
Same to GAN, SRGAN has also Generator and Discriminator. This framework supports 4x upscaling factors. It uses a perceptual loss function which is a weighted sum of an adversarial loss and a content loss. The adversarial loss pushes the solution to the natural image manifold using a discriminator network that is trained to differentiate between the super-resolved images and original images.
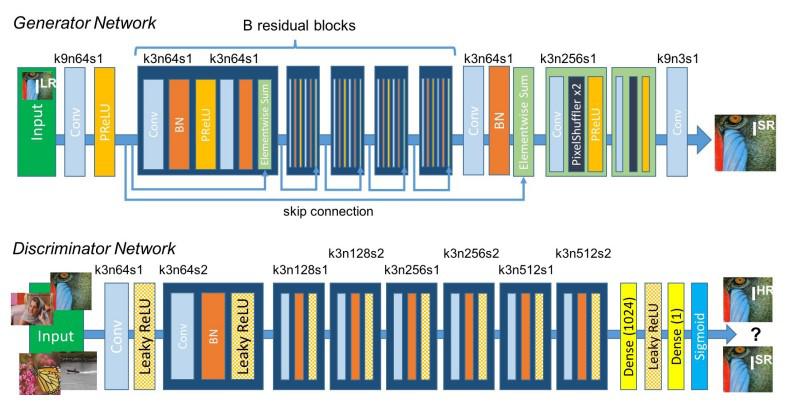
SRGAN architecture
The generator network comprises the residual blocks. They make use of skip connections for easier training. The discriminator network discriminates the read HR image and the obtained output HR image.
Generator and Discriminator in SRGAN network
SR Model using Deep learning
The code given below demonstrates the conversion of a low-resolution(LR) image to a high-resolution(HR) image using the Super-Resolution(SR) model
Step 1: Import the necessary libraries
Python3
import tensorflow as tf
import tensorflow_hub as hub
import cv2
import requests
import numpy as np
import matplotlib.pyplot as plt
|
Step 2: Load the input image and plot it.
Python3
getContent = requests.get(img).content
array_img = np.asarray(bytearray(getContent), dtype=np.uint8)
image_plot = cv2.cvtColor(cv2.imdecode(array_img, -1), cv2.COLOR_BGR2RGB)
plt.figure(figsize=(10, 10))
plt.title(image_plot.shape)
plt.imshow(image_plot)
plt.show()
|
Output:
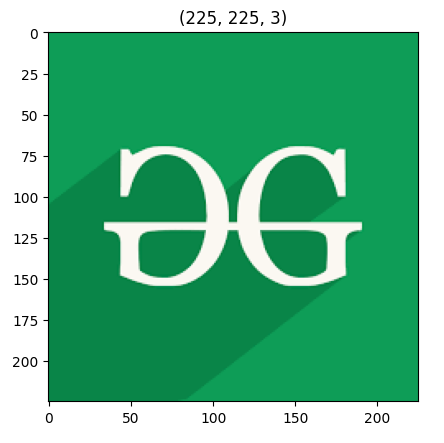
Input image
Step 3: Preprocess the image
Python3
def preprocessing(img):
imageSize = (tf.convert_to_tensor(image_plot.shape[:-1]) // 4) * 4
cropped_image = tf.image.crop_to_bounding_box(
img, 0, 0, imageSize[0], imageSize[1])
preprocessed_image = tf.cast(cropped_image, tf.float32)
return tf.expand_dims(preprocessed_image, 0)
|
Step 4: Here we are using a pre-trained Enhanced Super Resolution GAN (ESRGAN) Model from tfhub[https://tfhub.dev/captain-pool/esrgan-tf2/1]. Load the model.
Python3
model = hub.load(esrgn_path)
|
Step 5: Employ the model
Python3
def srmodel(img):
preprocessed_image = preprocessing(img)
new_image = model(preprocessed_image)
return tf.squeeze(new_image) / 255.0
|
Step 6: Plot the Super-Resolution output image.
Python3
hr_image = srmodel(image_plot)
plt.title(hr_image.shape)
plt.imshow(hr_image)
plt.show()
|
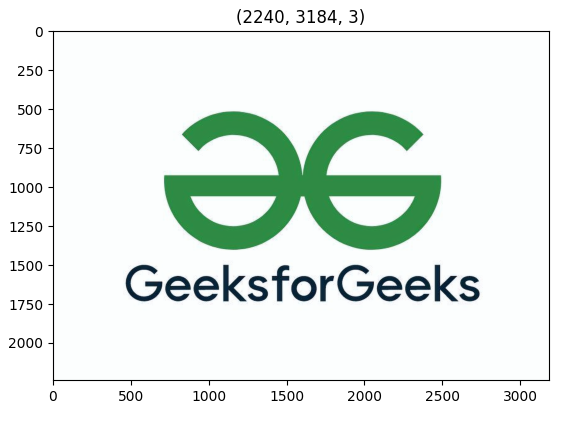
Output:
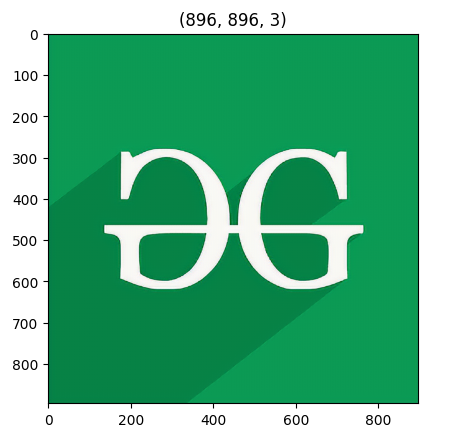
Output Image
Complete code
The below code will take input an image and convert it into a high-resolution image.
Python3
import tensorflow as tf
import tensorflow_hub as hub
import cv2
import requests
import numpy as np
import matplotlib.pyplot as plt
img = cv2.imread('GFG.jpeg')
image_plot = cv2.cvtColor(img, cv2.COLOR_BGR2RGB)
plt.title(image_plot.shape)
plt.imshow(image_plot)
plt.show()
def preprocessing(img):
imageSize = (tf.convert_to_tensor(image_plot.shape[:-1]) // 4) * 4
cropped_image = tf.image.crop_to_bounding_box(
img, 0, 0, imageSize[0], imageSize[1])
preprocessed_image = tf.cast(cropped_image, tf.float32)
return tf.expand_dims(preprocessed_image, 0)
model = hub.load(esrgn_path)
def srmodel(img):
preprocessed_image = preprocessing(img)
new_image = model(preprocessed_image)
return tf.squeeze(new_image) / 255.0
hr_image = srmodel(image_plot)
plt.title(hr_image.shape)
plt.imshow(hr_image)
plt.show()
|
Output:
Input Image
Output Image
Like Article
Suggest improvement
Share your thoughts in the comments
Please Login to comment...