Virtual Machines in Microsoft Azure
Last Updated :
03 Apr, 2023
Before we move on with how to deploy and use virtual machines in Microsoft Azure let’s know a few things.
A Virtual Machine (VM) is like any physical laptop, smartphone, or server that we use in our day-to-day life. It has features like CPU, memory, storage size, and different networking ports with boot disk similar to the gadgets mentioned above.
But, these are virtual computers unlike laptops, smartphones that are physical and tangible. They exist as code and can be referred to as a computer inside a computer.
What can we use VMs for?
There are many ways by which a VM can be used especially when used with cloud technology.
Some of its use cases are :
- To run software or applications on an operating system that they are not intended for.
- To get a new environment inside the laptop or PC to make it simpler and quicker for developers to build and test applications.
- Build and deploy applications in the cloud that can be accessed anywhere, anytime.
- To simulate and try out the extreme conditions without incurring high costs.
Advantages of VMs :
The portability, flexibility, and availability of virtual machines give us many benefits :
- It saves costs on maintenance, electricity, and the need for infrastructure.
- It is quicker and faster to have a new virtual machine up and running.
- It has a much lower downtime compared to physical hardware.
- It is easily scalable and gives the same performance for each and every separate instance we require.
- It is safe and secure as any application running in the virtual machine’s environment doesn’t affect the main system.
Now let’s our first Azure Virtual Machine using Microsoft Azure.
Creating our virtual machine using Microsoft Azure Portal :
Azure portal is an easy-to-use web-based user interface that helps to create, manage, deploy and use Azure resources effectively.
Prerequisites:
- You need to have an active Azure Subscription. You can avail a free 12-month subscription by going here.
After you have signed in to your account follow the simple steps below to have your virtual machine up and running :
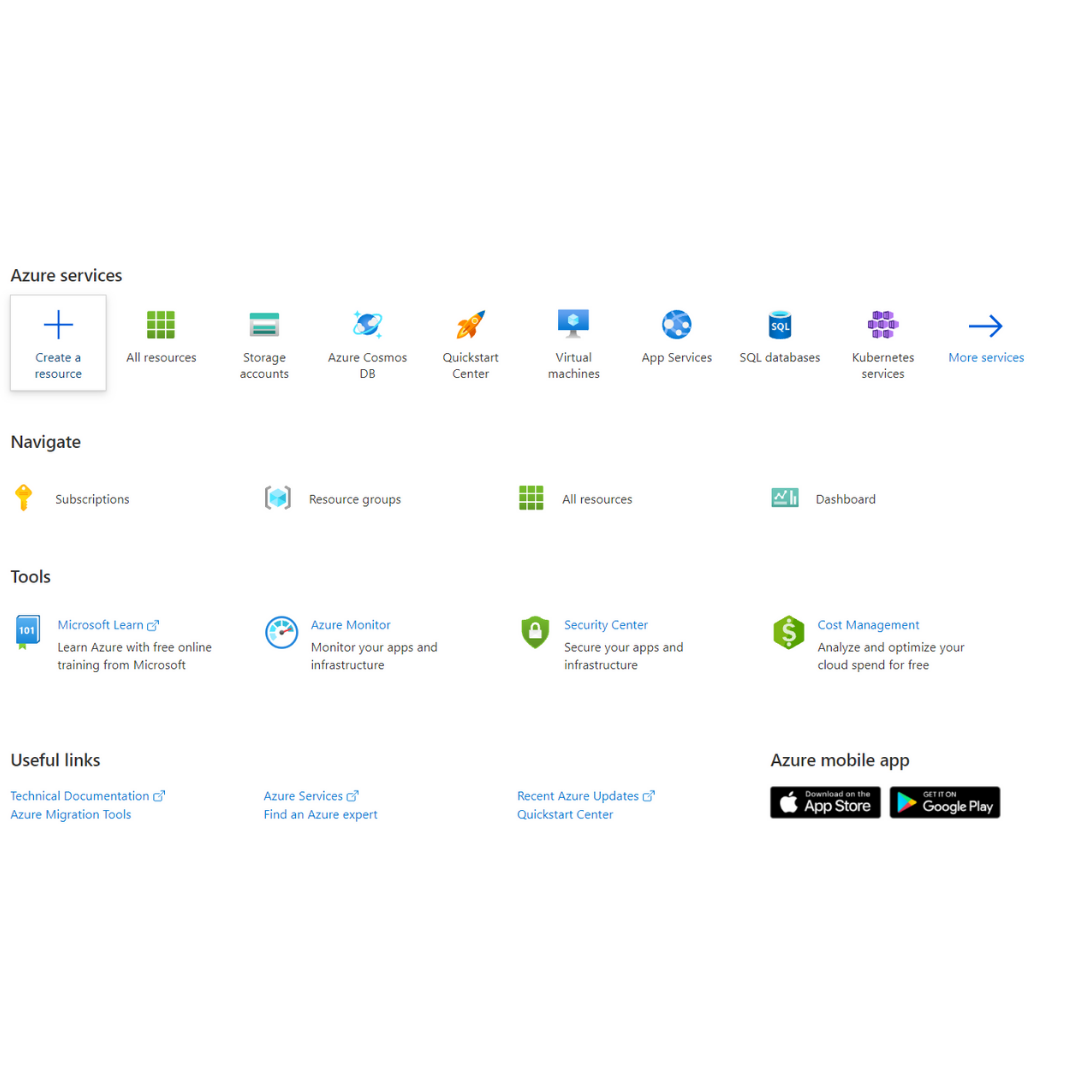
Step 1: You will be on the Azure homepage, go to Azure services, select Create a resource. The Create a resource pane appears, displaying popular products for Azure services.
Step 2: There are many options to choose from VM that fall under compute. In the left menu pane, select Compute, and in the Search services and marketplace search box, enter Virtual Machines and press Enter.
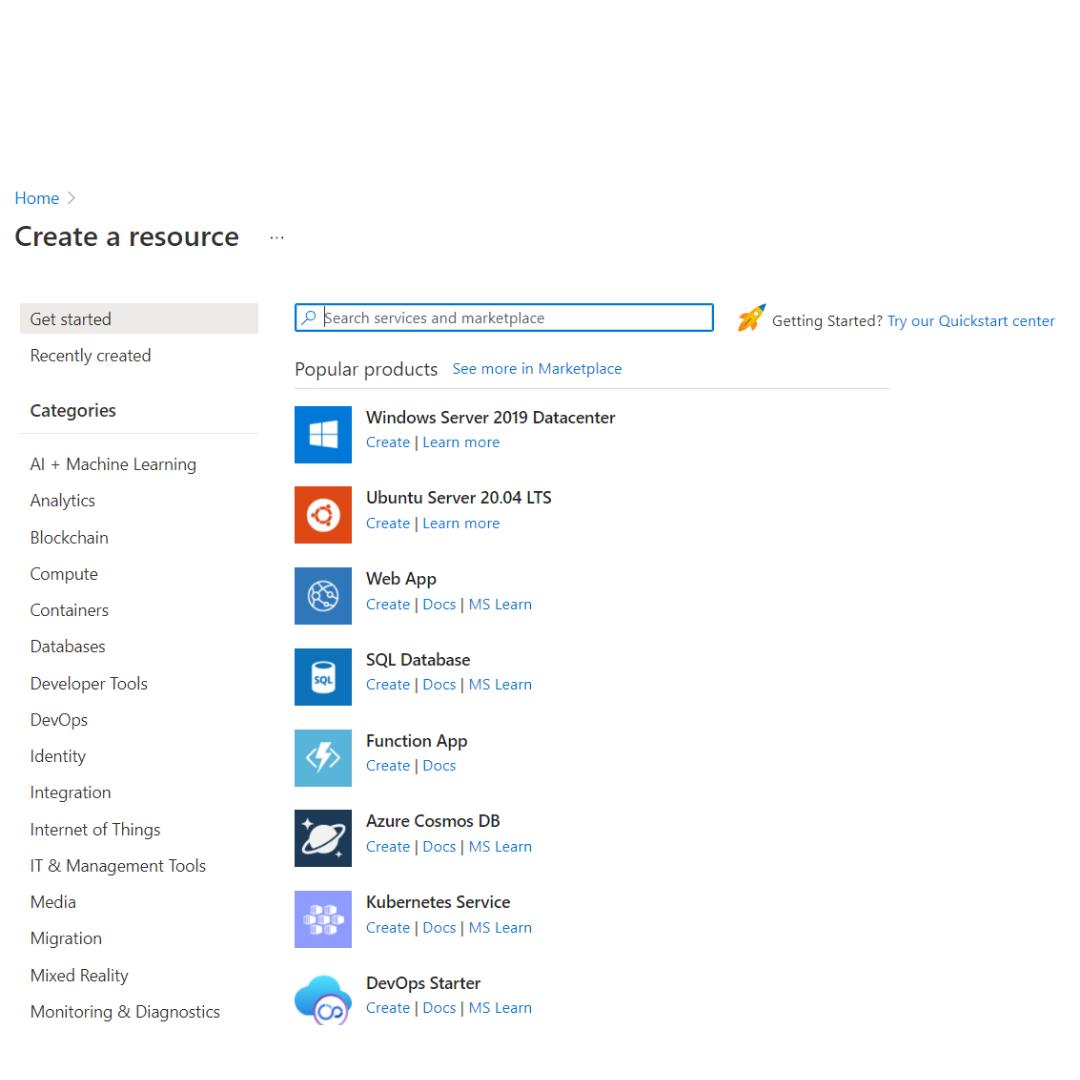
Step 3: Select Create. The Create virtual machine pane will appear.
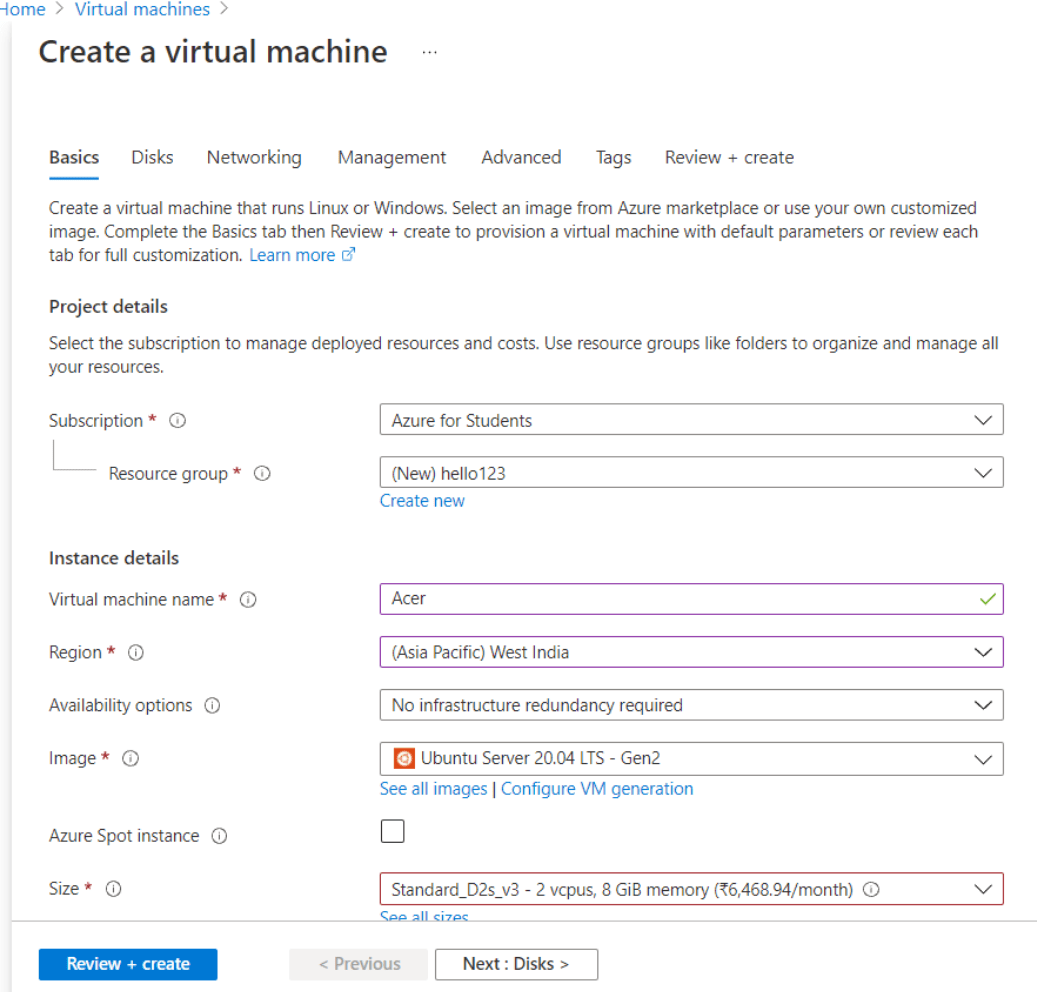
Step 4: Enter all the details about the subscription, resource group, virtual machine name, region, availability options, image, and Azure Spot instance of the virtual machine you wish to create. If the resource group doesn’t exist click create new to create a new resource group.
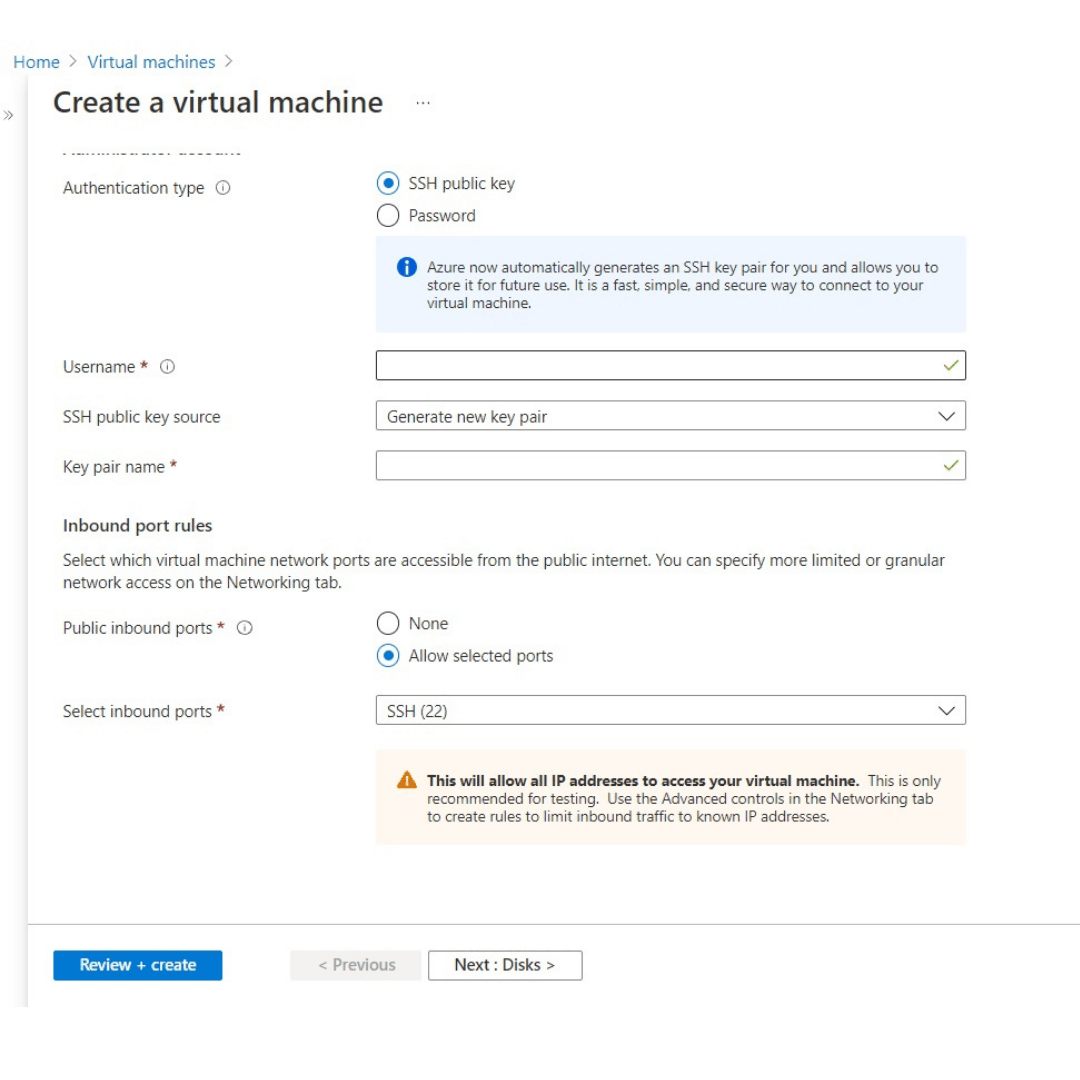
Step 5: In the Administrator account section, Choose a Username, Password that you will use to login to the VM once created. Also, choose inbound ports like (HTTP 80) using which you will connect.
Step 6: There are several other tabs you can explore to see the settings you can influence during the VM creation. Like in the disk you can add the disk architecture that you want. In the networking tab, we can change the networking configurations( add subnets, inbound ports, and many more. We can change all this as per business needs.
Step 7: After we are done configuring the virtual machine select Review + create to review and validate the settings. Azure will validate the configuration settings for a resource before it creates it. We may need to supply some additional information based on the requirements of the image creator built into Azure. This is simple; just open the tab that has an error. Verify all the settings are set the way you want, and then select Create to deploy and create the VM.
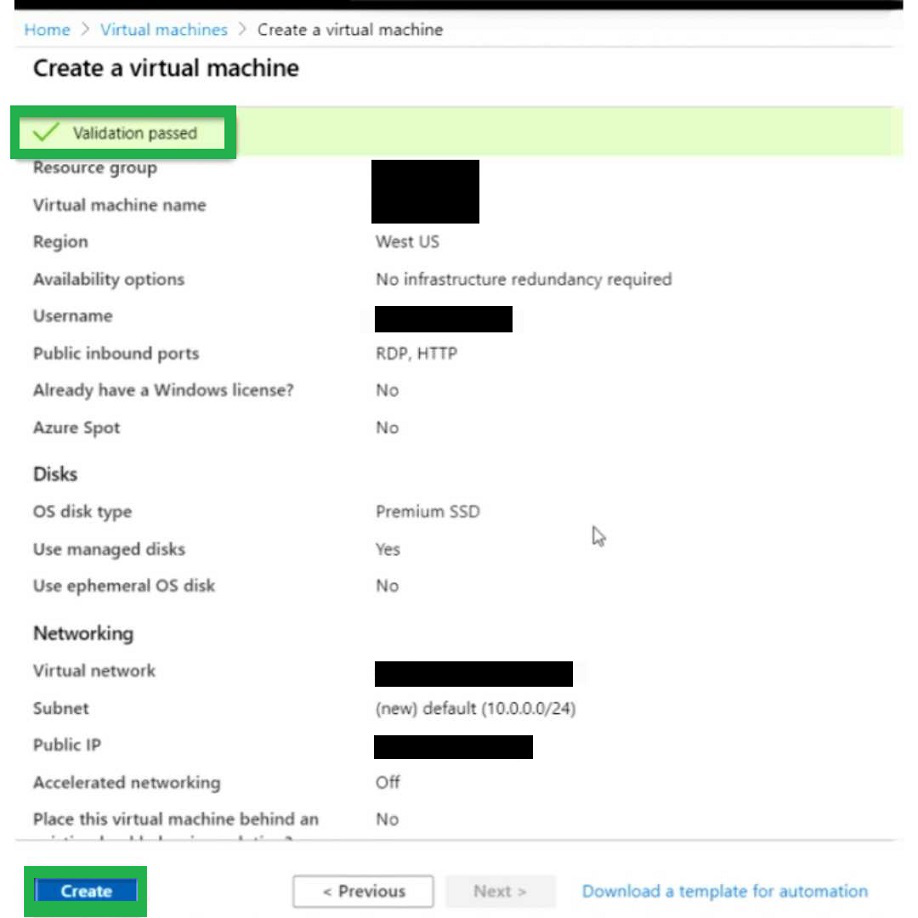
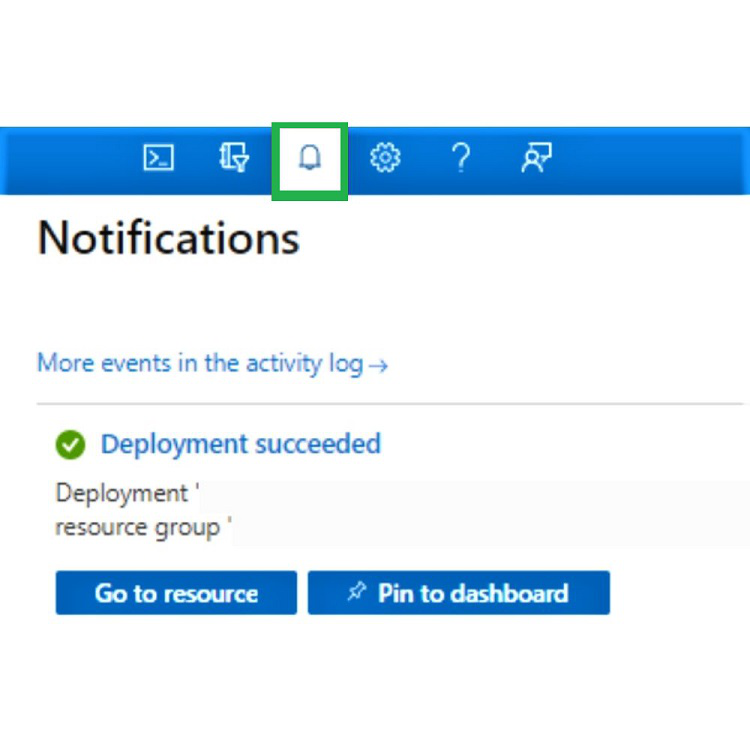
Step 8 : Now click on the “Create” button. The VM deployment process takes a few minutes to complete. It will show you “Your deployment is complete“. Now you can click on “Go to resource”.
Step 9: The Overview page of the VM appears. Here, we can see all the information and configuration options for the newly created VM. One of the pieces of information is the Public IP address with which we can connect with our VM.
Step 10: Congratulations, Now we have created our first VM successfully.
Congratulations! With a few steps, you learned what is VM, and deployed it on Azure.
We can also create VM using :
- Azure PowerShell
- Azure CLI
- Azure REST API
- Azure Client SDK
- Azure Automation Services
Like Article
Suggest improvement
Share your thoughts in the comments
Please Login to comment...