Build a Contact form Using Django, React and tailwind
Last Updated :
11 Mar, 2024
This article will guide you in creating a Contact form Using Django, React, and tailwind. We’ll explore the integration of Django, React, and Tailwind, and go through the step-by-step process of implementing the Contact form.
Build a Contact form Using Django, React and Tailwind
Here, is the step-by-step implementation of contact form using React, Tailwind, and Django Framework. Here, we will cover the article in 2 parts, frontend and then backend. To install Django follow these steps.
Backend Using Django
To start the project and app use this command
django-admin startproject djangobk
cd djangobk
python manage.py startapp api
Now add this app to the ‘settings.py’
INSTALLED_APPS = [
    "django.contrib.admin",
    "django.contrib.auth",
    "django.contrib.contenttypes",
    "django.contrib.sessions",
    "django.contrib.messages",
    "django.contrib.staticfiles",
    "rest_framework",
    "api",
    'corsheaders',
]
For install the corsheaders run the below command
pip install django-cors-headers
File Strcutrue :
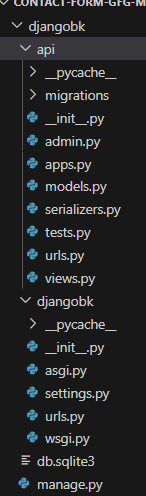
Setting Necessary Files
models.py : This Django model defines a “ContactForm” with fields for name, subject, optional phone number, email, and message. The model is structured with the Django ORM, specifying data types and constraints.
Python
from django.db import models
class ContactForm(models.Model):
name = models.CharField(max_length=255)
subject = models.CharField(max_length=255)
phone = models.CharField(max_length=10,null=True)
email = models.EmailField()
message = models.TextField()
def __str__(self):
return self.name
|
views.py : This Django Rest Framework view, “SubmitContactFormView,” handles POST requests for submitting contact forms. It utilizes a serializer to validate and save the incoming data to the ContactForm model. If the data is valid, it returns a success message with a 201 status code;
Python3
from rest_framework import status
from rest_framework.response import Response
from rest_framework.views import APIView
from .models import ContactForm
from .serializers import ContactFormSerializer
class SubmitContactFormView(APIView):
def post(self, request, format=None):
serializer = ContactFormSerializer(data=request.data)
if serializer.is_valid():
serializer.save()
return Response({'message': 'Form submitted successfully!'}, status=status.HTTP_201_CREATED)
else:
return Response(serializer.errors, status=status.HTTP_400_BAD_REQUEST)
|
serializers.py : The “ContactFormSerializer” in your Django app defines a serializer for the “ContactForm” model, specifying the fields to include in API interactions, such as name, subject, phone, email, and message. It facilitates the conversion between JSON data.
Python3
from rest_framework import serializers
from .models import ContactForm
class ContactFormSerializer(serializers.ModelSerializer):
class Meta:
model = ContactForm
fields = ['name', 'subject', 'phone', 'email', 'message']
|
project/urls.py: In the project’s URL configuration, the “urlpatterns” list includes paths for the Django admin interface and API routes. The “include” function adds the URLs defined in ‘api.urls’ under the ‘api/’ path.
Python3
from django.contrib import admin
from django.urls import path, include
urlpatterns = [
path('admin/', admin.site.urls),
path('api/', include('api.urls')),
]
|
api/urls.py : In the API app’s URL configuration, a single path is defined for the ‘submit_contact_form/’ endpoint, mapped to the “SubmitContactFormView” class-based view. This URL allows clients to submit contact forms through a POST request.
Python3
from django.urls import path
from .views import SubmitContactFormView
urlpatterns = [
path('submit_contact_form/', SubmitContactFormView.as_view(), name='submit_contact_form'),
]
|
settings.py : In settings.py we added the crosheaders Middleware and also the some allowing host for integrating react.
Python3
MIDDLEWARE = [
............................... ......................... ...............
............................ ......................... .....................
'corsheaders.middleware.CorsMiddleware',
]
CORS_ALLOWED_ORIGINS = [
]
CORS_ALLOW_CREDENTIALS = True
|
Frontend Using React + Tailwind
To start the project in react use this command
npx create-react-app myreactapp
cd myreactapp
Install the necessary library tailwindcss using the below command
npm install tailwindcss
File Structure :
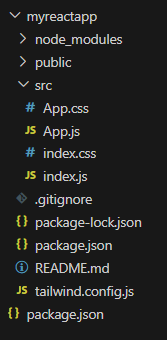
Creating User InterFace
app.js: The “App.js” file is a React component that creates a contact form interface. It uses the state hook to manage form data, Axios for handling HTTP requests, and Tailwind CSS for styling. The form captures user input for name, subject, phone, email, and message, and submits the data to the Django API endpoint upon button click.
Javascript
import React, { useState } from "react";
import axios from "axios";
function App() {
const [formData, setFormData] = useState({
name: "",
subject: "",
phone: "",
email: "",
message: "",
});
const handleChange = (e) => {
setFormData({ ...formData, [e.target.name]: e.target.value });
};
const handleSubmit = async (e) => {
e.preventDefault();
try {
await axios.post(
formData
);
alert("Form Submitted");
setFormData({ name: "", subject: "", phone: "", email: "", message: "" });
} catch (error) {
console.error("Error submitting form:", error);
alert("Error submitting form. Please try again later.");
}
};
return (
<div className="min-h-screen flex items-center justify-center bg-green-400">
<div className="bg-white p-4 rounded shadow-md max-w-sm w-full">
<div className="text-center">
<h1 className="text-2xl font-bold mb-2 text-green-900 ">
CONTACT US
</h1>
</div>
<form onSubmit={handleSubmit}>
<div className="mb-2">
<input
type="text"
id="name"
name="name"
value={formData.name}
onChange={handleChange}
placeholder="Name"
className="w-full p-2 border border-gray-300 rounded"
required
/>
</div>
<div className="mb-2">
<input
type="text"
id="subject"
name="subject"
value={formData.subject}
onChange={handleChange}
placeholder="Subject"
className="w-full p-2 border border-gray-300 rounded"
required
/>
</div>
<div className="mb-2">
<input
type="tel"
id="phone"
name="phone"
value={formData.phone}
onChange={handleChange}
placeholder="Phone"
className="w-full p-2 border border-gray-300 rounded"
required
/>
</div>
<div className="mb-2">
<input
type="email"
id="email"
name="email"
value={formData.email}
onChange={handleChange}
placeholder="Email"
className="w-full p-2 border border-gray-300 rounded"
required
/>
</div>
<div className="mb-2">
<textarea
id="message"
name="message"
value={formData.message}
onChange={handleChange}
placeholder="Message"
rows="3"
className="w-full p-2 border border-gray-300 rounded"
required
></textarea>
</div>
<button
type="submit"
className="bg-green-400 text-white p-2 rounded-2xl"
style={{ width: "355px" }}
>
SUBMIT
</button>
</form>
</div>
</div>
);
}
export default App;
|
index.css: Below, syntax is configuring Tailwind CSS in a single file, including base styles, components, and utilities to apply the framework’s styling to the project.
Python3
@tailwind base;
@tailwind components;
@tailwind utilities;
|
Deployment of the Project
Run the server with the help of following command:
python3 manage.py runserver
npm start
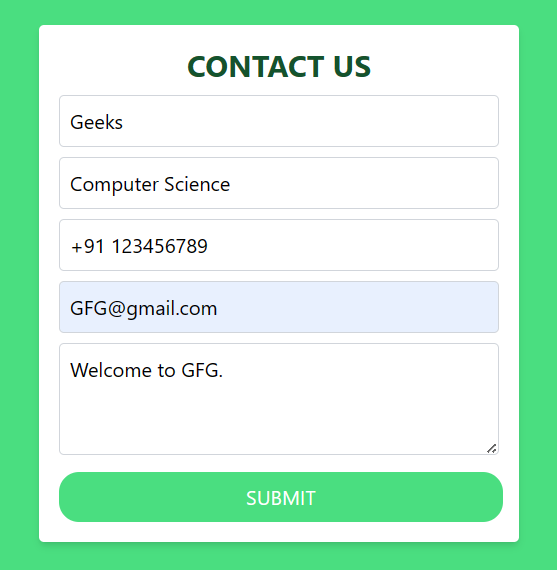
Output :
Share your thoughts in the comments
Please Login to comment...