Hosting a Web Application on Microsoft Azure in IAAS
Last Updated :
03 Dec, 2020
Azure provides a lot of services to host a web application whether it be static or dynamic in a number of ways. In this article, we will host a simple static web application taking Infrastructure as a Service on Microsoft Azure, by using a free and open-source cross-platform web server software named Apache HTTP Server on a virtual machine. A static web application can be a simple HTML, CSS, or JavaScript website that doesn’t require any dynamic changes, specifically any server-side alternations. First, we will require a web server that will host our web application on the internet. For this purpose, we will deploy a virtual machine exposed to the internet (having a public IP address) along with ports 22 (SSH) and 80 (HTTP) exposed. We will make this virtual machine a running web server by installing & using the Apache HTTP server application and its services on the VM. After the successful deployment and configuration of the web server, we will then deploy our static web application on the server that will host the application on the internet.
Prerequisites
- An Azure subscription: If you do not have one, create a free account before you begin.
- A static web application source. If you do not have any or do not want to develop one, you can make use of this sample web app project.
- PuTTy software for SSH authentication. Download the software from here.
Now Follow the below article after signing in to the Azure portal, to successfully achieve the above-mentioned statements:
Create a Resource Group
A resource group is a group in Azure that will hold all the resources that will be managed as a single group or a single Azure solution. It is best practice to add resources within the same resource group that will share the same lifecycle.
- On the left panel select Resource groups.
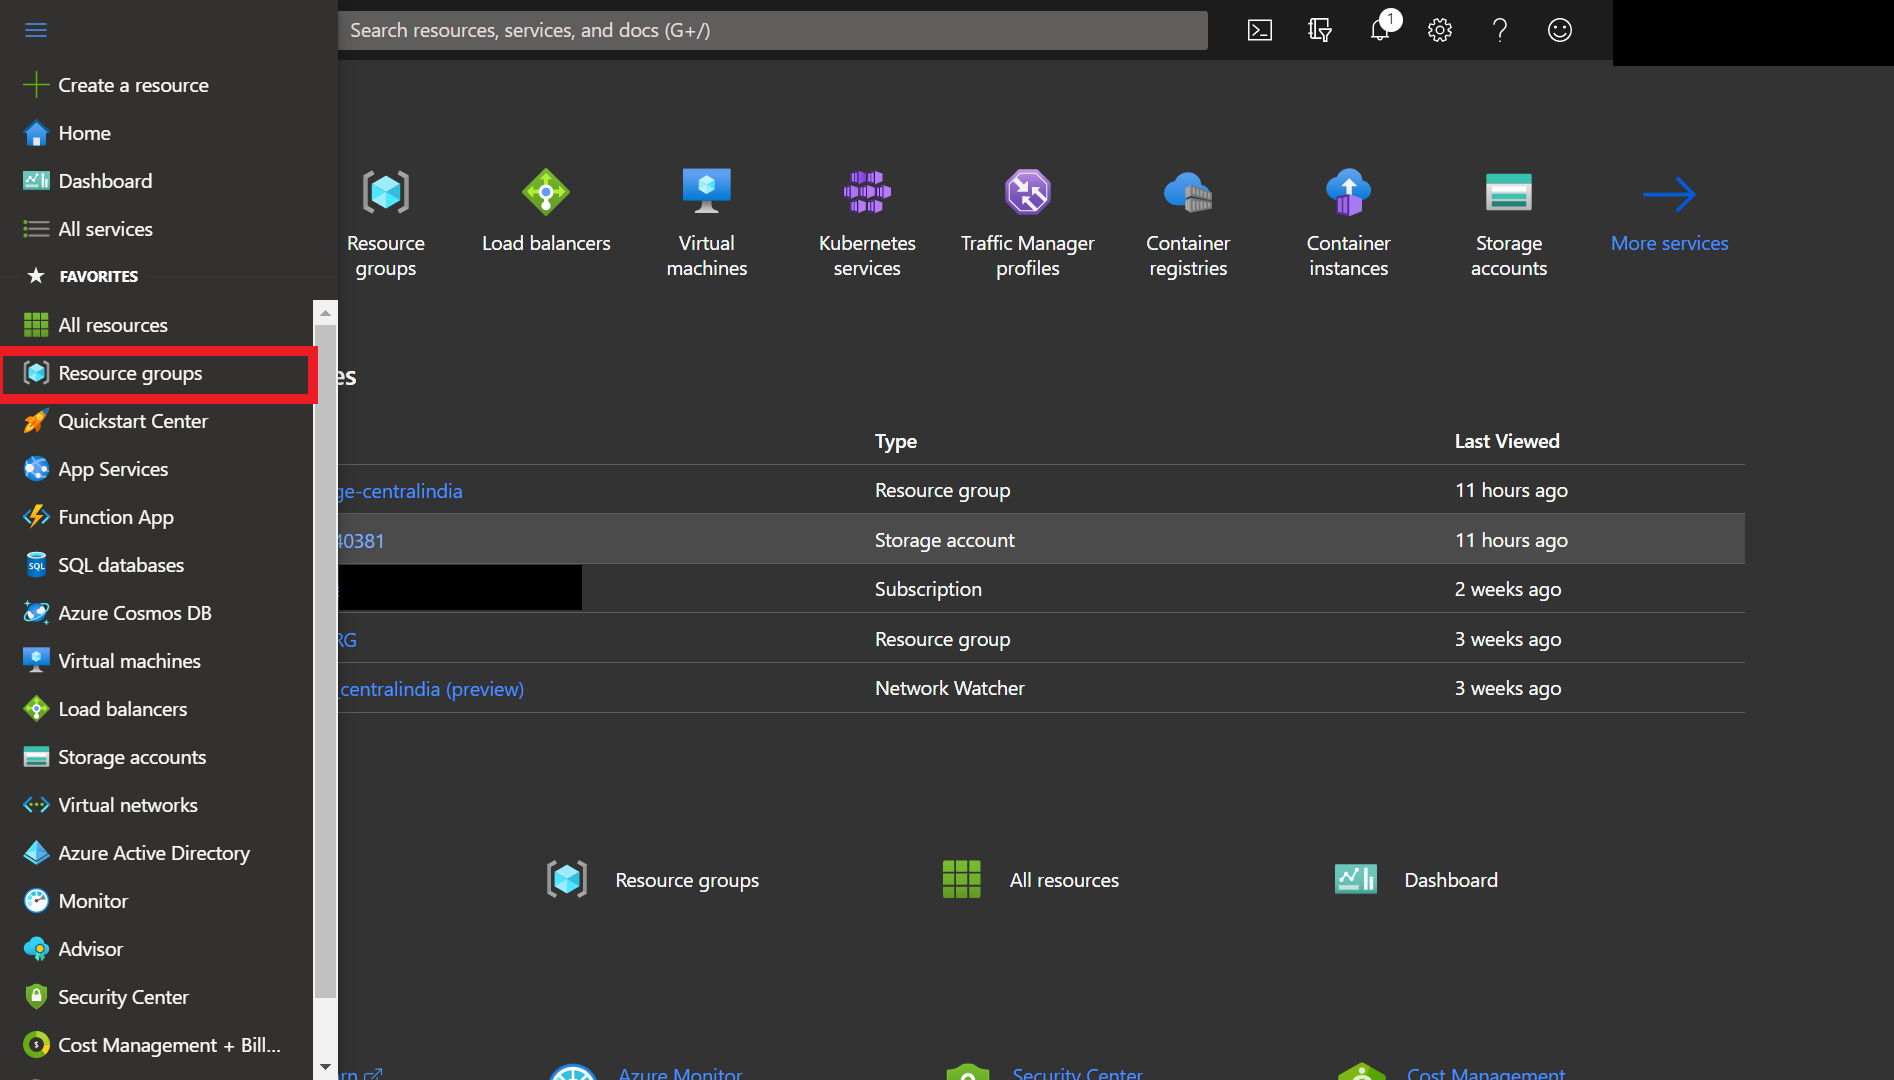
Select “Resource groups” on the left panel.
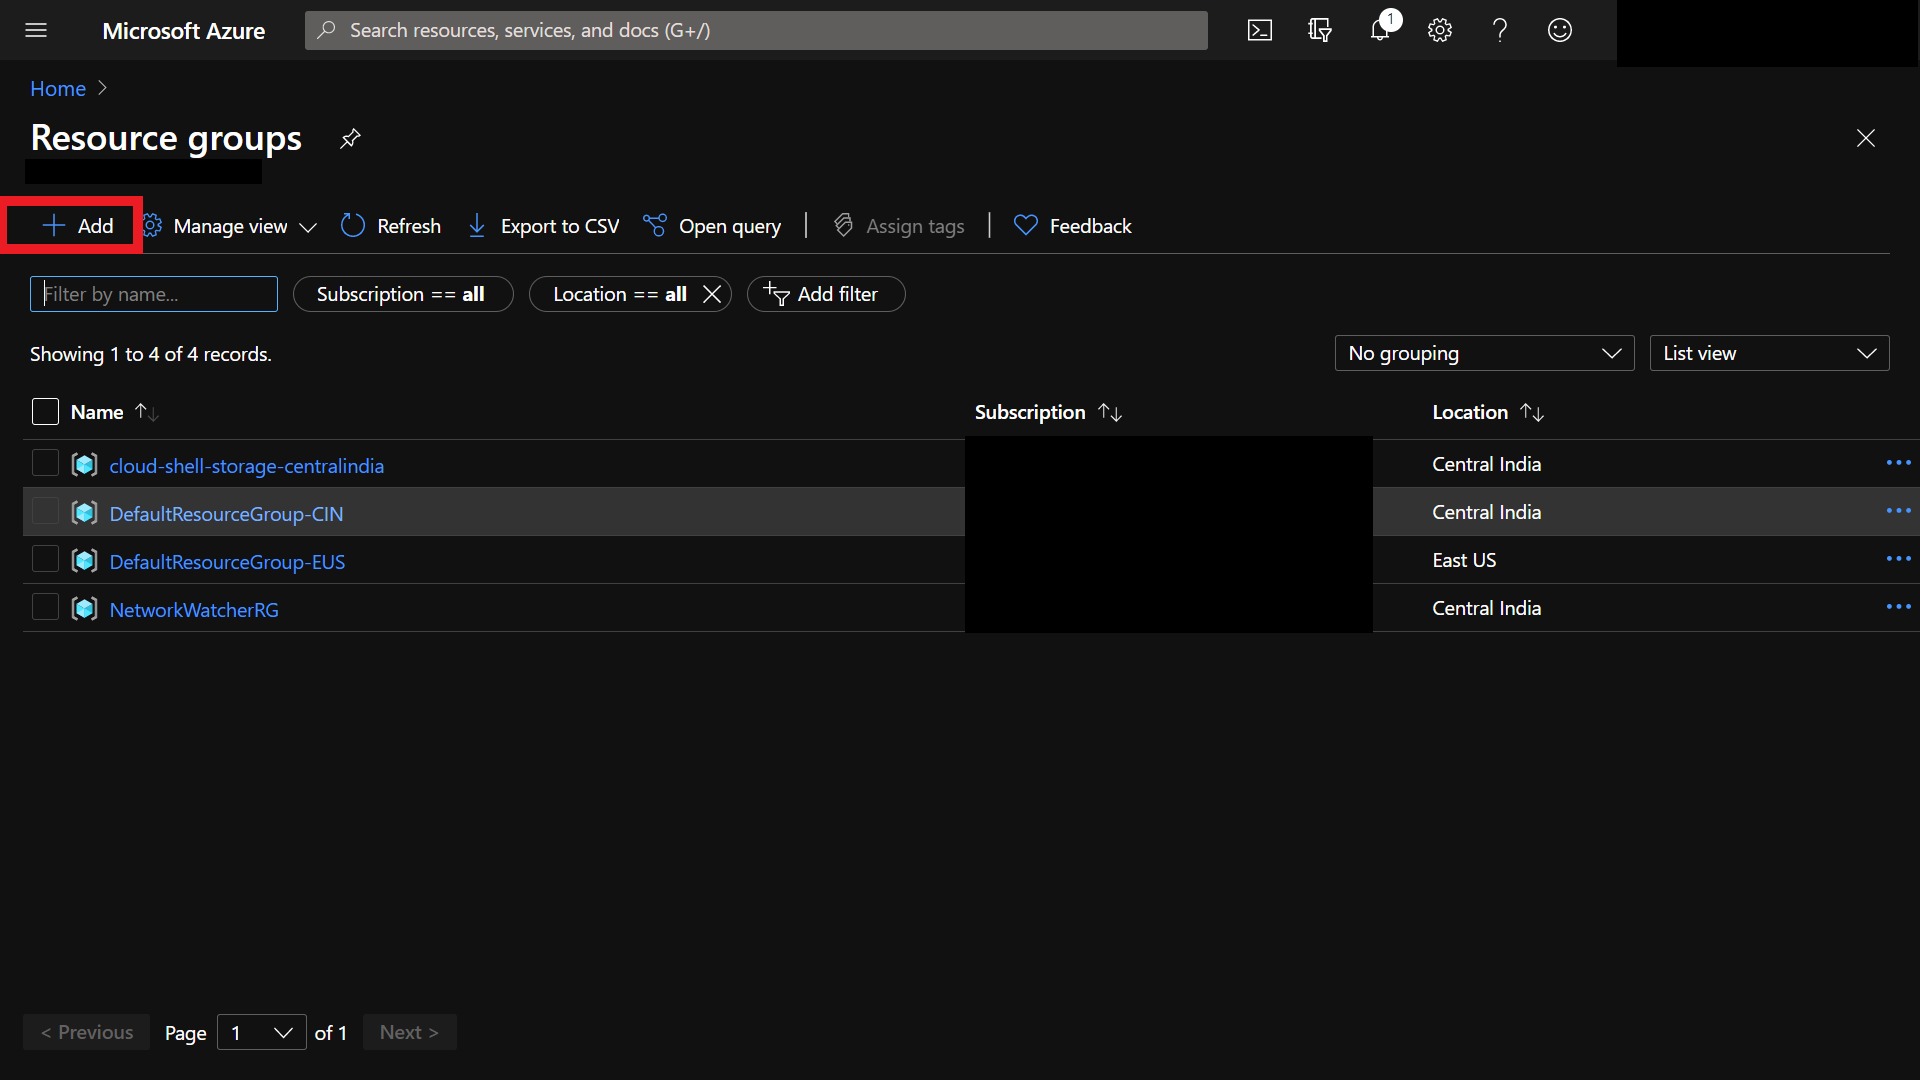
Add/create a new resource group.
- Select your subscription.
- Give a name to your resource group.
- Provide a region.
- The selected region will store all the metadata of the resources deployed within that resource group.
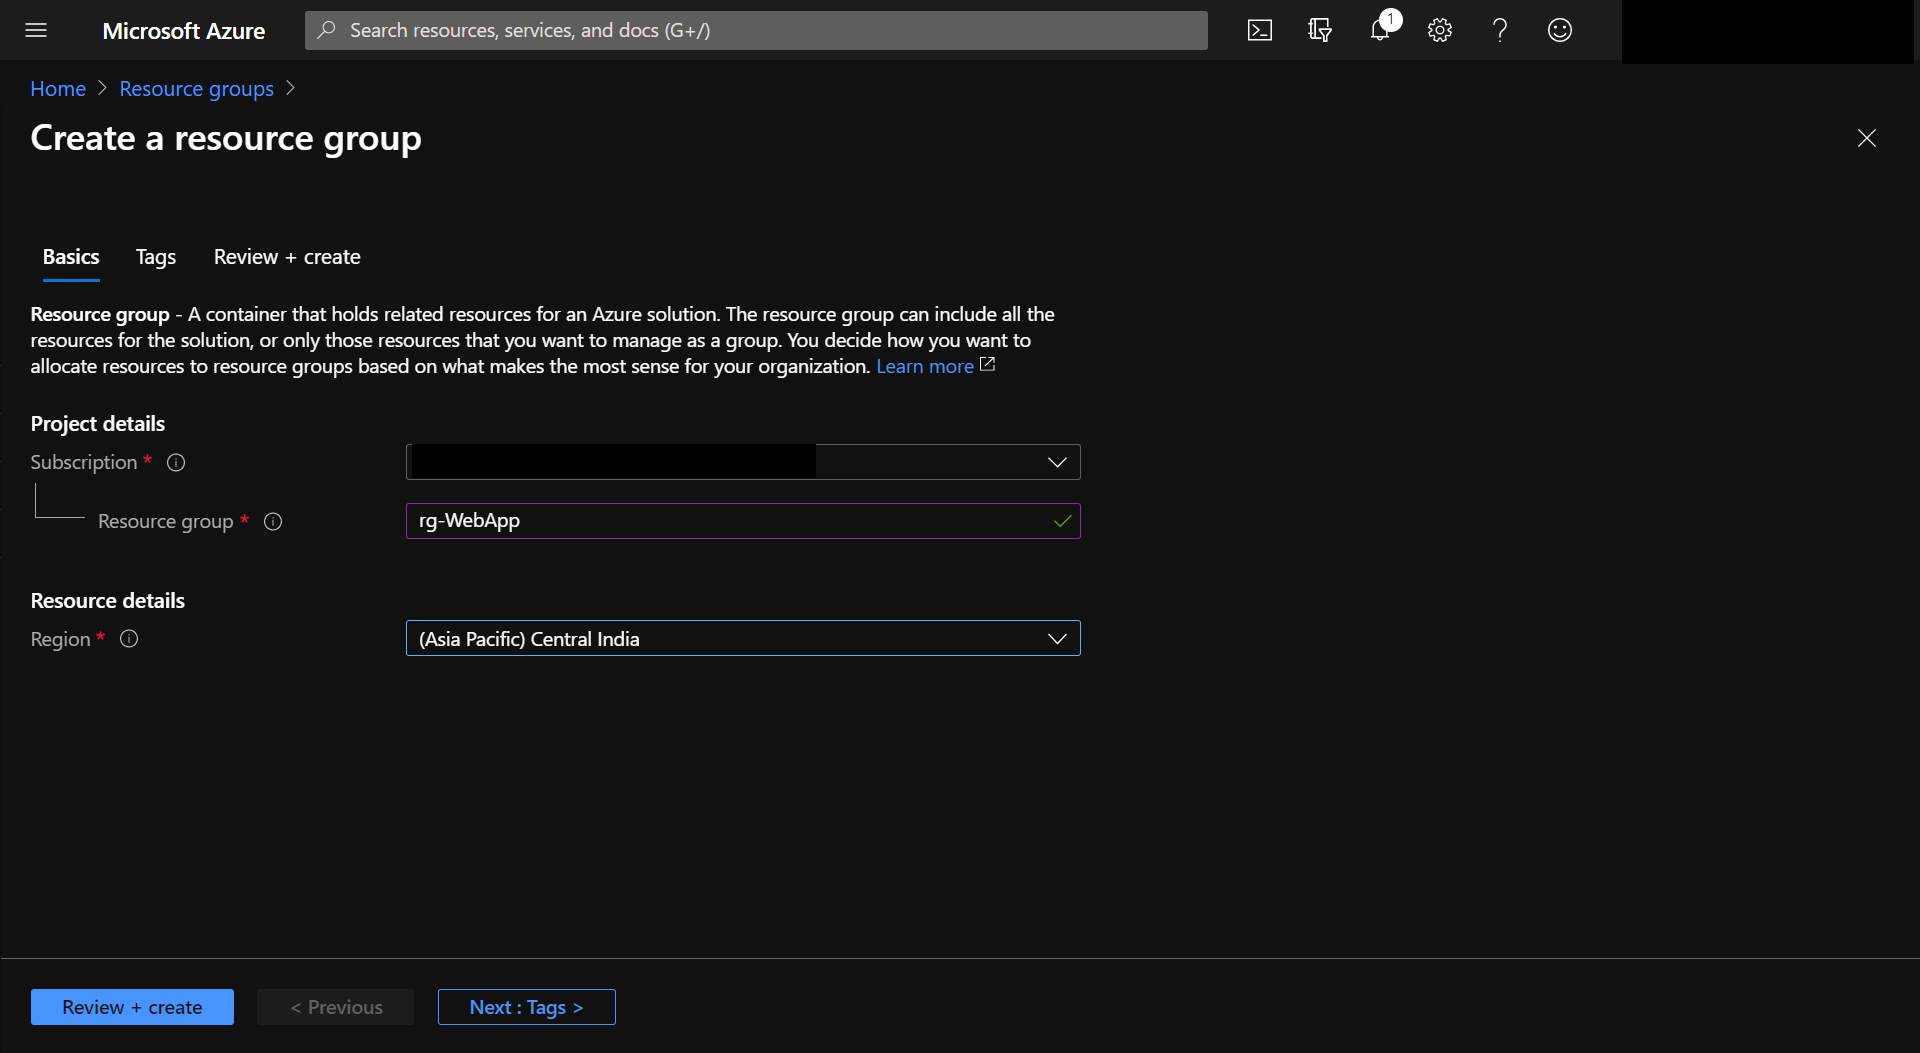
Fill out the basic details required for the resource group.
- You can label your resource group by providing tags to it as Name and Value.
- It can be anything.
- It is optional.
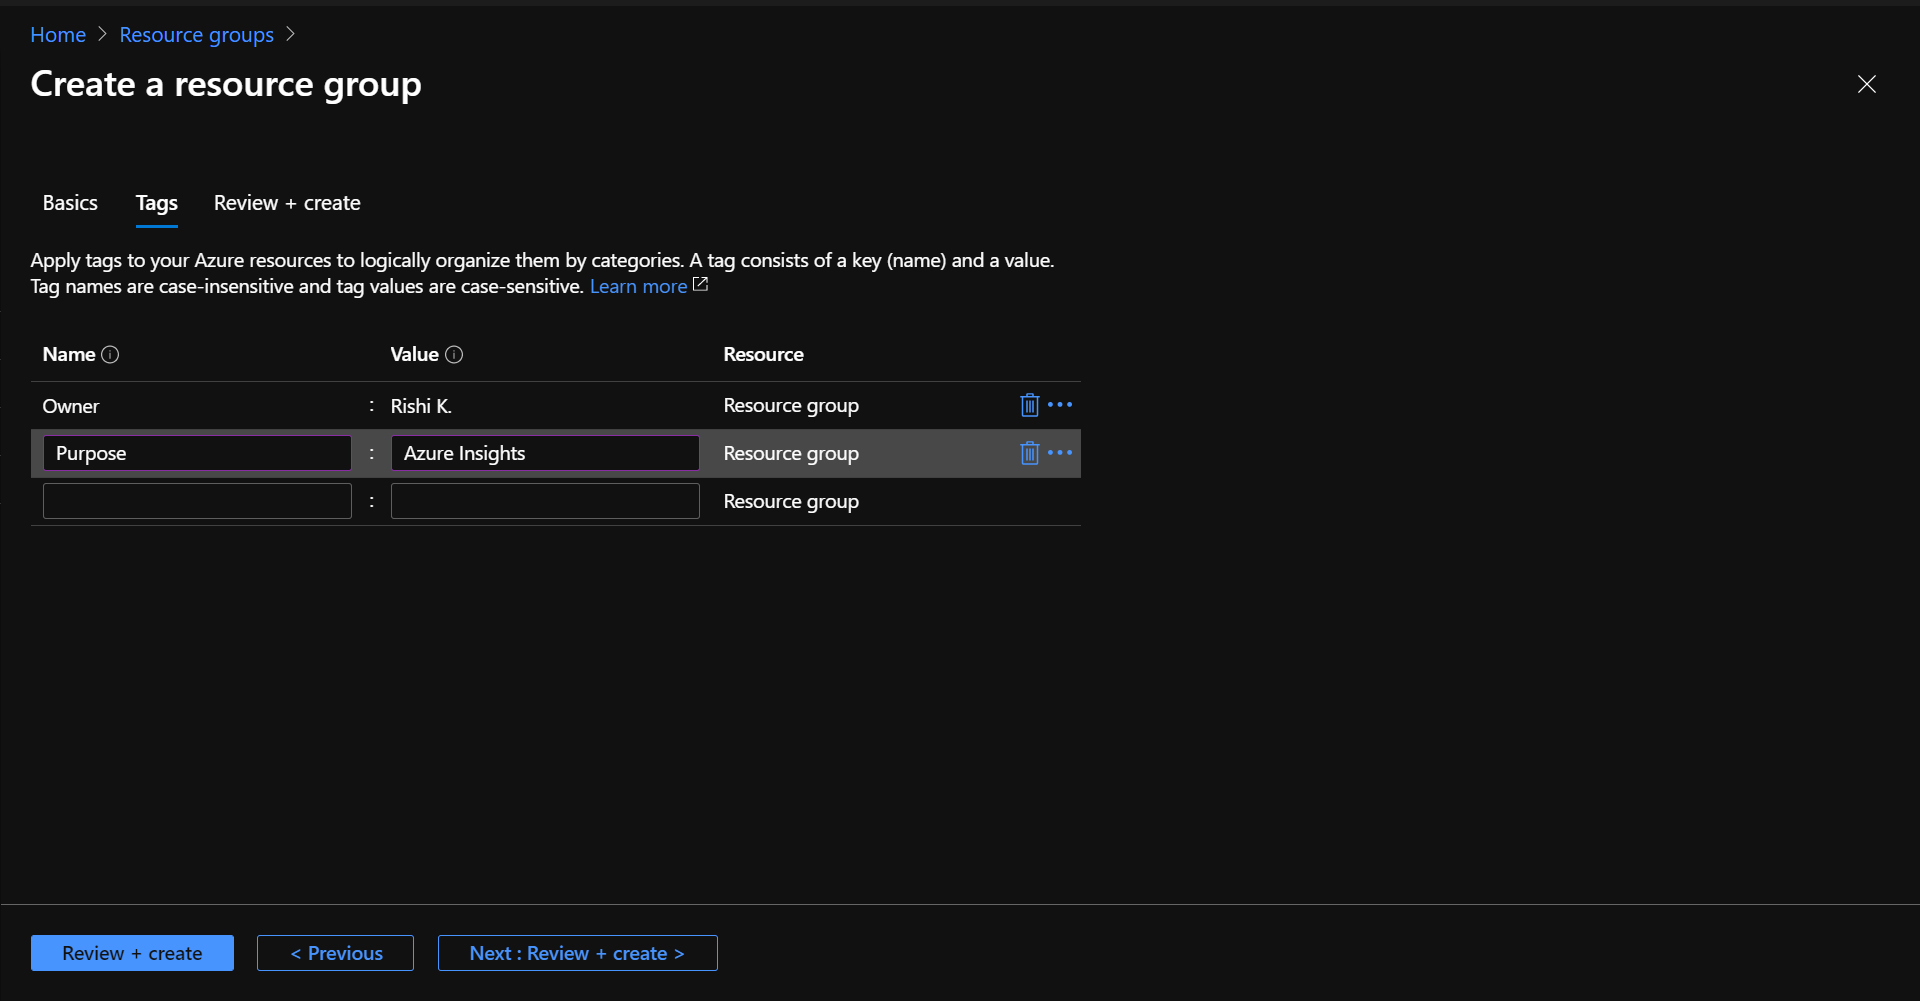
Give tags to your resource group (optional).
- Finally, go to the Review + Create option.
- Azure will validate all the details you provided for the creation of the resource group.
- If the validation passes, you can create the resource group by selecting Create.
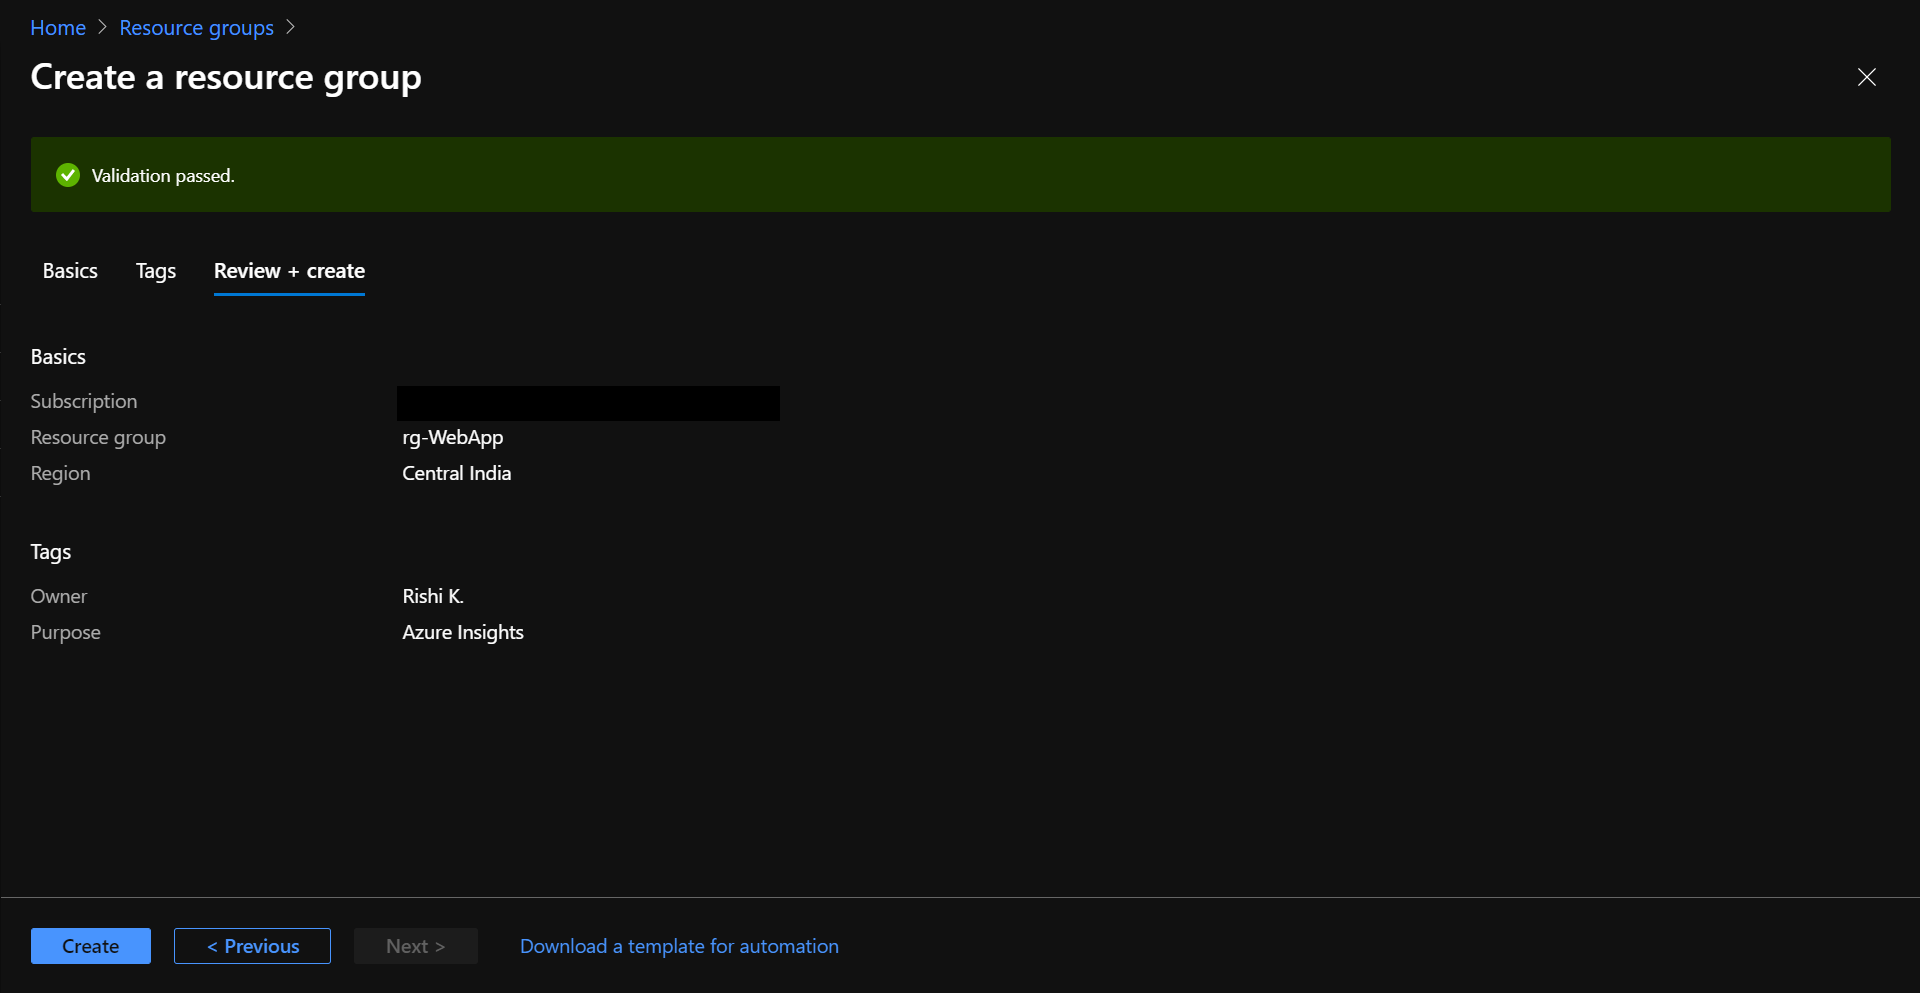
Review & create your resource group.
Create a Virtual Machine
- On the left panel select Virtual machines.

Select “Virtual machines” on the left panel.
- Select Add ⇢ Virtual machine.
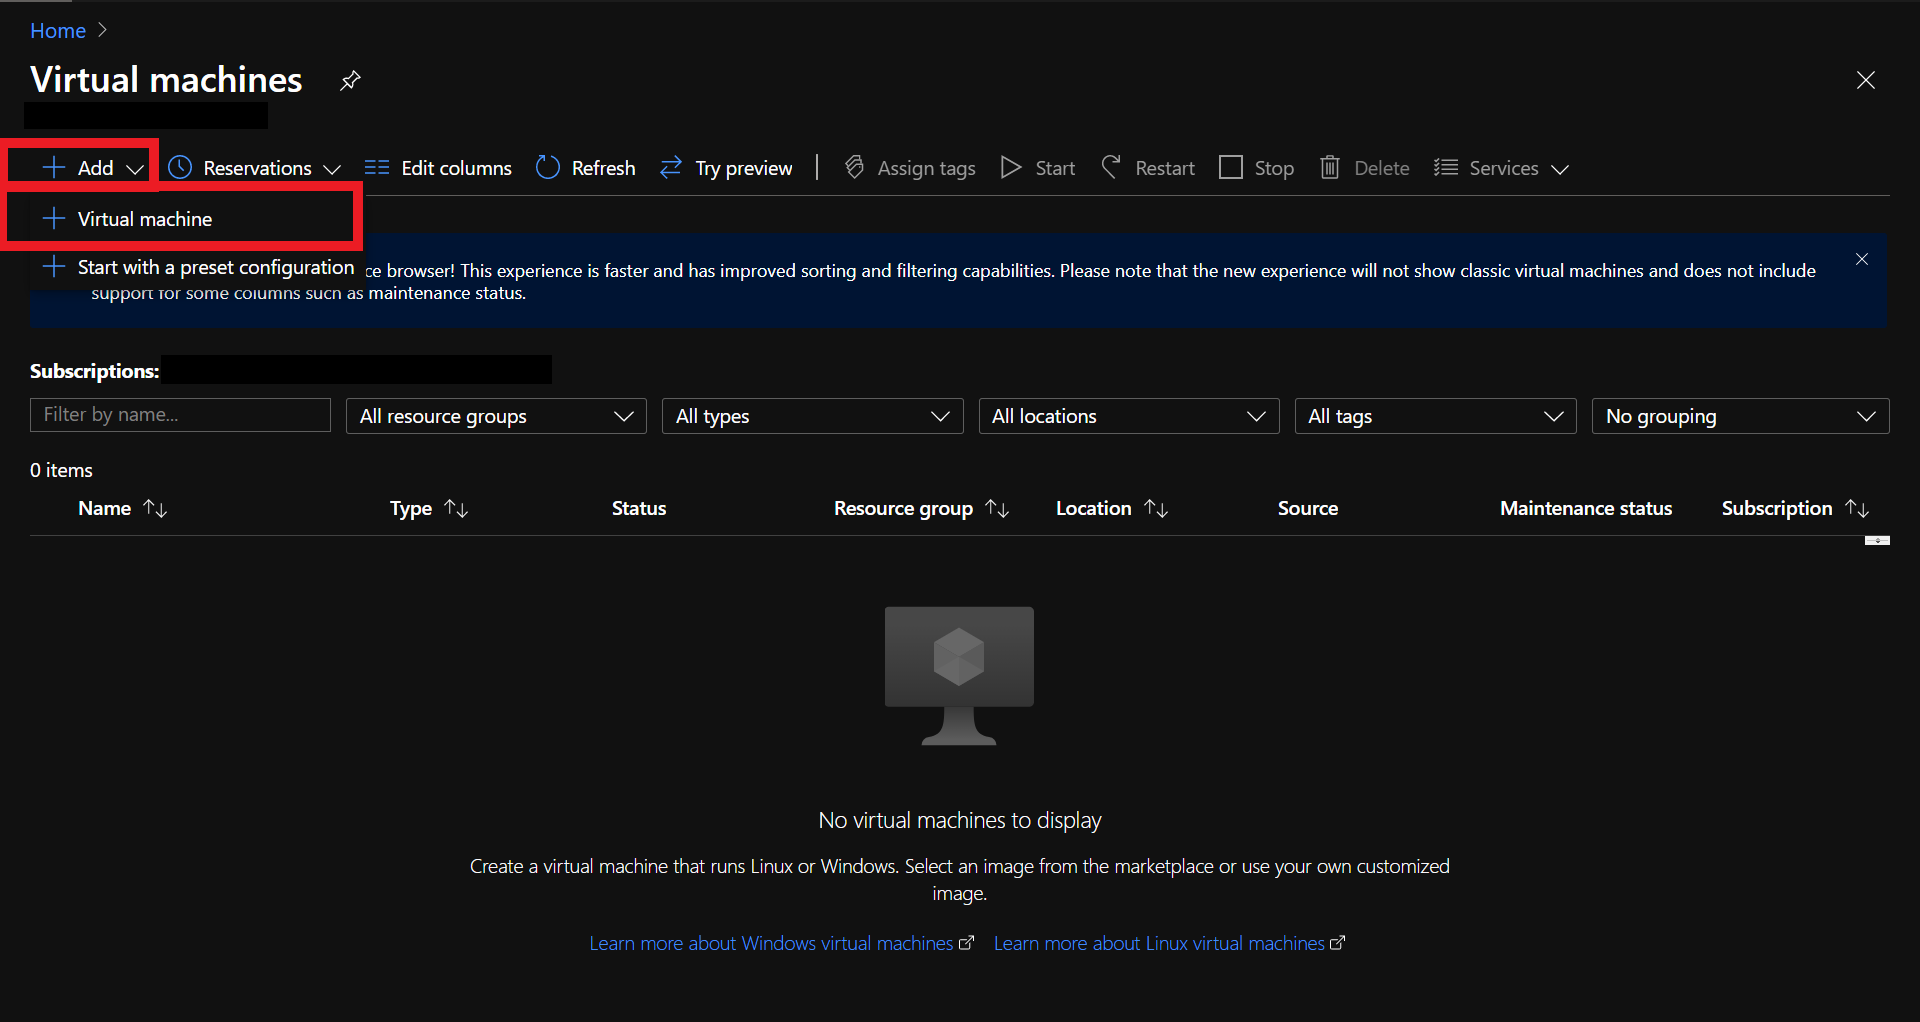
Add/create a new virtual machine.
Configure the Basics of the Virtual Machine
- Provide the name of the resource group in which the virtual machine will reside or create a new one.
- Here, we will provide an existing resource group named rg-WebApp which we created earlier.
- Give a name to your virtual machine.
- Here, we provide the name MyUbuntu-VM, since we will be using an Ubuntu VM.
- If you do not want to use an Ubuntu VM, you may specify your own image for the virtual machine by selecting Browse all public and private images in the Image option (go to point 5).
- NOTE: Here, in this lab project, since we will use SSH authentication to connect to the VM, a Linux virtual machine is needed.
- If you choose a Windows image you will require RDP authentication.
- Provide the region you want the VM to be deployed to.
- Here, we provide Central India.
- It’s a good practice to provide a region that is nearer to you, for lesser latency.
- Leave the Availability options as No infrastructure redundancy required for now.
- Provide the image of the virtual machine to be used.
- Here, we provide Ubuntu server 18.04 LTS – Gen1.
- You can select different sizes for the VM by selecting different values of CPU, RAM, Data disks, IOPS, etc., and charges will be applied accordingly.
- Select the SSH public key as the Authentication type.
- Provide the administrator username for the VM.
- In the SSH public key source field select Use existing public key option from the drop-down menu.
- Use PuTTygen software to generate a public-private SSH key pair (Asymmetric cryptography).
- Paste the generated public key in the SSH public key field & save the private key on your local machine.
- We save the private key as PK-1.ppk.
- You can select and allow certain ports to be exposed on the internet by enabling the Allow selected ports option.
- We allow port no. 22 (for SSH authentication) and port no. 80 (for accessing our web app on HTTP).
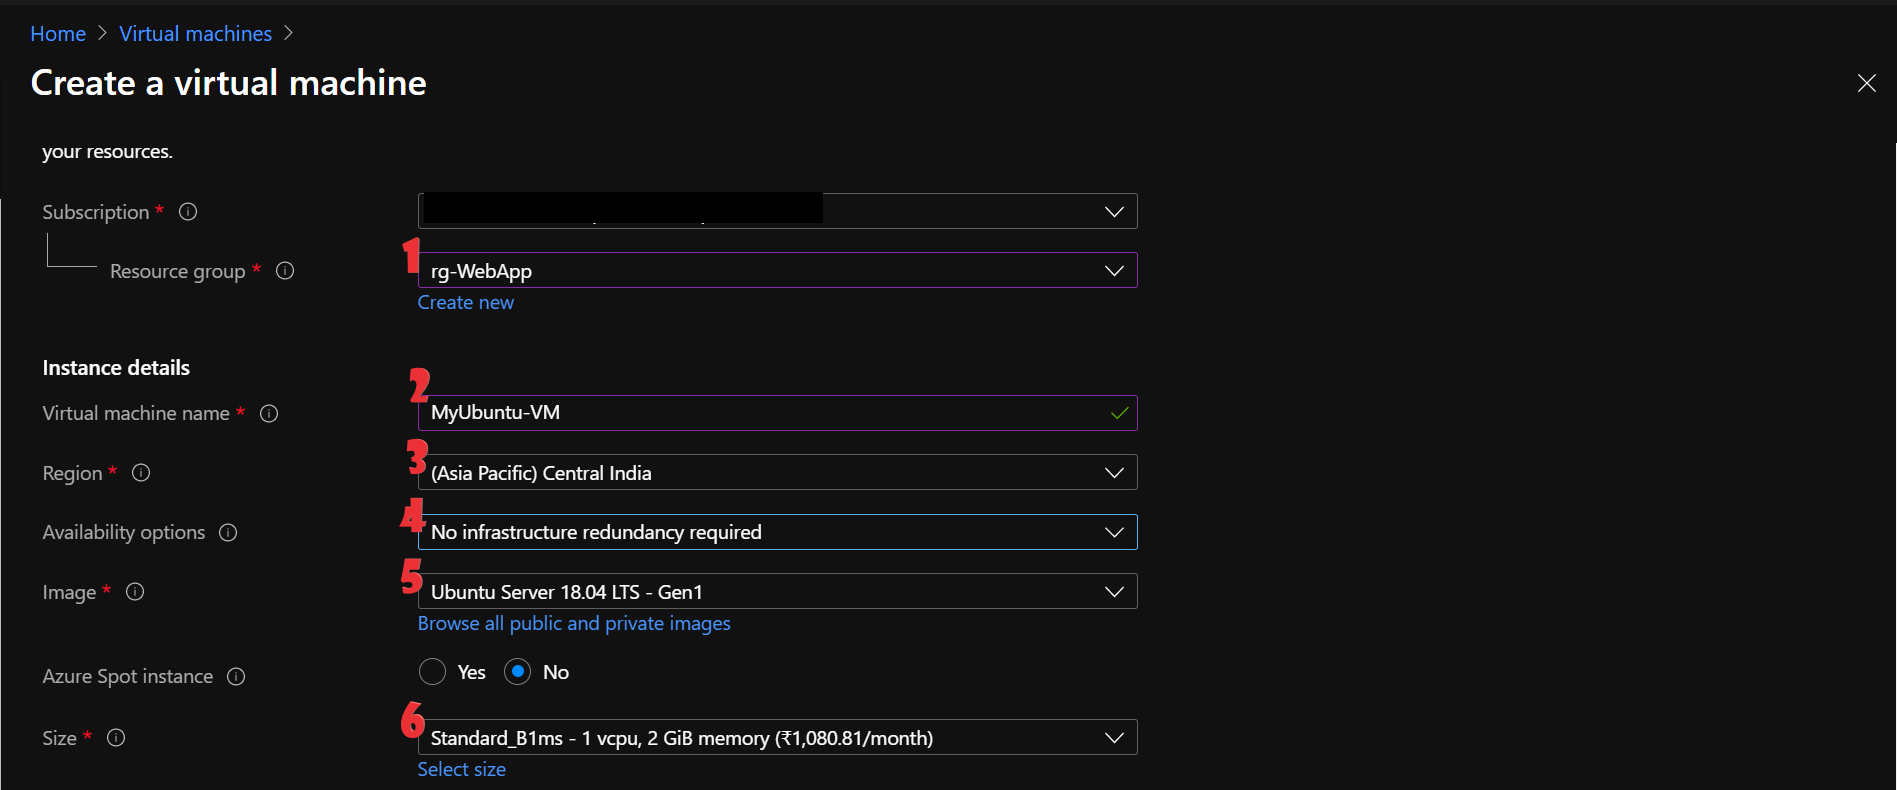
Fill out the basic details required for the virtual machine. (1)
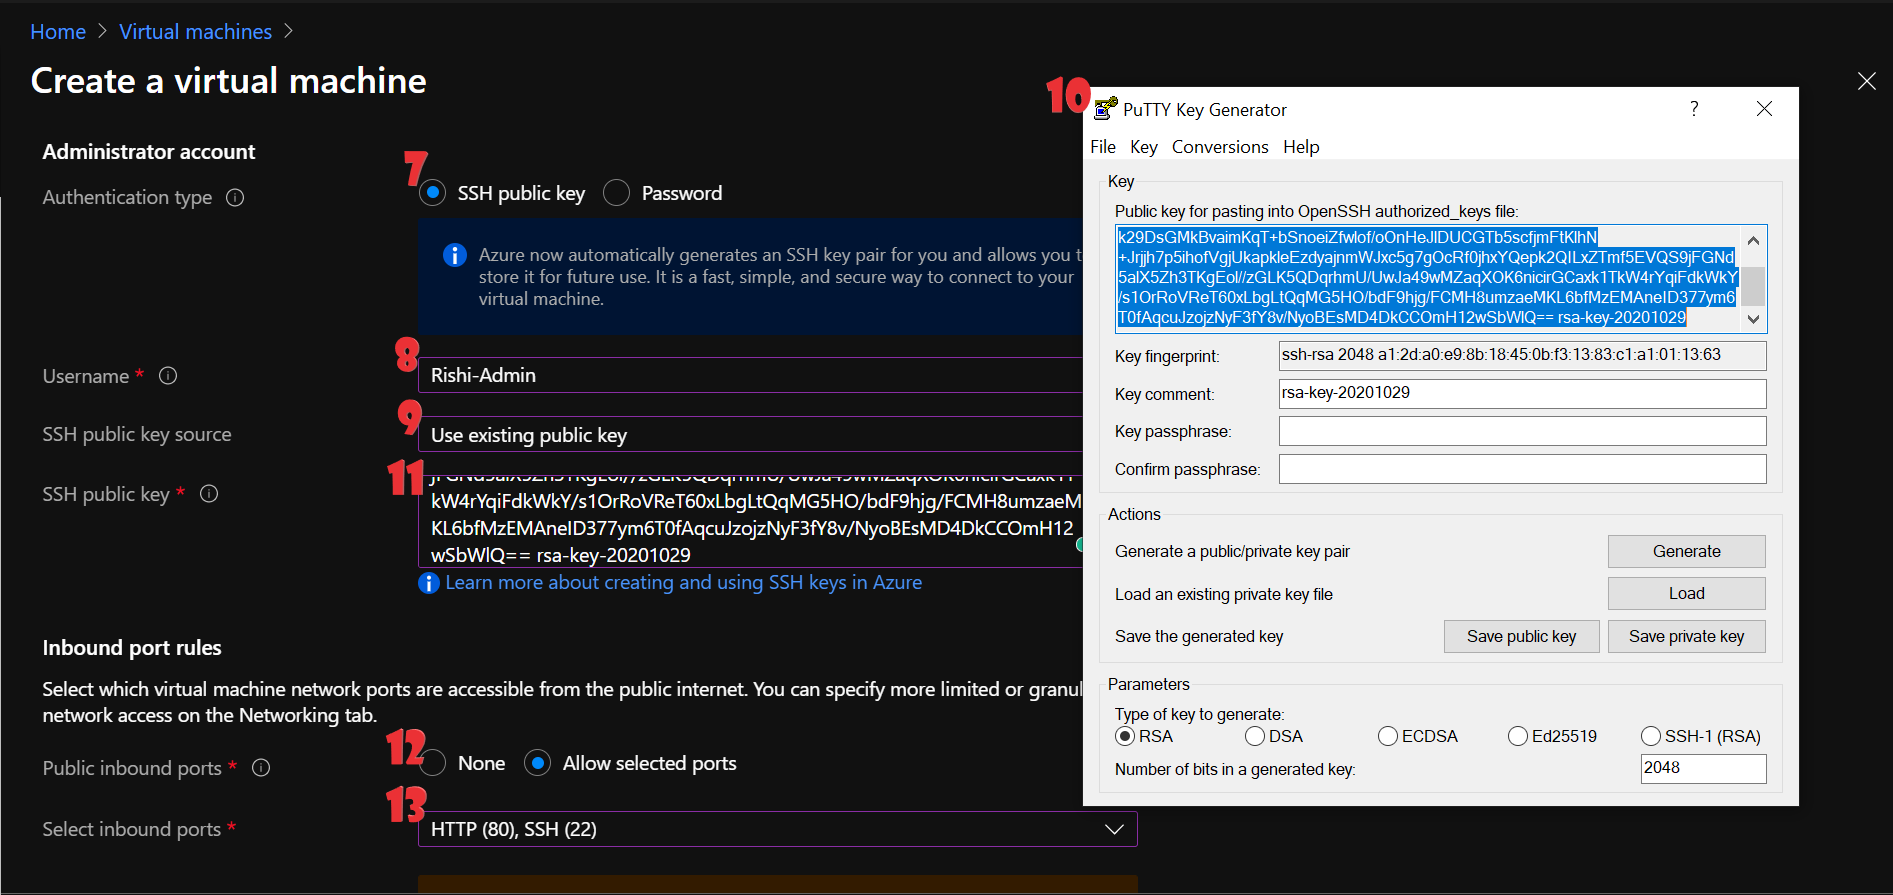
Fill out the basic details required for the virtual machine. (2)
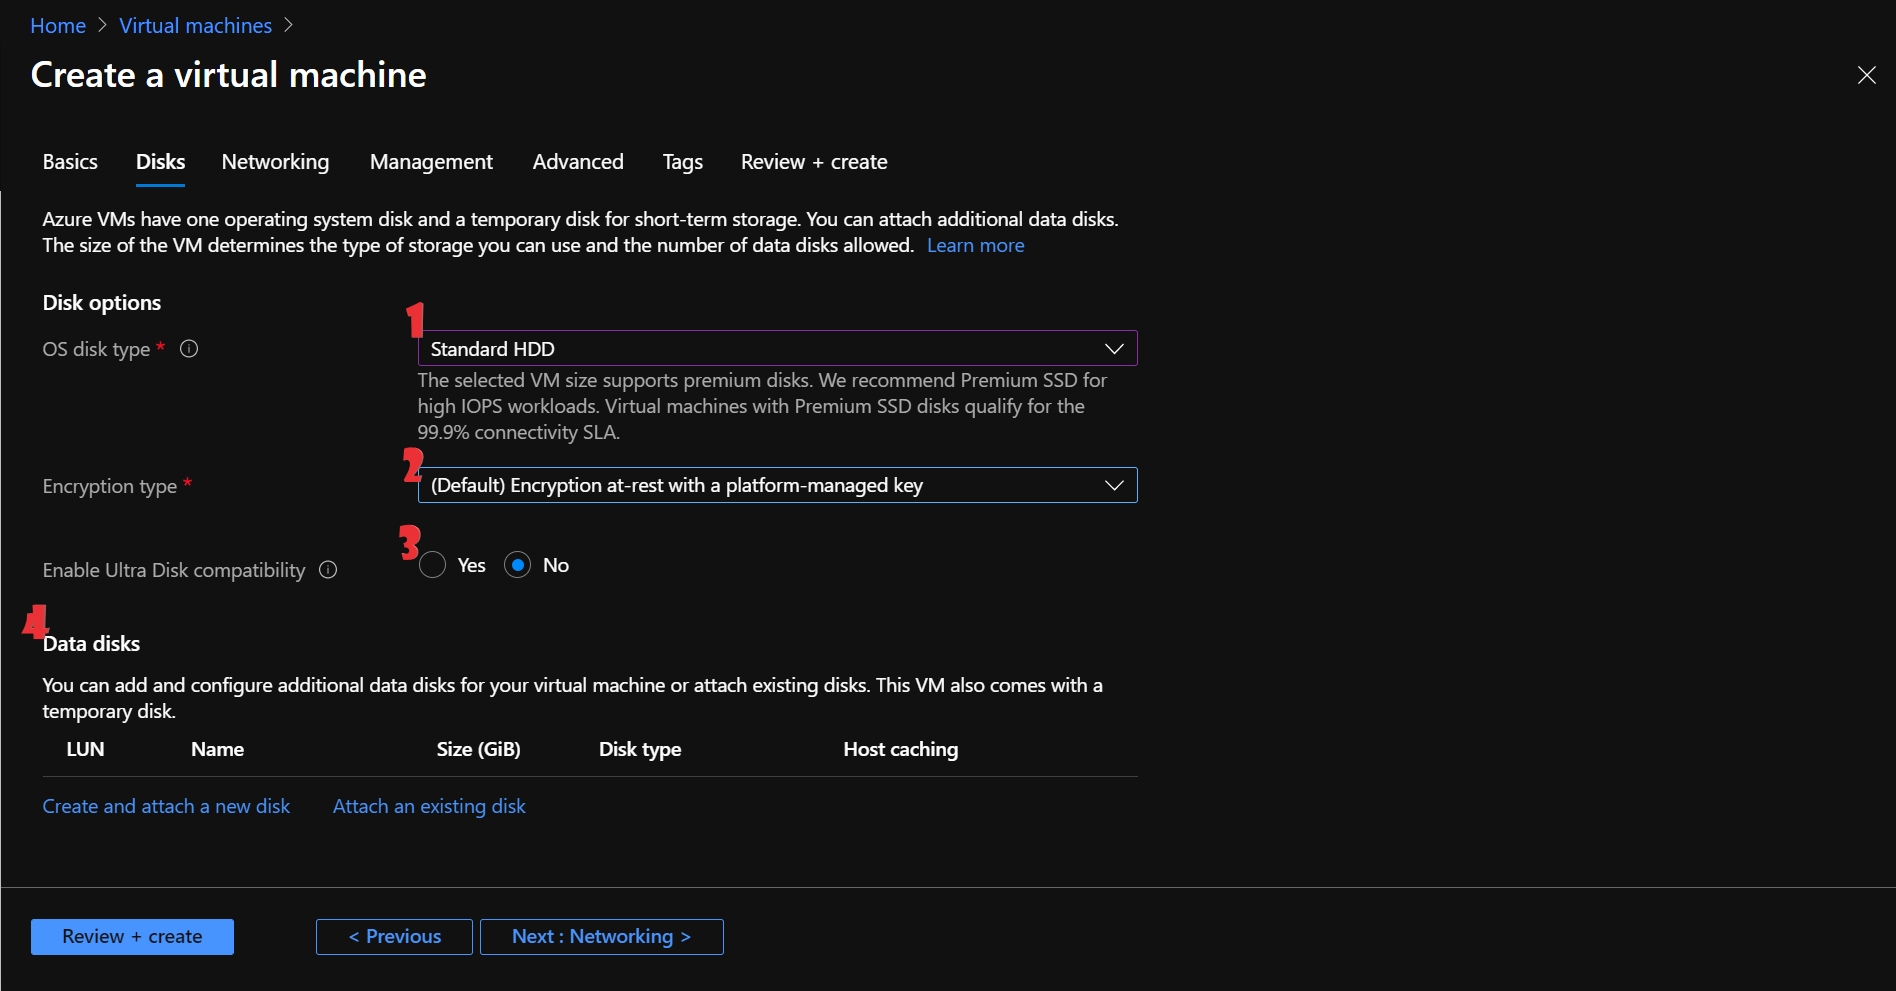
Configure the Disks of the Virtual Machine
- Since we won’t need any use of a higher IOPS workload, select Standard HDD from the drop-down menu of the OS disk type.
- Leave the encryption type as default.
- In this case, the encryption of the disk will be managed by Microsoft.
- Since we won’t be doing any data-intensive workload keep the Enable Ultra Disk compatibility as No.
- If you want to add additional disks to your VM, you can do so by selecting Create and attach a new disk option in the Data disks. We won’t need any additional disks, so leave it blank.
Fill out the details of the disk required for the virtual machine.
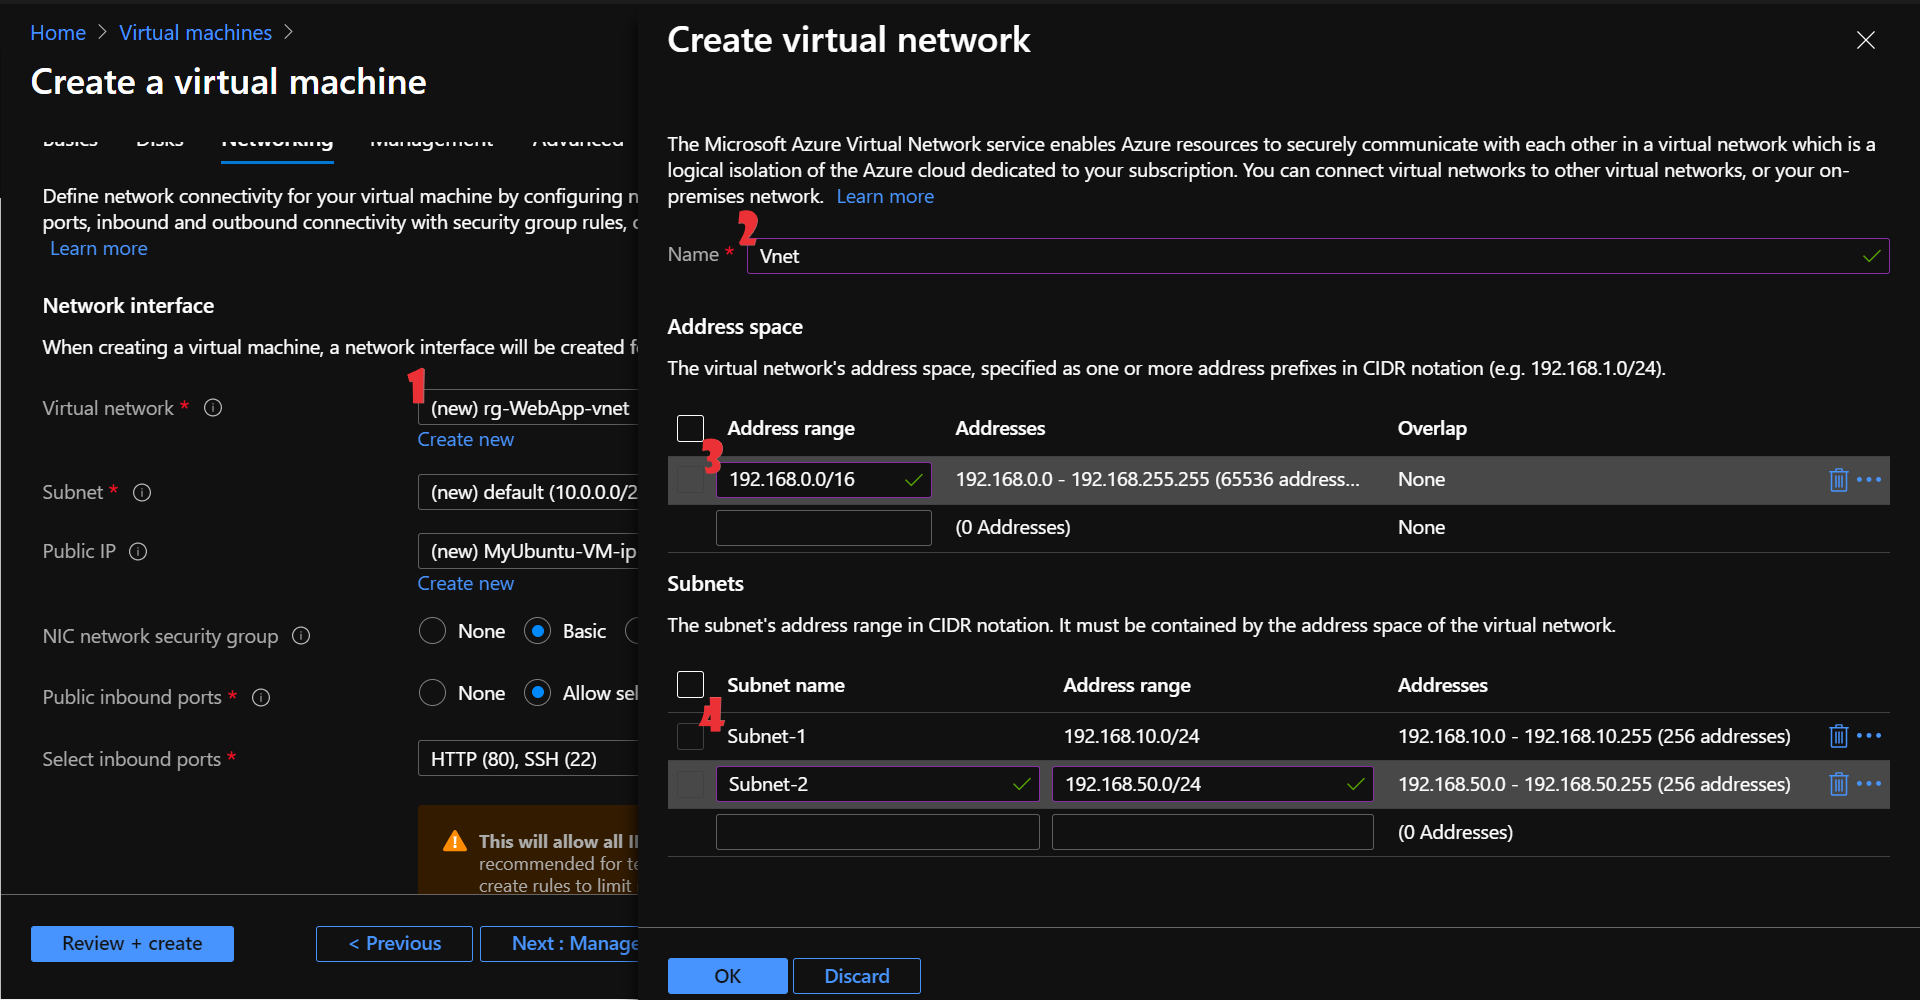
Configure the Networking of the virtual machine
A virtual machine needs a network where it can reside, function, and communicate.
You can provide an Azure virtual network for the purpose which will be a virtual isolated representation of your network in the cloud.
- Create a new virtual network by clicking on the Create a new option.
- Give a name to your virtual network.
- Provide address space to your virtual network.
- Here, we provide address space as 192.168.0.0/16.
- Provide sub-network(s) within your virtual network.
- We provide two subnets named Subnet-1 and Subnet-2 with address range 192.168.10.0/24 and 192.168.50.0/24 respectively.
- You can decide which subnet your VM will reside on.
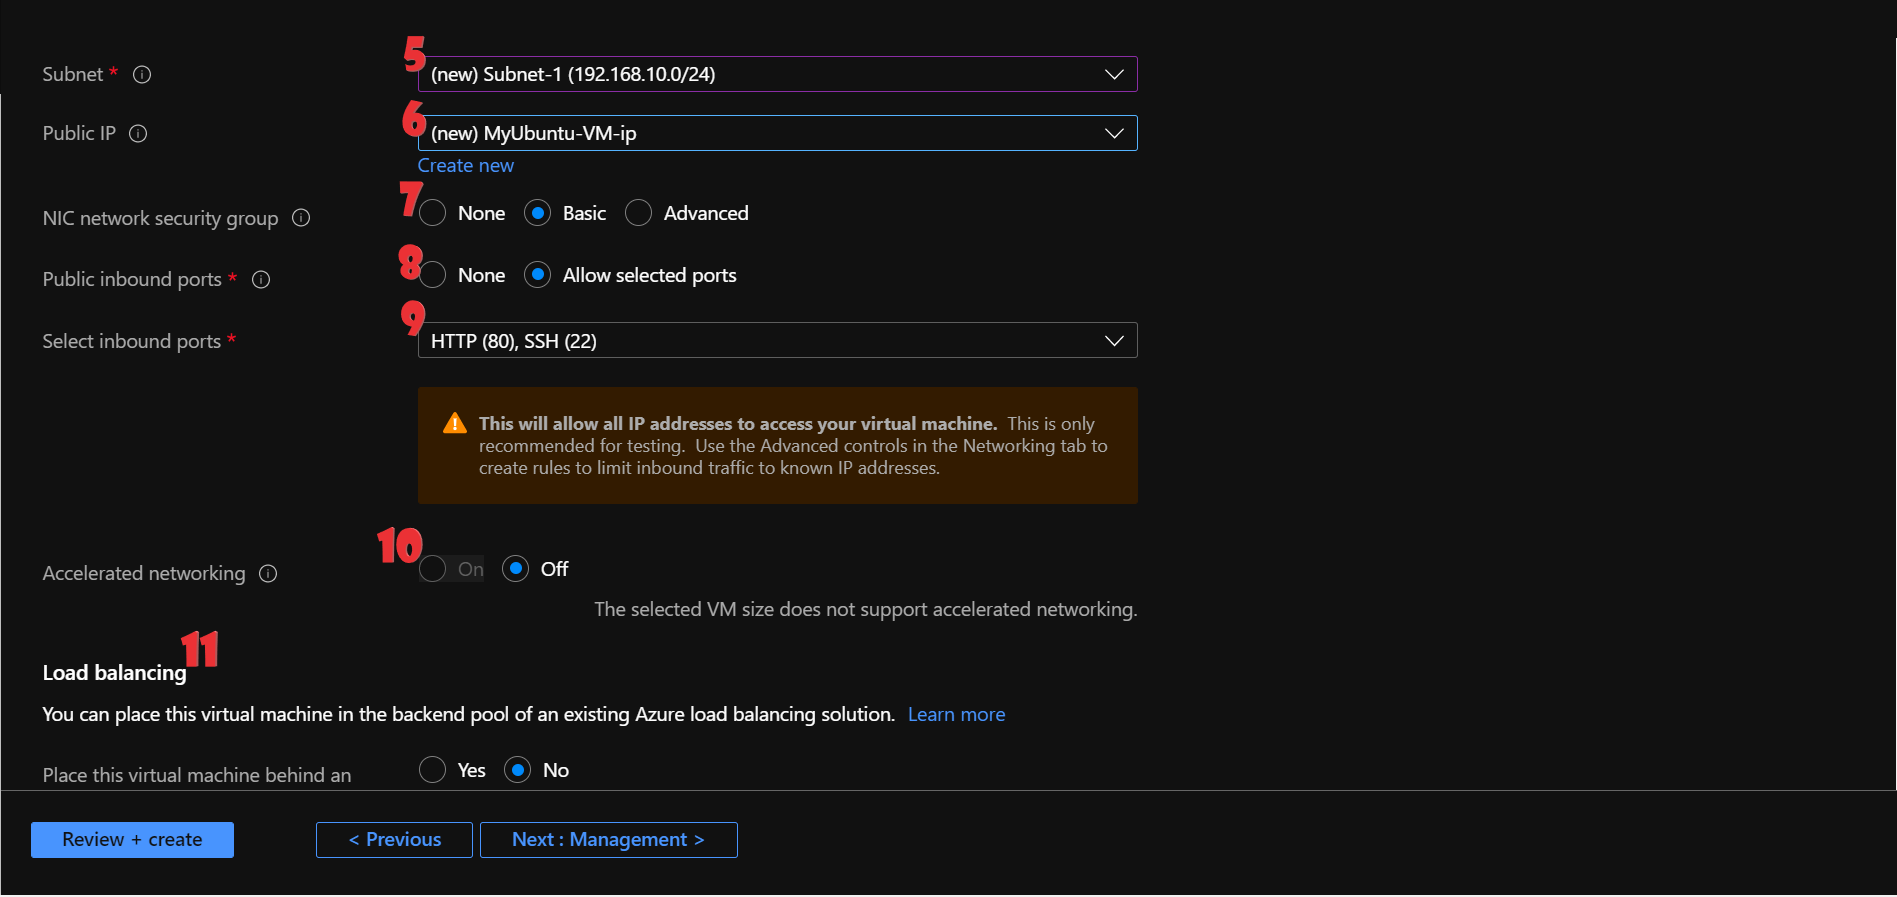
- You can decide whether to provide a public IP address for your VM or not.
- Since we will be accessing our web application on HTTP, we give the VM a public IP address with the default name.
- Keep the NIC NSG as basic.
- We need to allow certain ports to open.
- We select port numbers 80 (HTTP) and 22 (SSH) to be open.
- Keep the Accelerated networking off.
- In our case, the VM size does not support this option.
- Currently, we do not have a load balancer, nor we are implementing it, for now, so keep it as No.
Configure the networking details required for the virtual machine. (1)
Configure the networking details required for the virtual machine. (2)
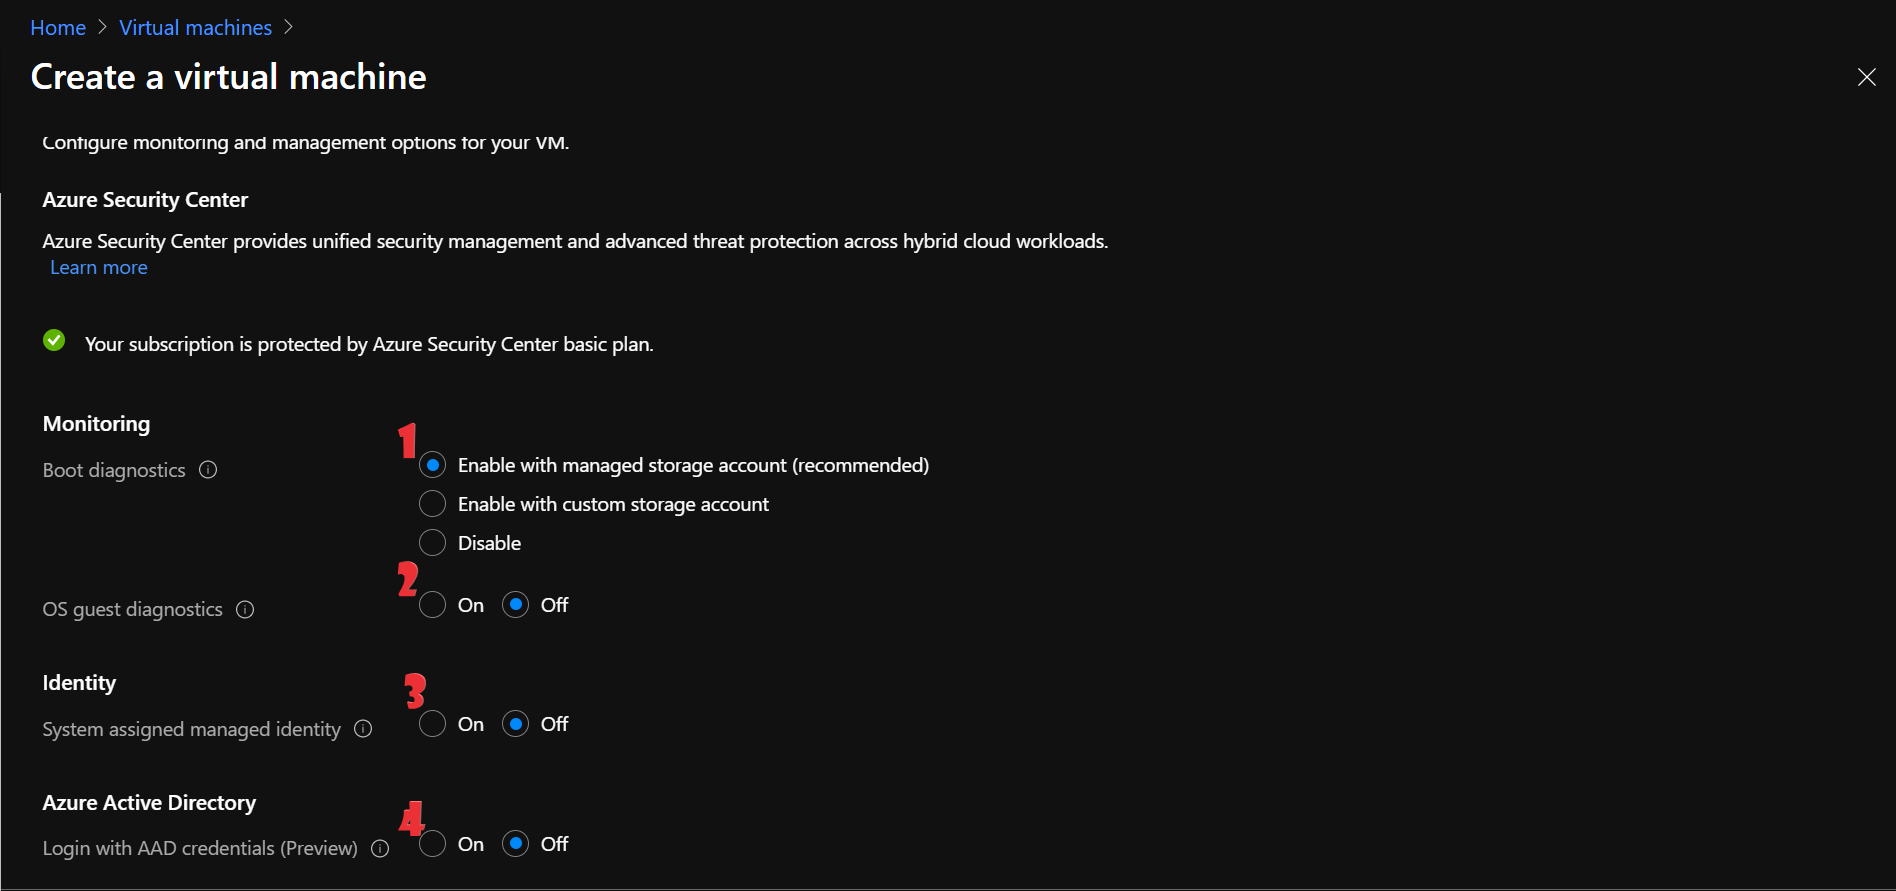
Configure the Management of the Virtual Machine
- Boot diagnostics troubleshoot boot failures for images. Enable it by selecting Enable with a managed storage account.
- OS guest diagnostics will generate metrics for monitoring at every minute. We don’t need it for now.
- Keep the identity option off.
- The Azure Active Directory is a directory service by Microsoft Azure for managing access and permissions to networks and resources. Keep this option off.
- Keep the Auto-shutdown option off if you do not want the VM to auto shutdown at a certain date and time.
- Keep the Backup option off.
Configure monitoring & management details required for the virtual machine. (1)
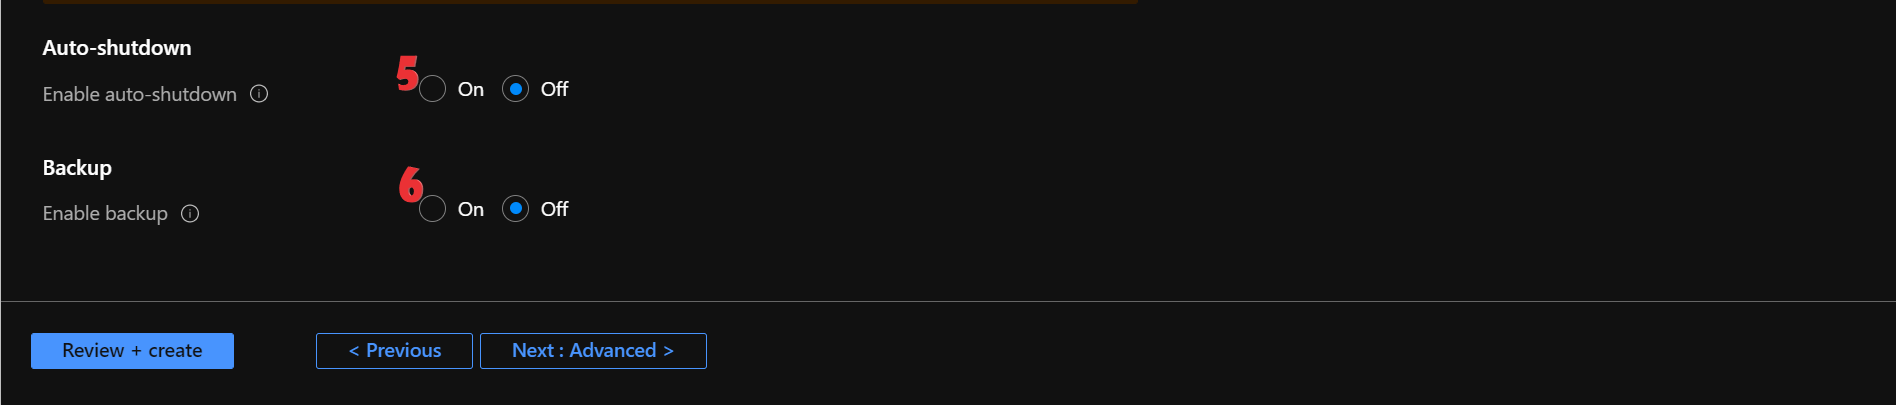
Configure monitoring & management details required for the virtual machine. (2)
- You can add tags to your virtual machine as well if you want.
- Finally, move to the Review + Create option.
- If the validation passes, select the Create option and your VM will be deployed in a few minutes or seconds.
- Select Go to resource option.
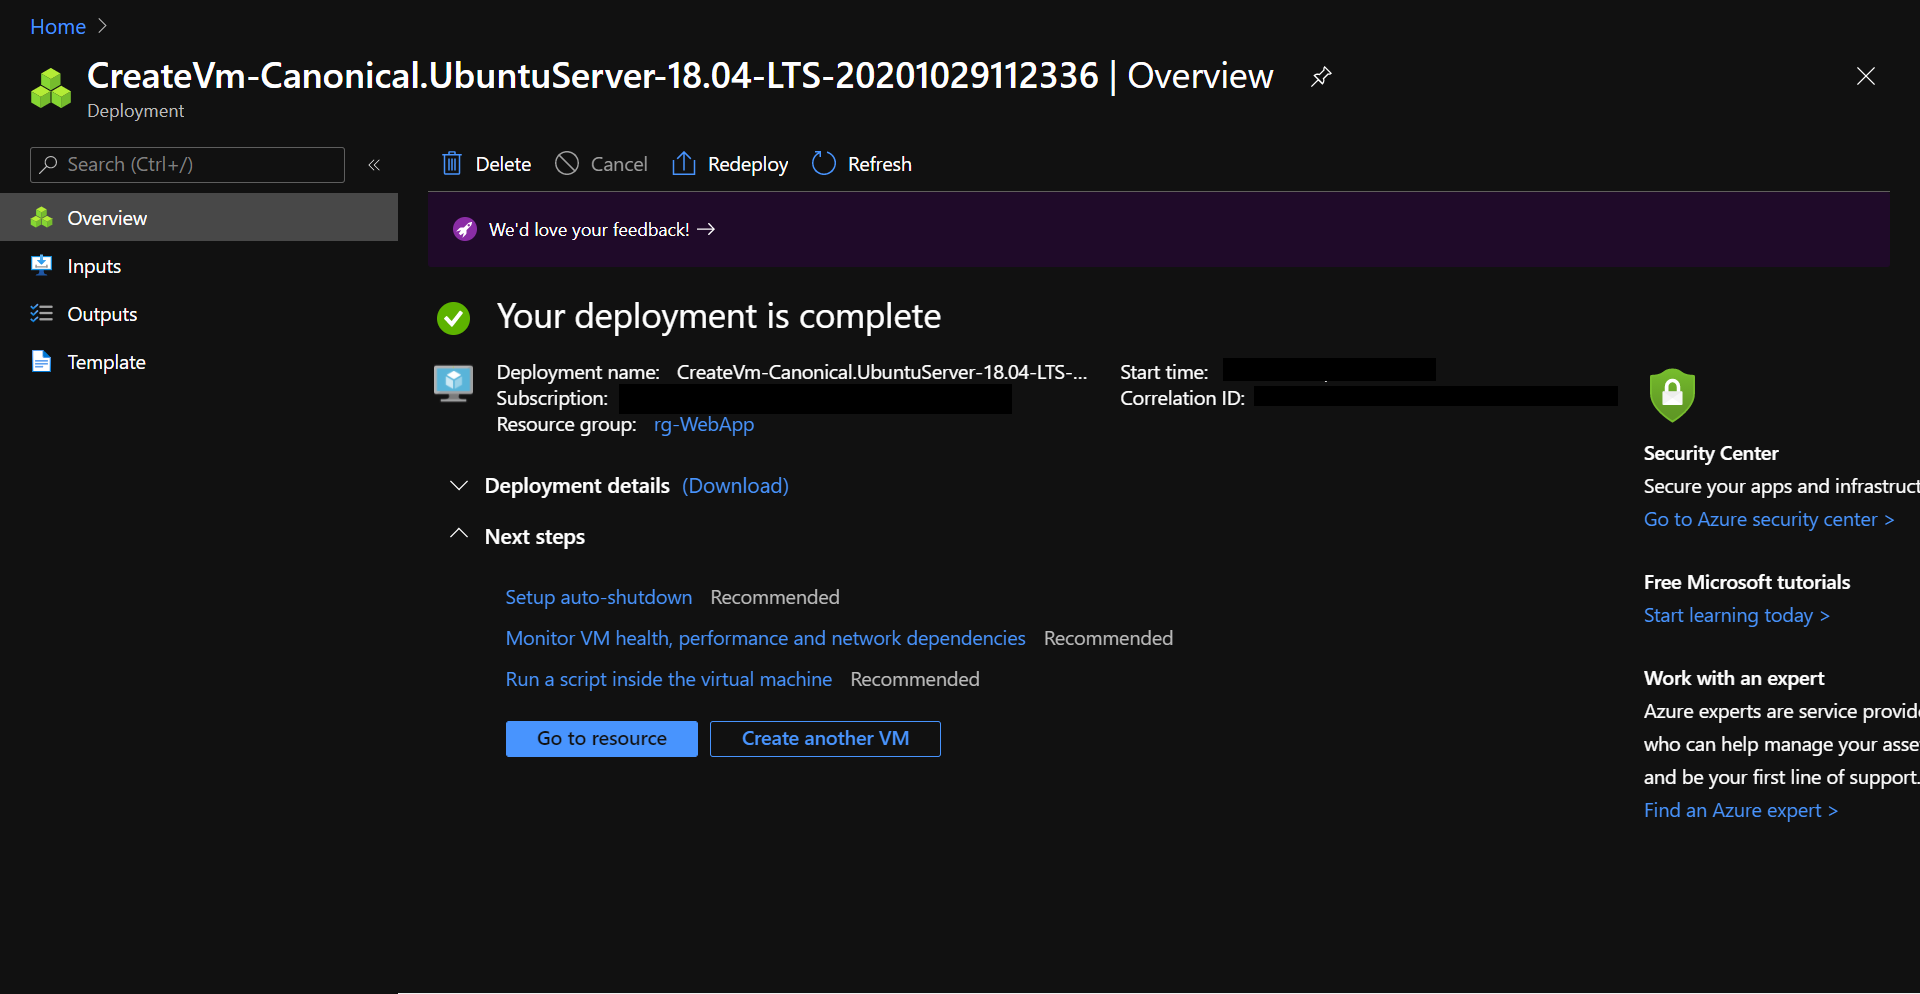
Virtual machine deployment overview.
Authenticate to the Virtual Machine
- In the Overview section in the resource, you can see the private IP address is 192.168.10.4 which confirms that the VM resides in the 1st Subnet as we specified.
- Copy the public IP address of the VM.
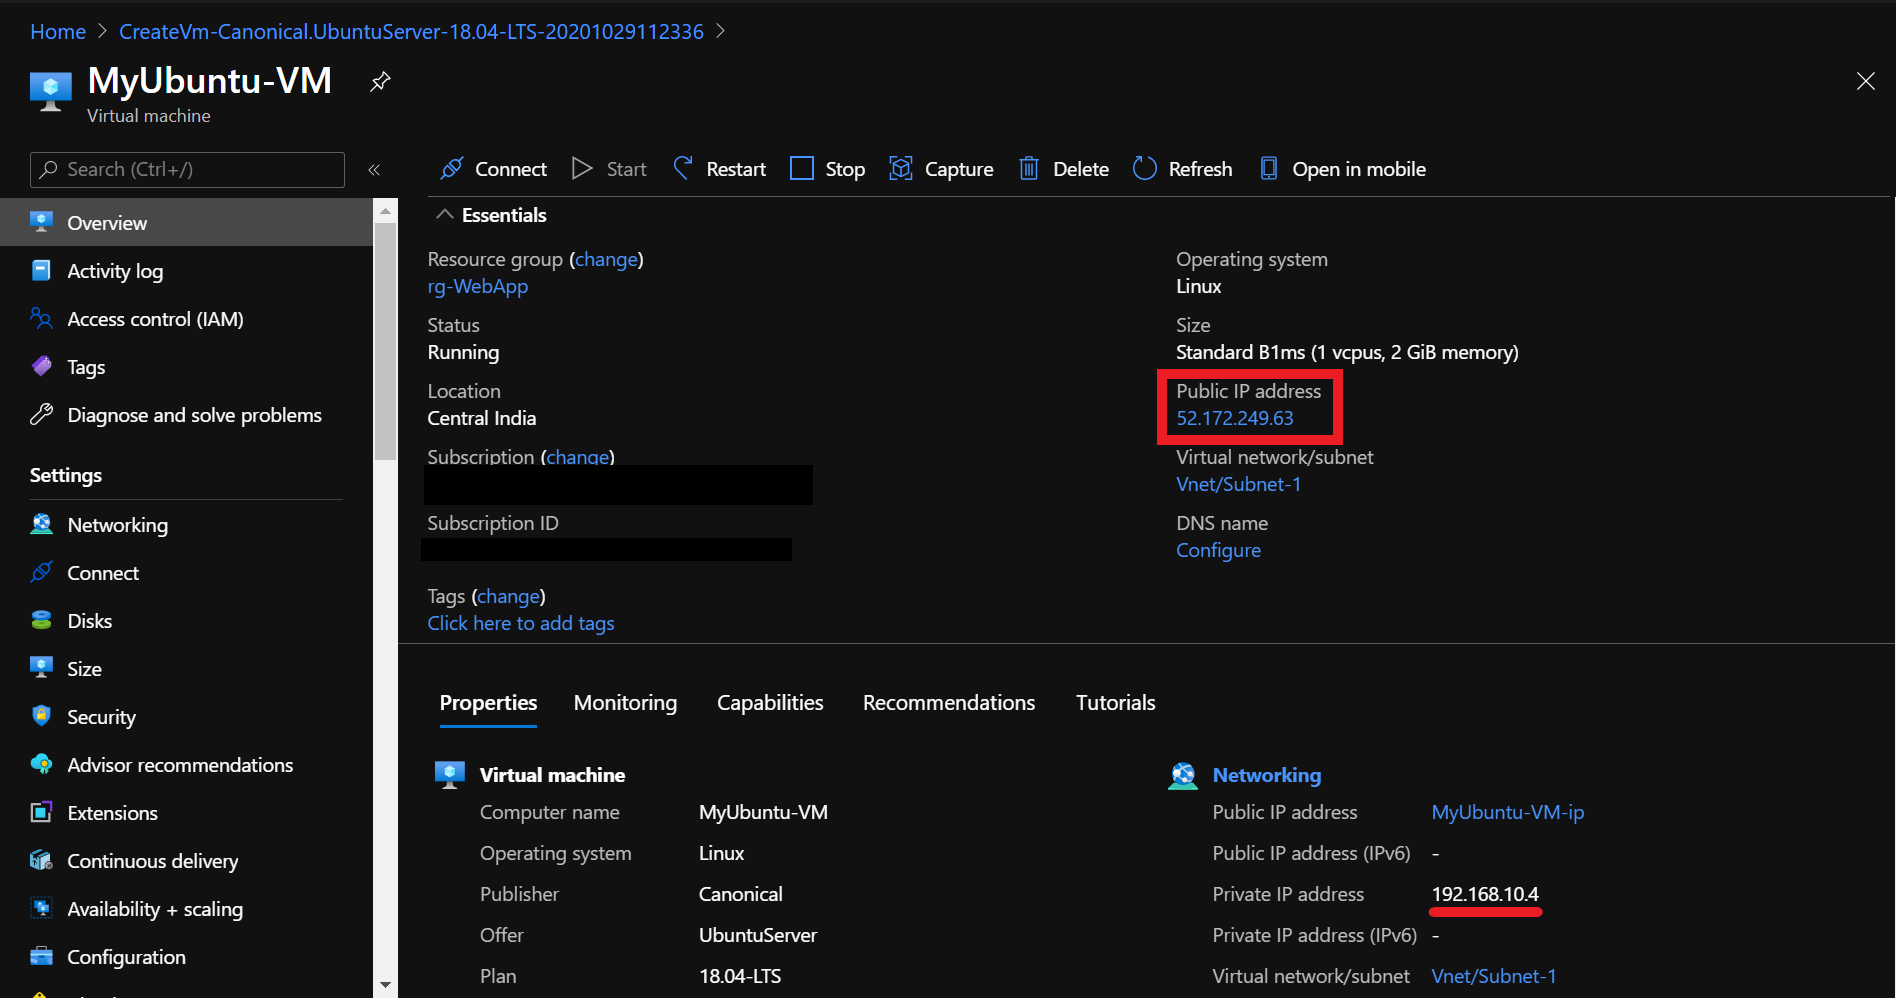
Copy the public IP address of the VM from the overview section.
- Open PuTTy software.
- Paste the public IP address of the VM in the Host Name (or IP address) field and specify the port number 22 for SSH authentication.
- Go to the SSH ⇢ Auth option in the left panel in PuTTy.
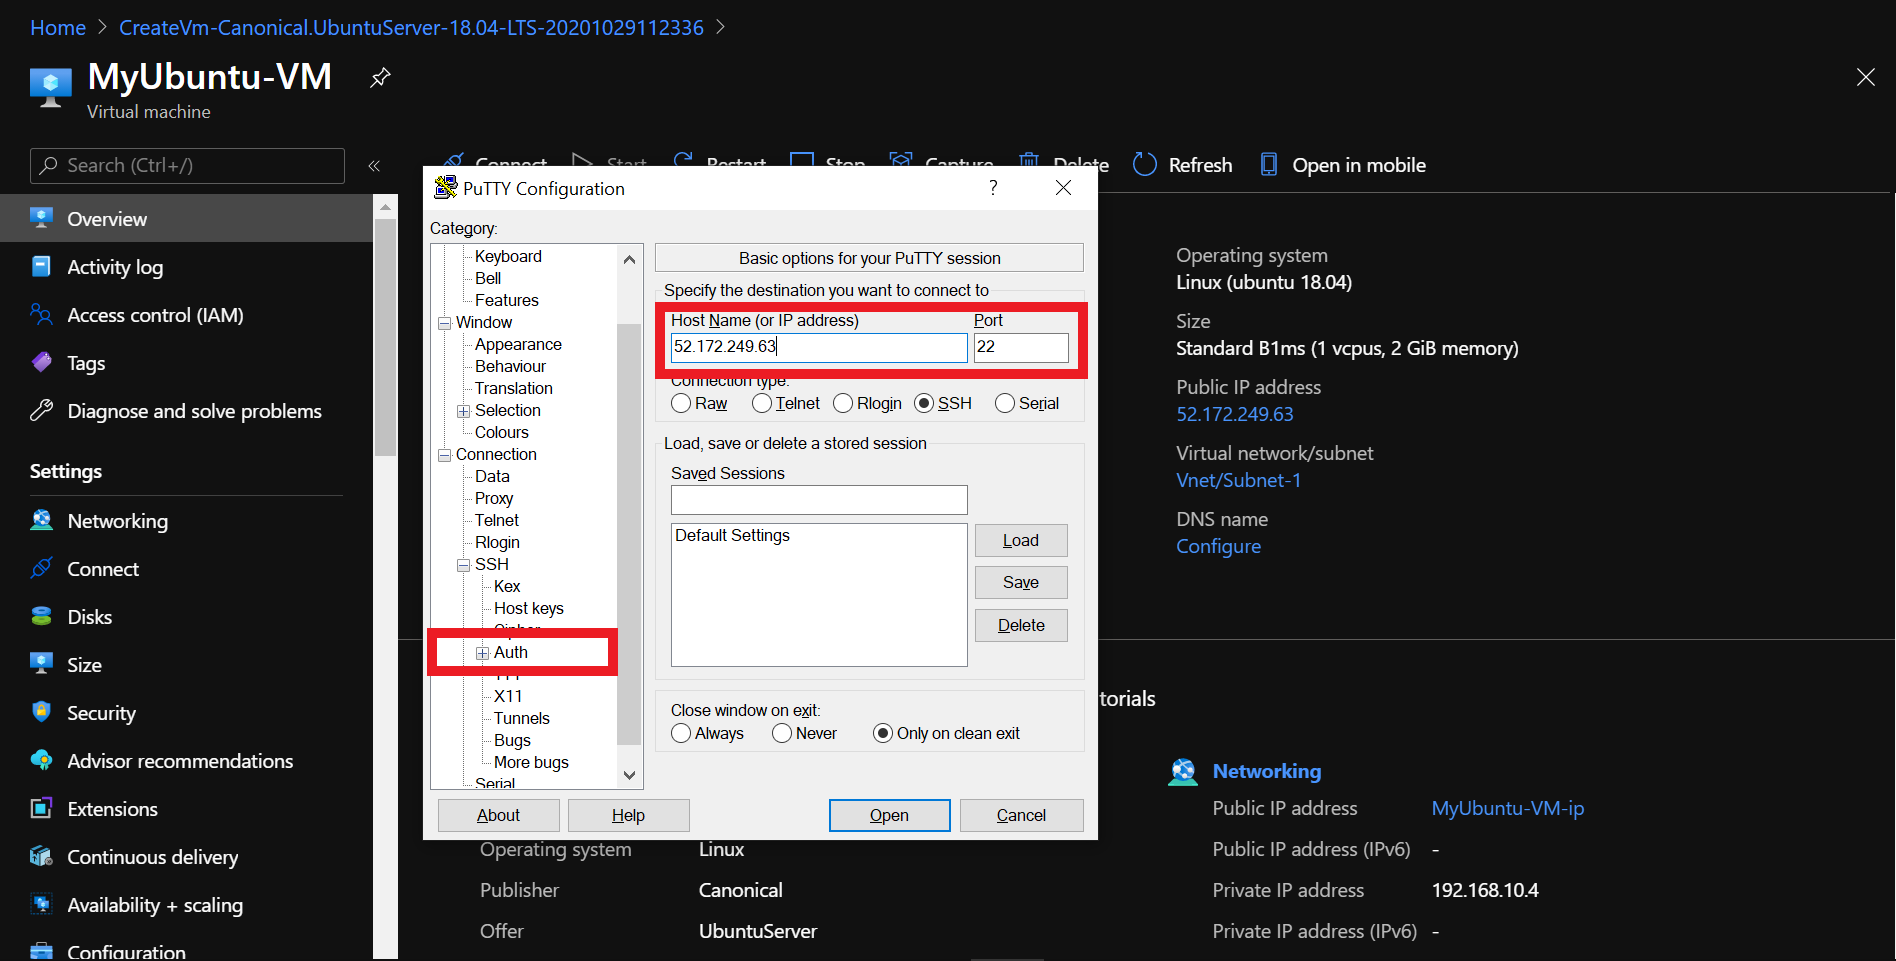
Paste the public IP address of the VM in PuTTy.
- Browse and specify the private key that we saved as PK-1.ppk, in the Private key file for the authentication field.
- Click Open.
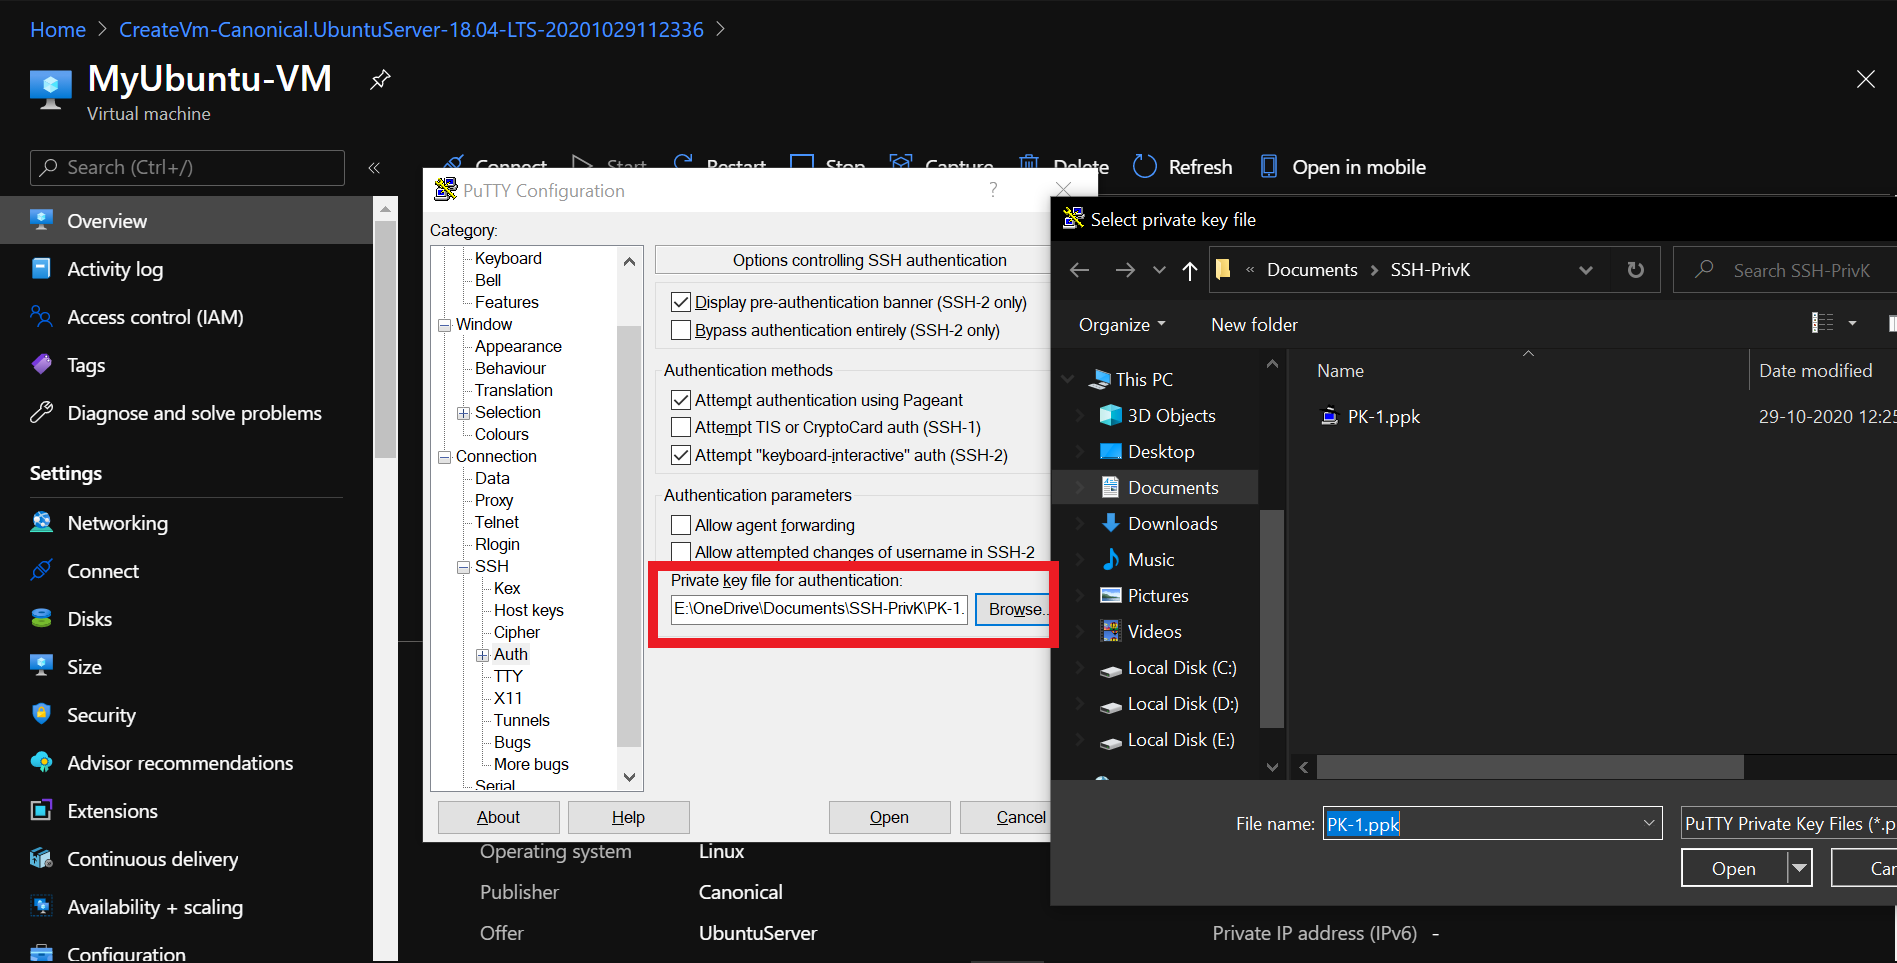
Provide the private key in PuTTy.
- PuTTy will provide you a command-line-interface to the VM
- If you get a PuTTy Security Alert click Yes in the option.
- Provide the administrator username and hit enter.
- You will be logged into the virtual machine.
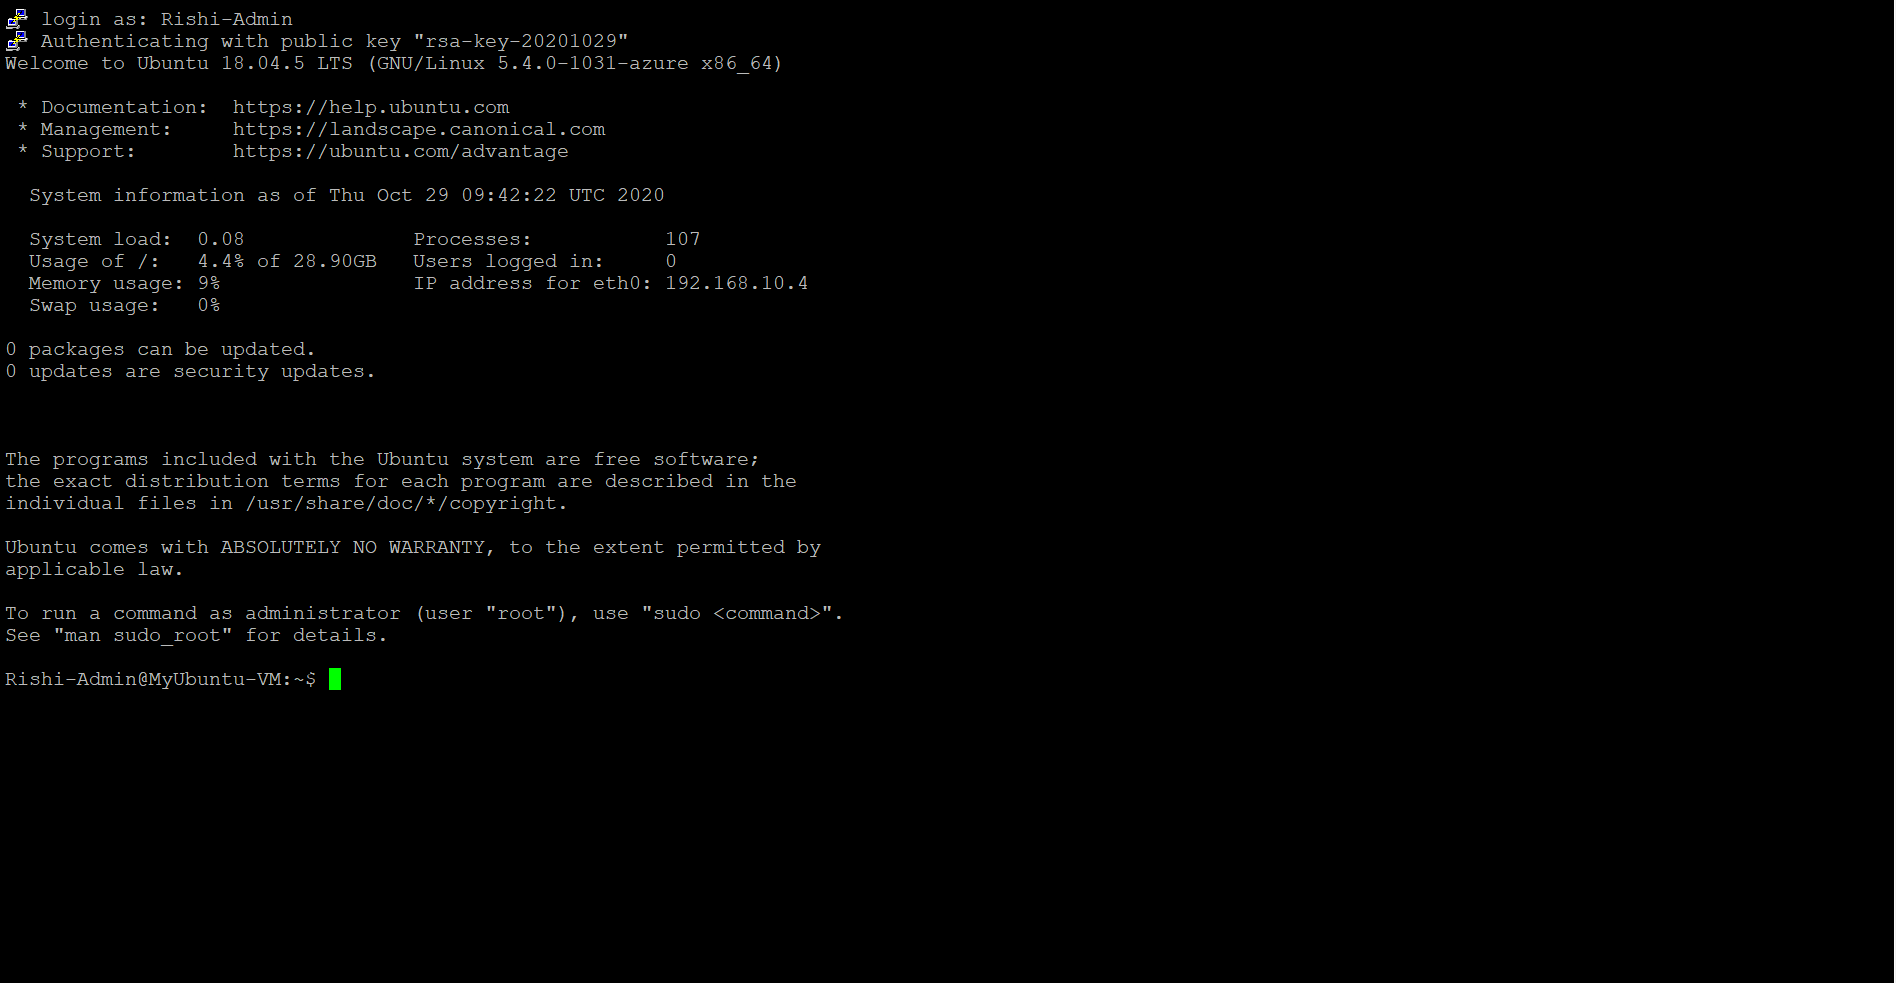
Virtual machine authentication successful.
Hosting Static Web Application
1. Install the Apache HTTP Server using the command,
sudo apt-get install apache2
2. Run the Apache service using the command,
sudo service apache2 start
3. Copy the public IP address of the VM and browse it on the internet specifying port number 80, as.
<VM's public IP address>:80
- You must be able to see that the webserver is running and the default web page is hosted on the internet.
- If you want, you can make changes to this web page residing in the path /var/www/html/index.html and reload the web page to see the changes.
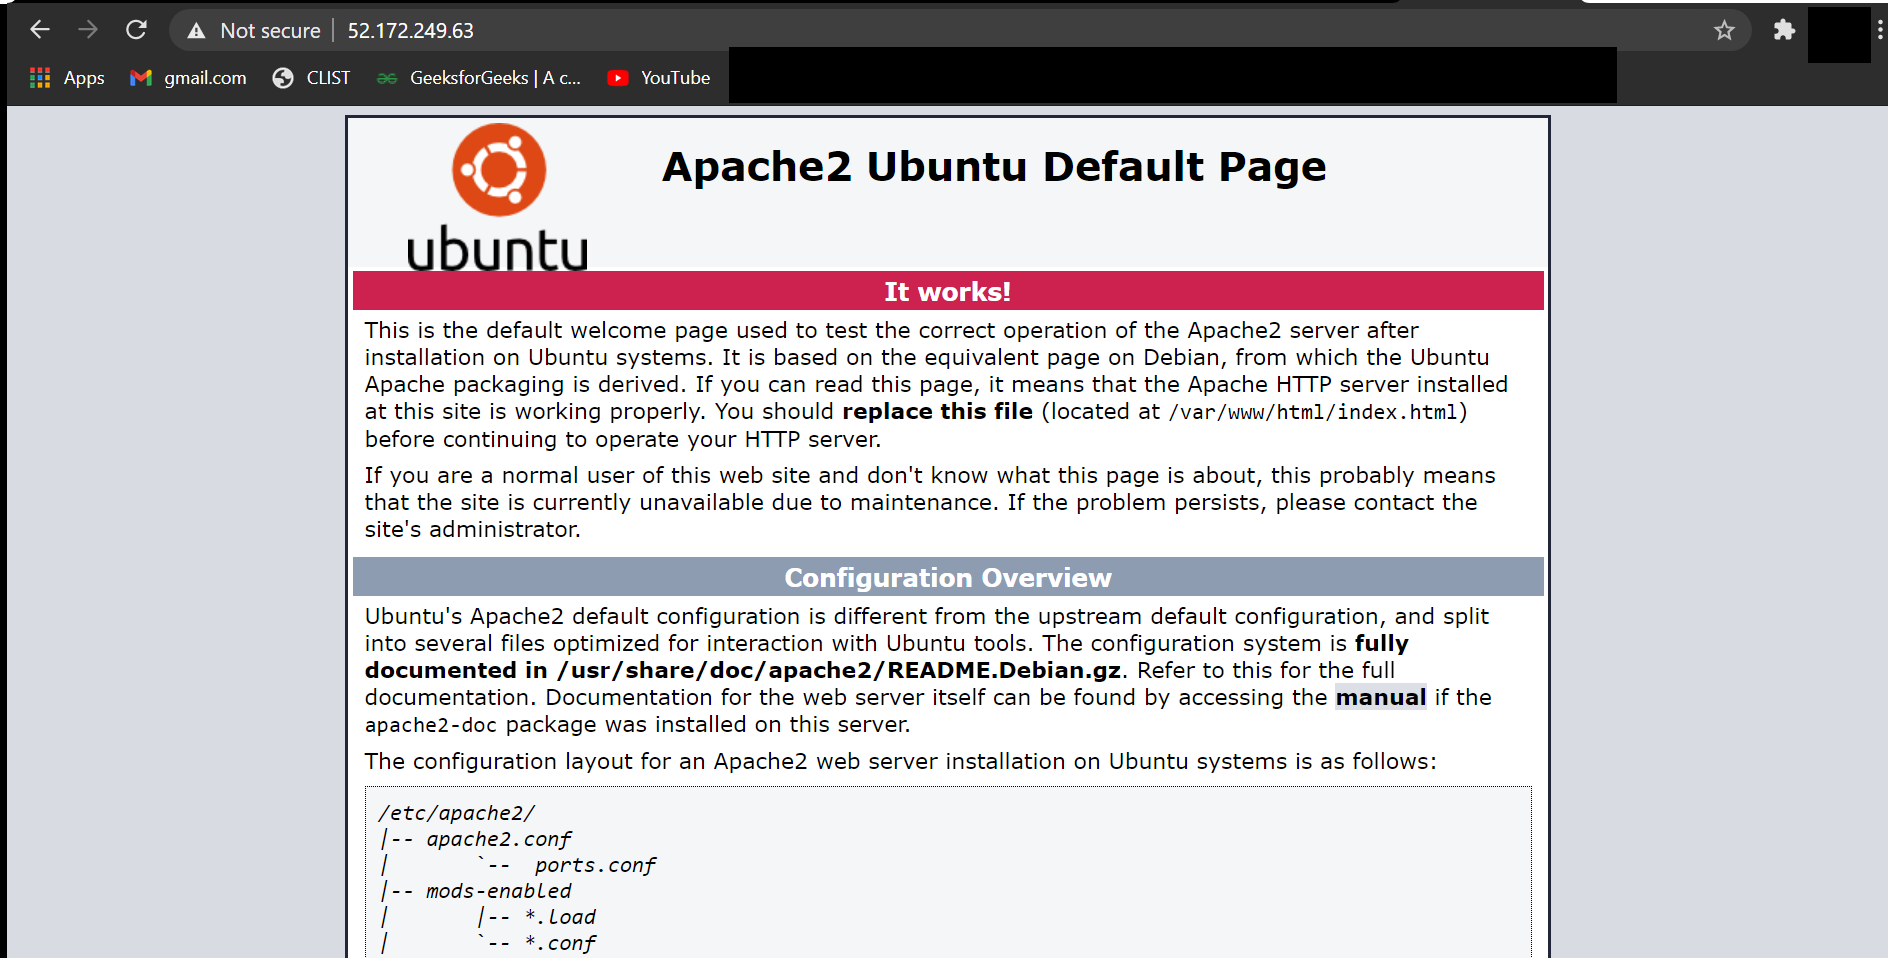
The web server is running & the default web page is successfully hosted.
4. Now navigate to the path /var/www/ using the command,
cd /var/www/
5. Delete the directory html using the command,
sudo rm -rf html
6. Clone your web application source from GitHub or any other version control if any, using the command,
sudo git clone https://github.com/CODESofRishi/HAA-WebApp2.git
7. Rename the directory cloned from GitHub as html, using the command,
sudo mv HAA-WebApp2/ html
8. Reload the web page.
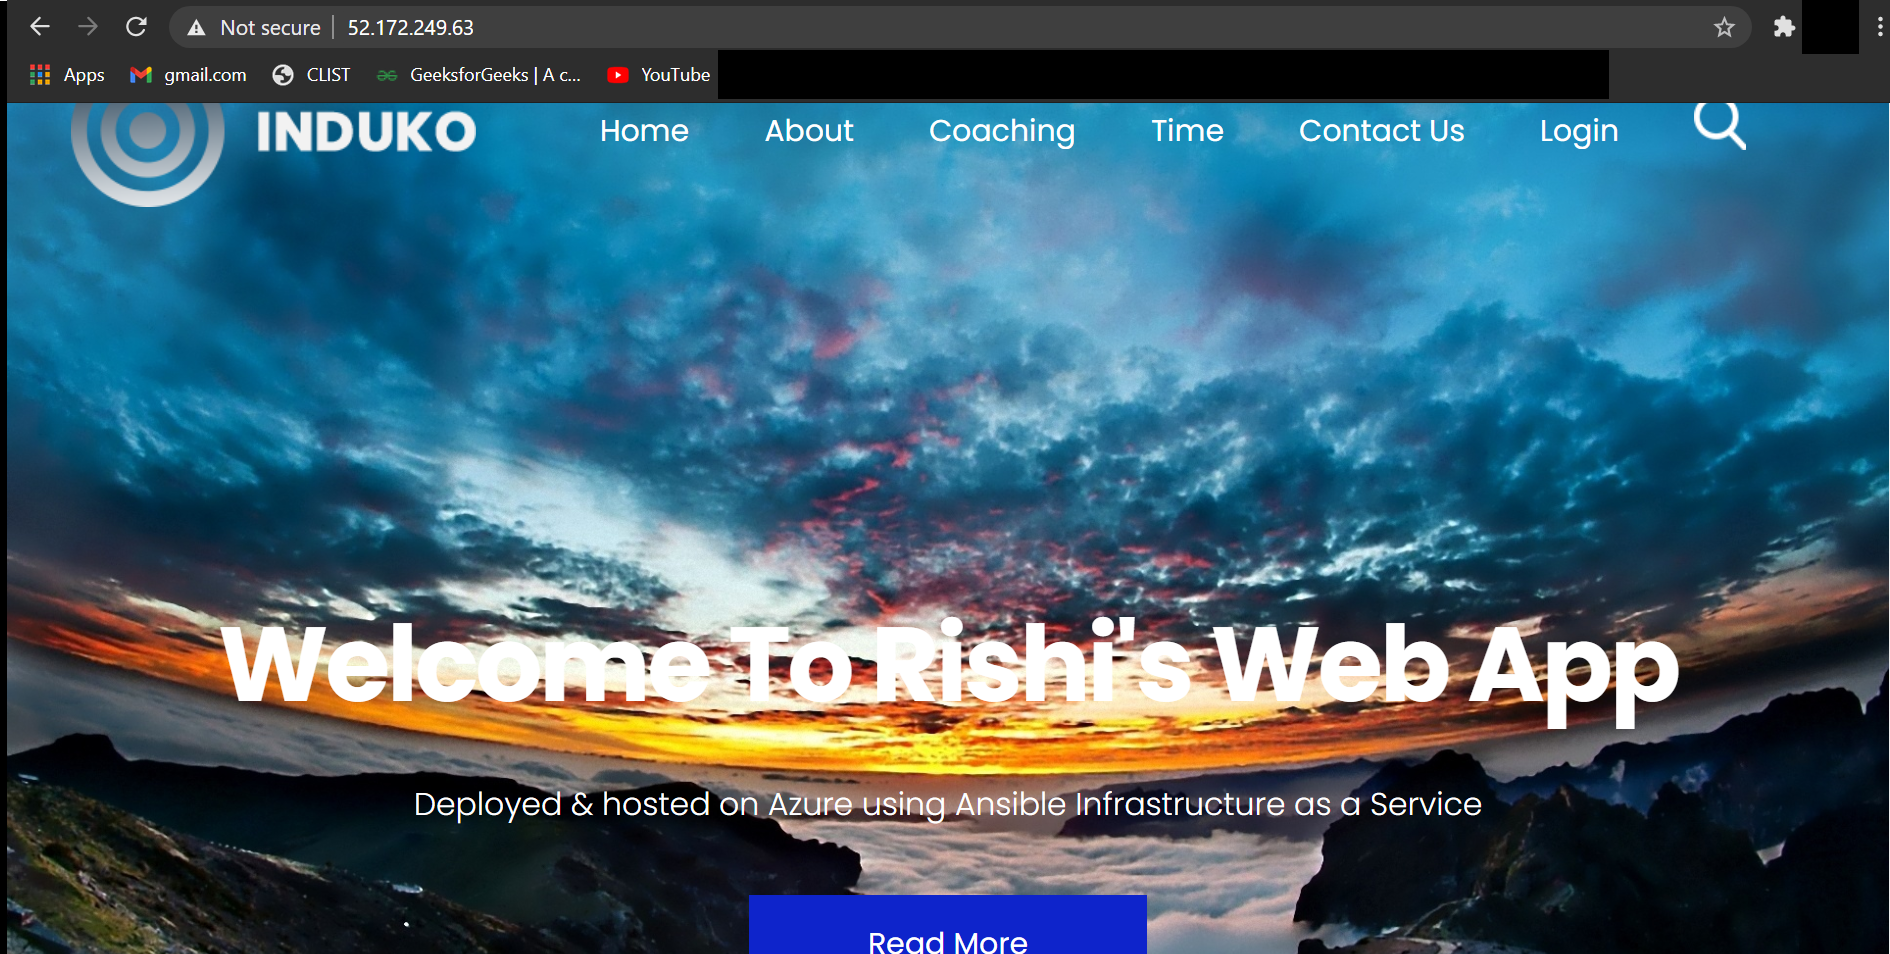
Our static web application is successfully hosted.
Congratulations your static web application is now hosted on the internet.
Before wrapping up
- As long as the VM will be running you will be billed for it.
- So do not forget to delete the resource group when you are done with the project.
- On the left panel of the Azure portal go to Resource groups.
- Select your resource group.
- Select the Delete resource group option.
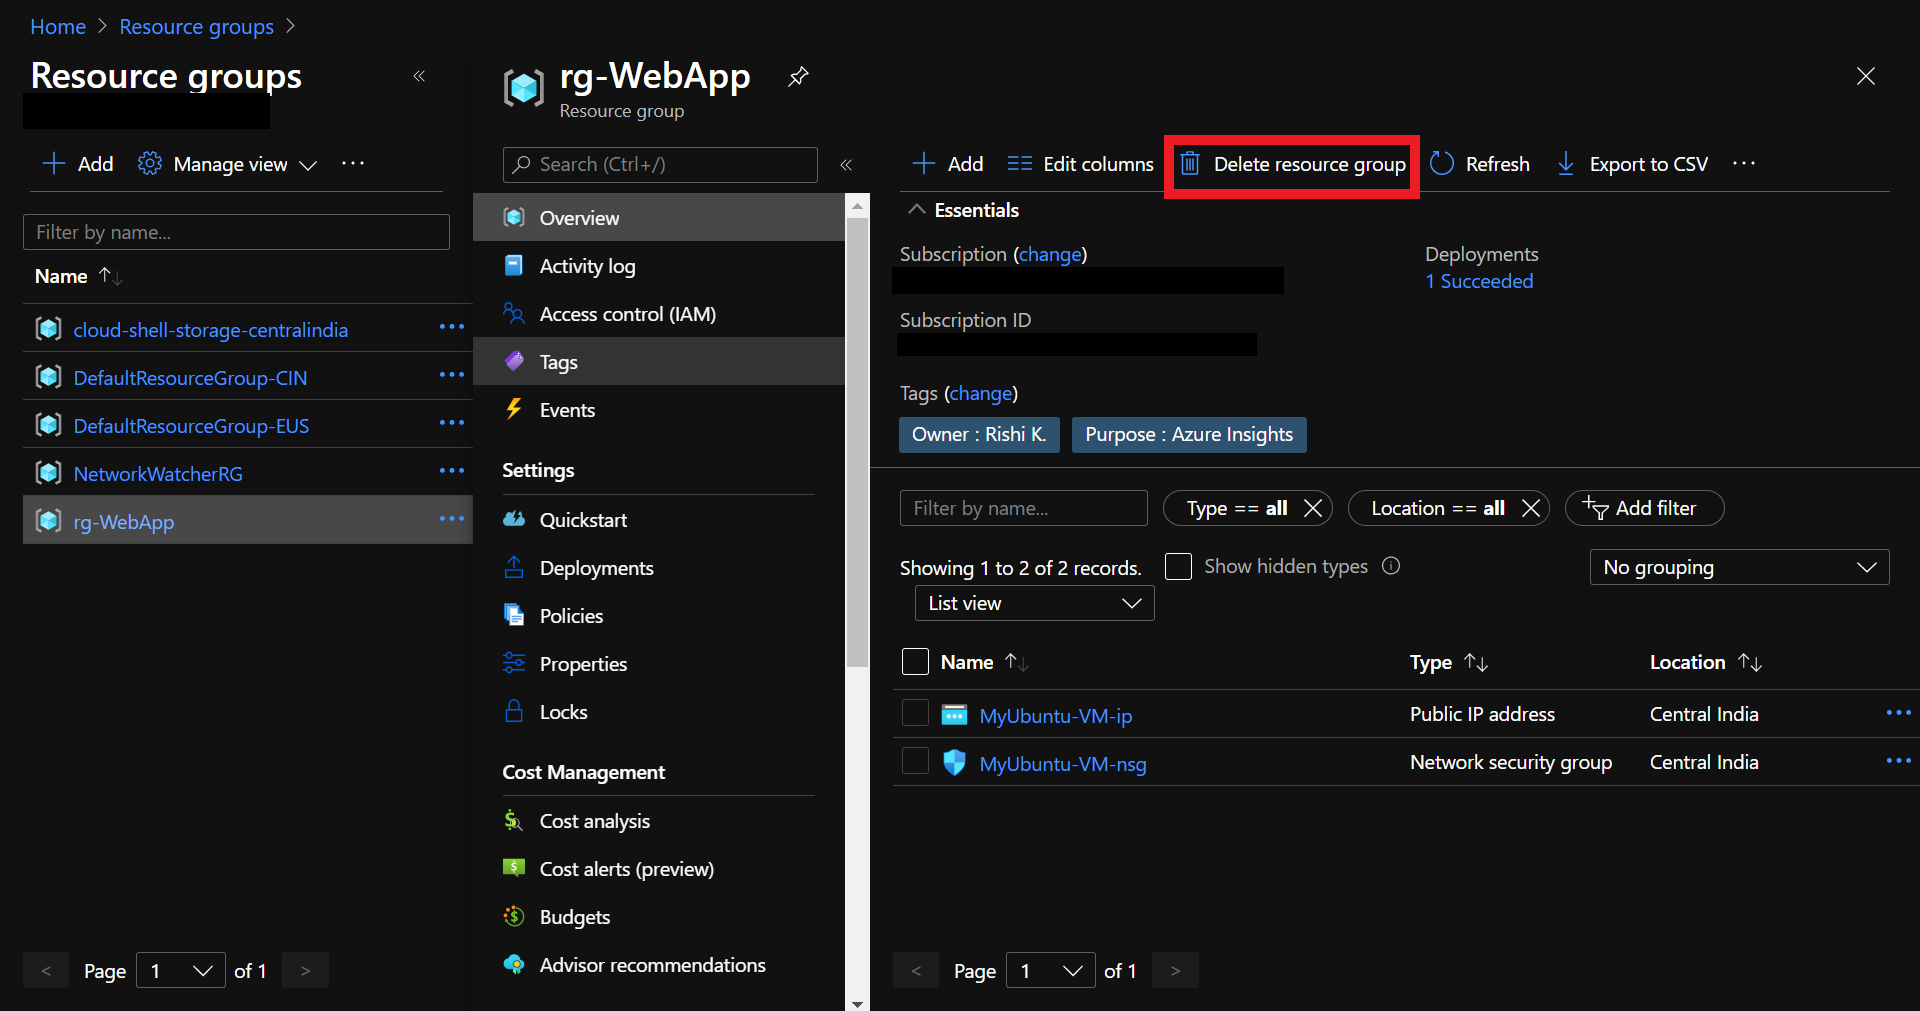
Delete the resource group.
Share your thoughts in the comments
Please Login to comment...