How to Upload a Project on Github?
Last Updated :
03 May, 2024
A lot of students ask questions about open source.
What is open source, and how can I contribute to it?
Is it helpful if I contribute to open source, and the list goes on relevant to “Open Source”?
In this article, we will guide you step-by-step about contributing to a Project by cloning a Project from GitHub and finally uploading the Changes to GitHub. But before directly learning about How to Upload a Project on GitHub, you should know about open Source.
What is open source?
According to opensource.com, The term “open source” refers to something people can modify and share because its design is publicly accessible. The term originated in the context of software development to designate a specific approach to creating computer programs. Today, however, “open-source” designates a broader set of values — what we call “the open-source way.” Open source projects, products, or initiatives embrace and celebrate principles of open exchange, collaborative participation, rapid prototyping, transparency, meritocracy, and community-oriented development. i.e., “open-source is what is free to access by all. Anyone can change and distribute its own model”. There are so many blogs available on the internet to learn about open-source, software, and their importance. The most common and widely used platform to use for open source is Git and GitHub.
Steps to Upload a Project On GitHub?
The purpose of Git is to manage a project, or a set of files, as they change over time. Git stores this information in a data structure called a repository. A git repository contains, among other things, the following: A set of commit objects.
GitHub is a Git repository hosting service, but it adds many of its own features. While Git is a command-line tool, GitHub provides a Web-based graphical interface. It also provides access control and several collaboration features, such as wikis and basic task management tools for every project. Let’s discuss some commands used in Git to push, pull, commit, and do changes to your GitHub repository.
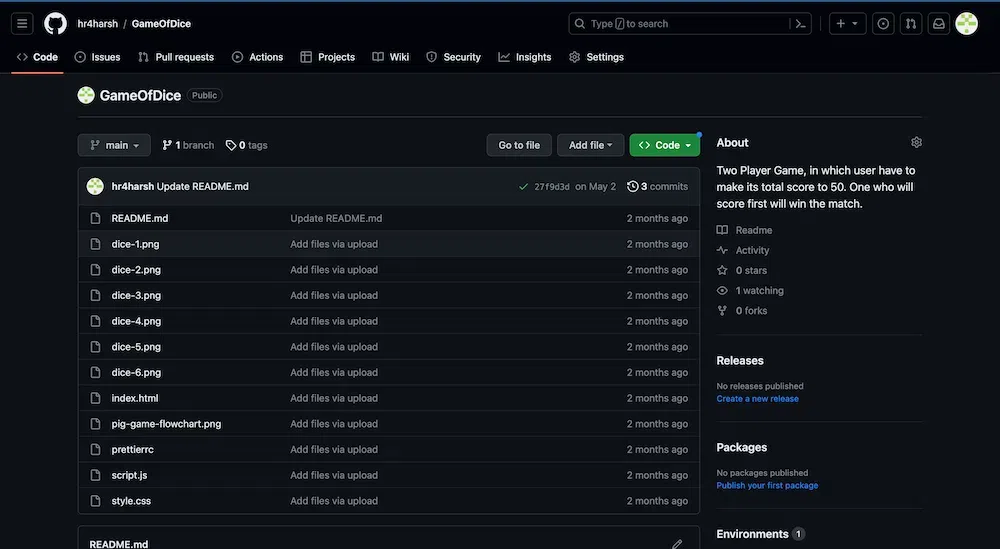
Step-0 Selecting the Project and Copying the link
Firstly, Select a Project in which you want to make changes and copy the link to that Project, which will appear after clicking the code button.
Step-1 Installing Git and Cloning a Project
- First, install Git from the official and install it on your PC. To install git, click here
- After creating your profile on GitHub https://github.com, make a repository and clone (copy the link of your repository) your repository with HTTPS.
- Now go to the terminal and use this command to clone this repository to your PC.
Syntax
git clone [your copy link]
Example

Now you have cloned your Github repository to your system now add all your relevant codes in that cloned directory to upload it to your GitHub Profile.
Step-2 Moving to Our Project Folder
Now in the terminal go to your Project folder in which you want to make changes.

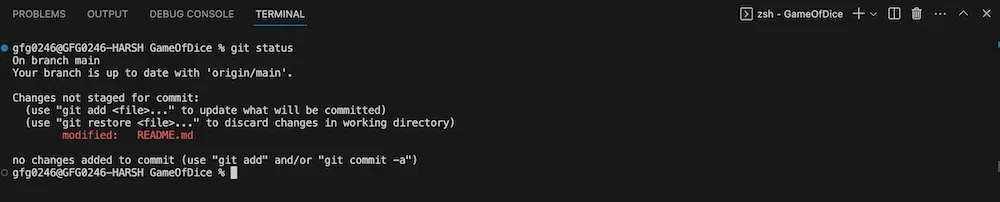
Step-3 Checking the Status
Now when you will type the command git status you will see all those files you have added to the directory in a red-colored untracked file segment like this. Here README.md is the unracked file that has the updated content in it.
Syntax
git status
Example
Step-4 Add changes to Staging Area
Now add these files into the staging area (Staging is a step before the commit process in git. That is, a commit in git is performed in two steps: staging and actually commit. As long as a changeset is in the staging area, git allows you to edit it as you like to replace staged files with other versions of staged files, remove changes from staging, etc.)
Syntax
git add <files_Name with their respective extensions>
Example

Step-5 Commit Changes
Here you can see that now your files are successfully added to the staging area. Now you need to commit these files with a description. And to do so use
Syntax
git commit -m “Your description”
Example

Step-6 Uploading Changes to Remote Profile
Now we have committed these changes in our local system and to upload these changes to our remote profile use the command
Syntax
git remote -v
Example

Step-7 Push Changes to GitHub
Great, Now just one step left is to push these changes into our GitHub repository. Use the command below to upload your files or any changes.
Syntax
git push origin master
Example
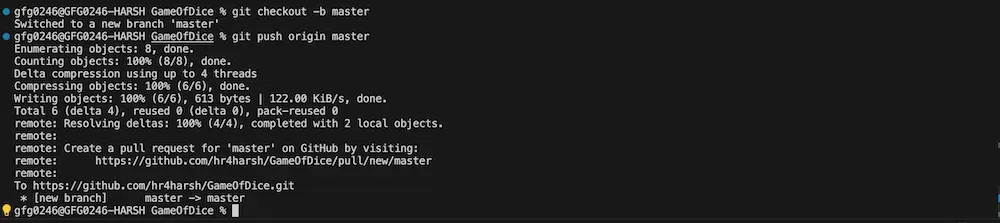
Great You have successfully uploaded your files to your GitHub repository.
Final Repository
Here, in the front of the README.md file, you can see that the changes have been updated, a few minutes ago.
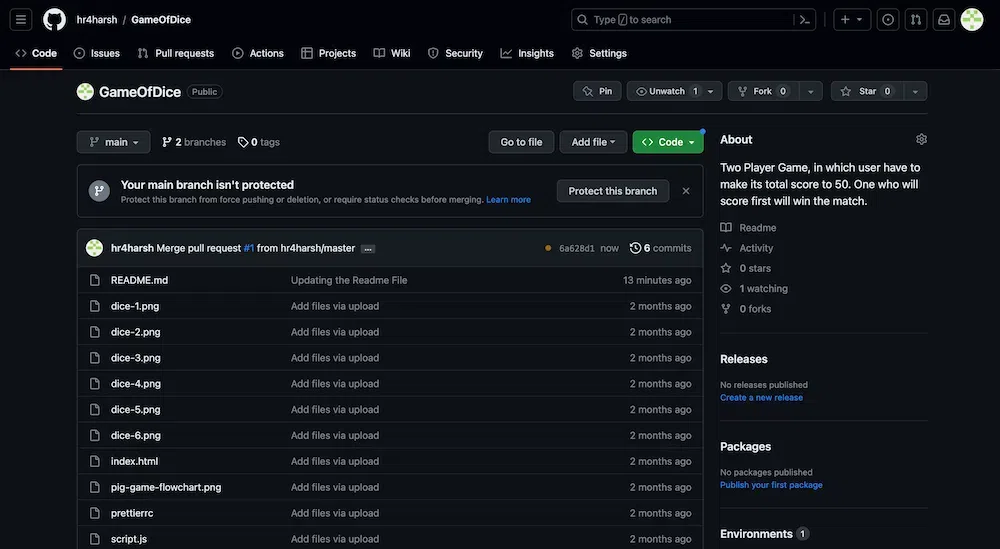
All the files and directories are uploaded to your Github account. Now you can manage, revert, access, or do any changes in your repositories like this.
Conclusion
As, a developer, you should have knowledge of working with Git and Github, because, it is a very essential tool in the process of any software development to know the application’s history or version. Understanding Git and Github, not only helps you in collaborating with other developers but also provides a secure way to manage code versions and track changes over time. In this article, we have discussed the benefits of open-source contribution and learned the step-by-step process to contribute to any project and upload that changes to GitHub.
FAQs on How to Upload a Project on GitHub?
Q1. What are the steps to Upload a Project on GitHub?
Answer: By following these commands you can Upload your Project on GitHub
1. Make a Project Folder
2. Go to Folder and create an application.
3. Install Git and create an account on GitHub.
4. Initialize git using the git init command
5. Check status using the git status command
6. Add and Commit the change
7. Upload changes to remote Profile
8. Push the changes to GitHub
Q2. What is the difference between Git and GitHub?
Answer:
Git is a tool for keeping track of code changes and GitHub is for sharing and collaborating on the code with others. They both make coding together easier! So, Git keeps track, and GitHub helps us share! and collaborate.
Q3. How do I collaborate with others on GitHub?
Answer:
You can invite collaborators to your repository, and they can clone it to their computers. They can make changes, push them to GitHub, and you can review and merge their work. Same way as discussed in the article.
Share your thoughts in the comments
Please Login to comment...