Mongoose Validation
Last Updated :
25 Dec, 2023
Mongoose is a MongoDB object modeling and handling for a node.js environment. Mongoose Validation is essentially a customizable middleware that gets defined inside the SchemaType of Mongoose schema. It automatically fires off before a document is saved in the NoSQL DB. Validation can also be run manually using doc.validate(callback) or doc.validateSync() methods. Let’s understand more about this with the help of some examples.
Prerequisites
Types of mongoose validation:
In Mongoose there are two types of validation:
- Built-in validation
- Custom validation
To get a better understanding of how built-in validators work, let’s look at the following:
1. Built-in validators:
A. Required validator: A schema uses required whenever it is mandatory to fill that field with any value.
Required validator takes an array with 2 items, first a Boolean var and a message to return the validation if it fails.
required: [true, “user name is required”]
we can also specify the Required validator without custom error message,
required: true
B. Unique validator: Unique is not a validator, but an option.
If the unique option is set, Mongoose will require each document to have a unique value for each path.
Unique option takes an array with 2 items, first a Boolean var and a custom error message.
unique: [true, 'email already exists']
we can also specify unique option without custom error message,
unique: true
2. Custom validators
In addition to the built-in validators, you can define custom validators. In custom validation, a validation function is passed along with the declaration. Defining a custom validator involves creating a specialized function within the schema’s field definition to ensure that the data inserted or updated meets specific criteria beyond the standard validation rules offered by Mongoose.
Steps to create node application And Installing Mongoose:
Step 1: Create a node application using the following command:
mkdir folder_name
cd folder_name
npm init -y
touch main.js
Step 2: After creating the NodeJS application, Install the required module using the following command:
npm install mongoose
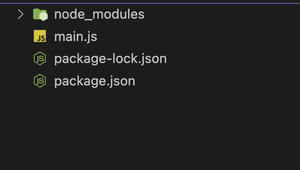
Project Structure: It will look like the following.
The updated dependencies in package.json file will look like:
"dependencies": {
    "express": "^4.18.2"
}
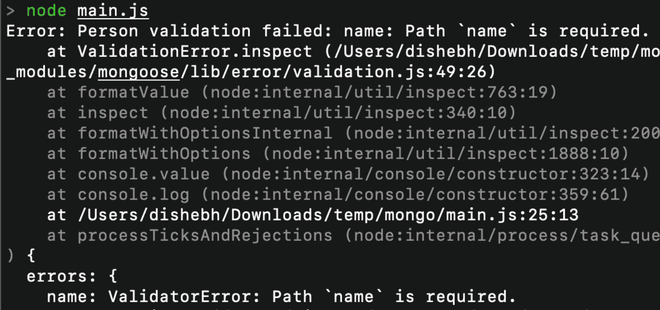
Example 1: In this example, we will use a “required” validator to check whether a value is passed to the document or not before saving it to the DB.
Javascript
const mongoose = require('mongoose')
dbName: 'event_db',
useNewUrlParser: true,
useUnifiedTopology: true
}, err => err ? console.log(err) :
console.log('Connected to database'));
const personSchema = new mongoose.Schema({
name: {
type: String,
required: true
}
});
const Person = mongoose.model('Person', personSchema);
const person = new Person({});
(async () => {
try {
await person.save();
} catch (err) {
console.log(err)
}
})();
|
Step to Run Application: Run the application using the following command from the root directory of the project:
node main.js
Output:
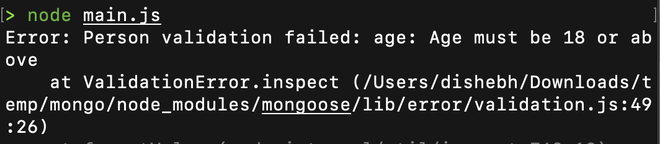
Example 2: In this example, we will use a “required” and a “min” validator to check whether a value is passed to the document or not and whether the value is above a threshold number before saving it to the DB.
Javascript
const mongoose = require('mongoose')
dbName: 'event_db',
useNewUrlParser: true,
useUnifiedTopology: true
}, err => err ? console.log(err) :
console.log('Connected to database'));
const personSchema = new mongoose.Schema({
age: {
type: Number,
required: true,
min: [18, 'Age must be 18 or above']
}
});
const Person = mongoose.model('Person', personSchema);
const person = new Person({ age: 16 });
(async () => {
try {
await person.save();
} catch (err) {
console.log(err)
}
})();
|
Step to Run Application: Run the application using the following command from the root directory of the project:
node main.js
Output:
Reference: https://mongoosejs.com/docs/validation.html
Share your thoughts in the comments
Please Login to comment...