Solidity – Deploy a Smart Contract for Marks Management System
Last Updated :
22 Sep, 2021
Solidity is a high-level language. The structure of smart contracts in solidity is very similar to the structure of classes in object-oriented languages. The solidity file has an extension .sol.
What are Smart Contracts?
Solidity’s code is encapsulated in contracts which means a contract in Solidity is a collection of code (its functions) and data (its state) that resides at a specific address on the Ethereum blockchain. A contract is a fundamental block of building an application on Ethereum.
Example: In the below example, the aim is to deploy a Smart Contract for Marks Management System by using Solidity. In this contract, the details of every student like student ID, Name, Marks, etc can be added and if one wants to give some bonus marks to students then they can also be added. After building the contract all the details of every student can be retrieved.
Approach:
- The first step is to deploy the smart contract using the Remix IDE. After writing the code compile the code. When it is successfully compiled then deploy it. After deploying the contract a deployed Contract is obtained and then add the student details one by one.
- If bonus marks need to be added then add in the bonusMarks section after that click on stdCount and fetch the student details to call the stdRecords.
- Add one or more new student details in this Smart Contract by the increment of stdCount.
Implementation
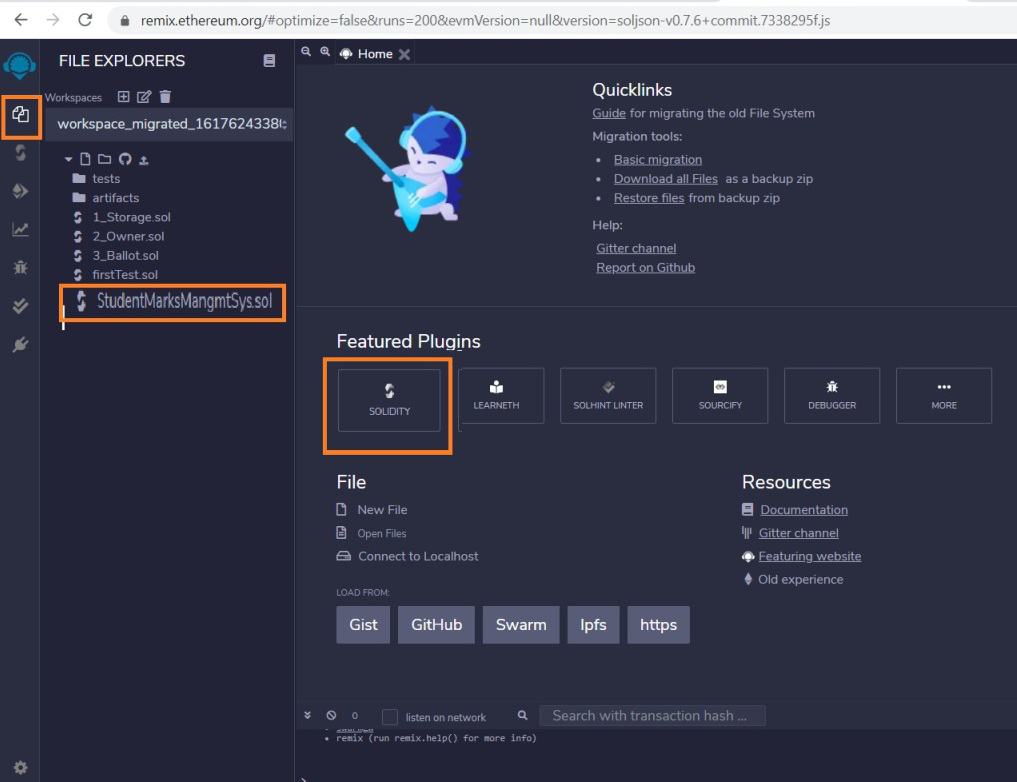
Step 1: Open Remix IDE.
Step 2: Click on File Explorers and select Solidity in the environment and create a new file StudentMarksMangmtSys.sol by clicking on New File section.
Step 3: Build a smart contract that contains all the details of the student with the help of Remix IDE by clicking on the file name.
Solidity
pragma solidity >= 0.7.0<0.8.0;
contract MarksManagmtSys
{
struct Student
{
int ID;
string fName;
string lName;
int marks;
}
address owner;
int public stdCount = 0;
mapping(int => Student) public stdRecords;
modifier onlyOwner
{
require(owner == msg.sender);
_;
}
constructor()
{
owner=msg.sender;
}
function addNewRecords(int _ID,
string memory _fName,
string memory _lName,
int _marks) public onlyOwner
{
stdCount = stdCount + 1;
stdRecords[stdCount] = Student(_ID, _fName,
_lName, _marks);
}
function bonusMarks(int _bonus) public onlyOwner
{
stdRecords[stdCount].marks =
stdRecords[stdCount].marks + _bonus;
}
}
|
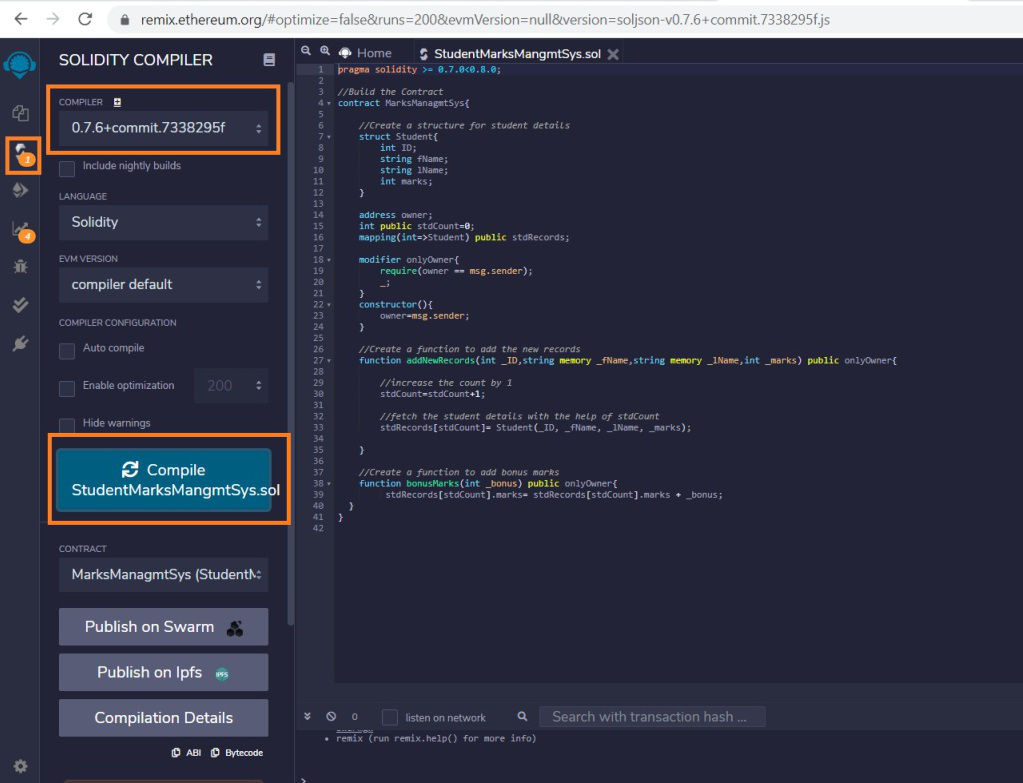
Step 4: After building the contract compile it. Select the compiler version before clicking on Compile button.
Step 5: After successful compilation, to deploy the contract, select the Environment JavaScript VM (Berlin) before clicking on the Deploy button.
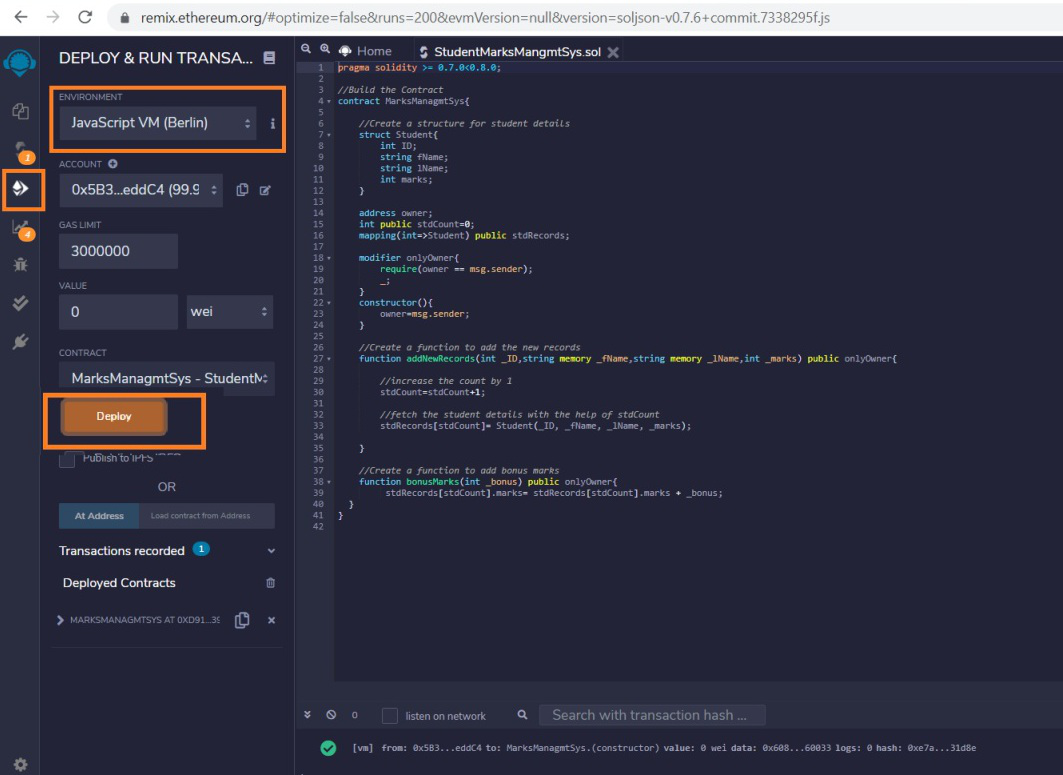
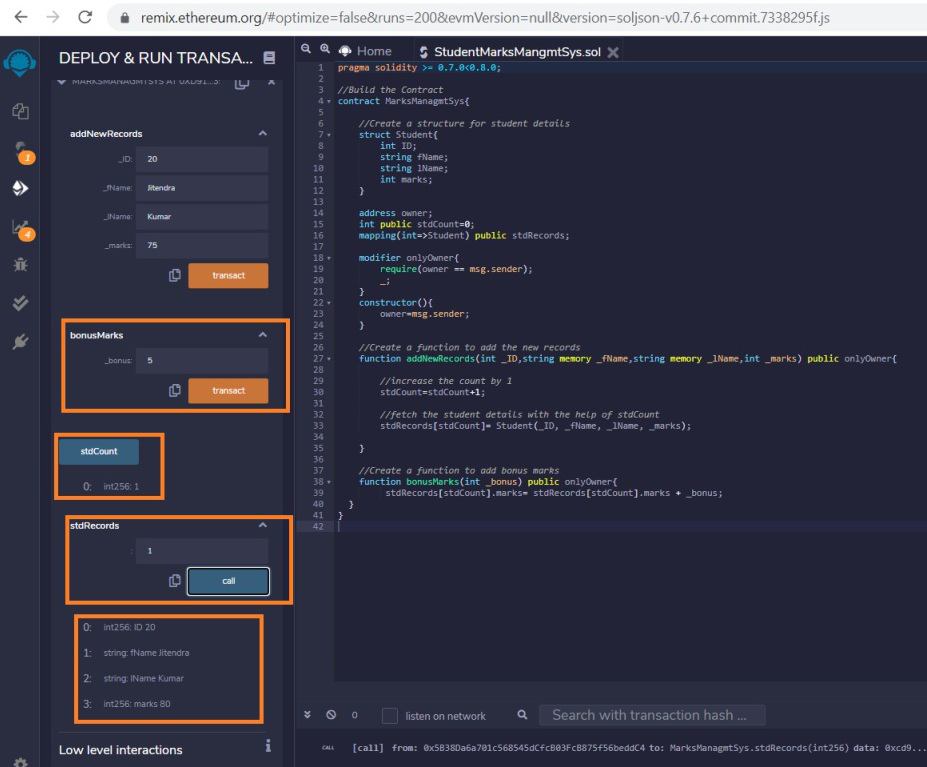
Step 6: If the contract is successfully deployed then deployed contract is obtained. Open the deployed contract and add the student details and transact it.
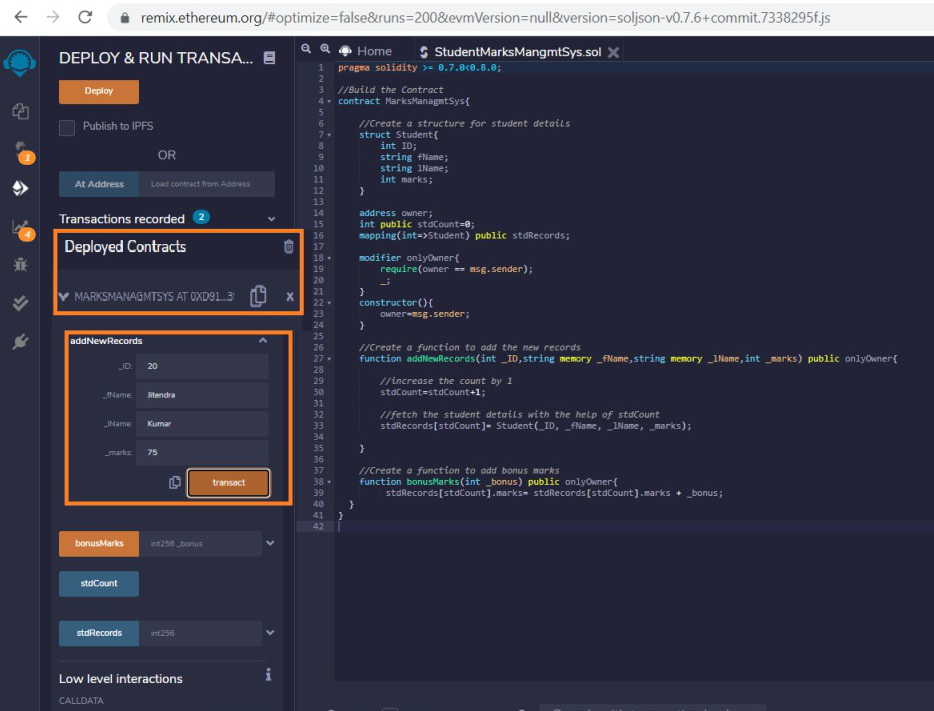
Step 7: Add the bonus marks if you want to give them to the student and transact it after that click on the stdCount. One can see the student details after calling the stdRecords by entering the stdCount.
Share your thoughts in the comments
Please Login to comment...