What is the difference between Service Directive and Module in Angular ?
Last Updated :
13 Nov, 2023
Angular is a Typescript framework used to build dynamic and Single-Page Applications. This has a strong focus on modularity and reusability of code which helps in creating complex and maintainable applications. At the core, Angular has 3 fundamental building blocks, i.e., Service, Directive and Module. These help in shaping the structure, behaviour and functionality of the Application. In this article, we will see each of them in detail, along with understanding their basic implementation through the examples.
Module
A Module is a container in an Angular Application. This is used to organise and structure the application. Also, it helps in managing different dependencies and configurations used in the application. We have multiple modules in an angular application and the main one is AppModule where we have to configure most of the things. Modules help in modularity, lazy loading and maintainability.
Syntax: @NgModule
import { NgModule } from '@angular/core';
import { BrowserModule }
    from '@angular/platform-browser';
import { AppComponent }
    from './app.component';

@NgModule({

    // Declare all other components,directives,pipes here
    declarations: [AppComponent],

    // Add modules here
    imports: [BrowserModule],

    // Provide services
    providers: [],

    // Root component that is used as
    // entry point of your application
    bootstrap: [AppComponent],
})
export class AppModule { }
Example: Below is the app module where every component, service, etc are organised.
Javascript
import { NgModule } from '@angular/core';
import { BrowserModule }
from '@angular/platform-browser';
import { AppComponent }
from './app.component';
import { EmployeeService }
from './employee.service';
import { EmployeeDetailsComponent }
from './employee-details/employee-details.component';
import { EmployeeListComponent }
from './employee-list/employee-list.component';
@NgModule({
declarations: [AppComponent,
EmployeeDetailsComponent,
EmployeeListComponent,],
imports: [BrowserModule],
providers: [EmployeeService],
bootstrap: [AppComponent],
})
export class AppModule { }
|
Service
A Service is basically a class with a specific purpose. It is a reusable class that can be used by different components in a single application. It is used for sharing data, writing business logic, etc. Services are used to add functionalities like fetching data from the backend, sending data back, and validating the user input. This allows us to follow singleton and not repeat code in multiple components. The tasks which are common in multiple components are written in a service. And it is a good habit to write every business logic in a service. Service uses the Dependency Injection concept to communicate between the components. These are injected into other components or even other services to be used.
Creating the Service
A service can be created using the command:
ng generate service [name]
OR
ng g s [name]
Syntax: @Injectable
import { Injectable } from '@angular/core';

@Injectable({

    // Specify a module where the service is provided
    providedIn: 'root'
})
export class MyService {

    // Service logic and data here
}
Example: In this example, we will implement a Service containing a list of employees, their id, name and age.
Javascript
import { Injectable } from '@angular/core';
@Injectable({
providedIn: 'root'
})
export class EmployeeService {
constructor() { }
public employees: any = [
{ "id": 1, "name": "Nancy", "age": 30 },
{ "id": 2, "name": "Rohit", "age": 21 },
{ "id": 3, "name": "Nilesh", "age": 32 },
{ "id": 4, "name": "Dileep", "age": 44 }
];
getEmployees() {
return this.employees;
}
}
|
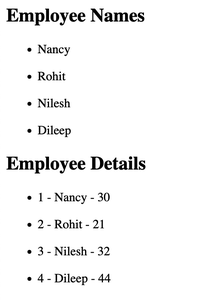
Now, we implement this service in two different components, EmployeeList which displays employee names and Employee Details component which displays all employee details.
Javascript
import { Component, OnInit }
from '@angular/core';
import { EmployeeService }
from '../employee.service';
@Component({
selector: 'app-employee-list',
templateUrl: './employee-list.component.html',
styleUrls: ['./employee-list.component.css']
})
export class EmployeeListComponent implements OnInit {
public employees: any = [];
constructor(private emp: EmployeeService) { }
public ngOnInit(): void {
this.employees = this.emp.getEmployees();
}
}
|
HTML
<h2>Employee Names</h2>
<ul *ngFor="let emp of employees">
<li>{{emp.name}}</li>
</ul>
|
Now, include the following code in the EmployeeDetails.component.ts & EmployeeDetails.component.html files.
Javascript
import { Component, OnInit }
from '@angular/core';
import { EmployeeService }
from '../employee.service';
@Component({
selector: 'app-employee-details',
templateUrl: './employee-details.component.html',
styleUrls: ['./employee-details.component.css']
})
export class EmployeeDetailsComponent implements OnInit {
public employees: any = [];
constructor(private emp: EmployeeService) { }
ngOnInit(): void {
this.employees = this.emp.getEmployees();
}
}
|
HTML
<h2>Employee Details</h2>
<ul *ngFor="let emp of employees">
<li>{{emp.id}} - {{emp.name}} - {{emp.age}}</li>
</ul>
|
Output:
Directive
This is more like a DOM element in the angular that tells the angular to manipulate DOM or change behaviour in a specific way. The Directive helps the HTML code to be more dynamic and interactive. There are a few inbuilt directives in Angular such as *NgIf, *NgFor. *NgFor is used to repeat the HTML code based on condition instead of writing manually each time or at run time. Likewise *NgIf is used to hide or show the HTML element based on a condition. It’s shown only if it’s true. We can also create our own custom directives.
Syntax: @Directive
import { Directive, ElementRef, Renderer2 } from '@angular/core';

@Directive({
    selector: '[appCustomDirective]' // Custom directive selector
})
export class CustomDirective {
    constructor(private el: ElementRef, private renderer: Renderer2) { }

    // Directive logic here
}
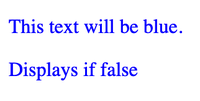
Example: In this example, we create a custom directive which allows the style to change color to blue, when the condition becomes true, & the directive gets applied.
Javascript
import { Component, ElementRef,
OnInit, Renderer2 }
from '@angular/core';
@Component({
selector: 'app-direct',
templateUrl: './direct.component.html',
styleUrls: ['./direct.component.css']
})
export class DirectComponent implements OnInit {
constructor(private ele: ElementRef,
private render: Renderer2) { }
ngOnInit(): void {
this.render.setStyle(this.ele.nativeElement, 'color', 'blue');
}
}
|
HTML
<p appColorDirective>This text will be blue.</p>
<p *ngIf=false>Displays if true</p>
<p #else>Displays if false</p>
|
Output: Below is the output which styles the text into red through a custom directive and if else implemented through an inbuilt directive.
Difference Between Modules, Services and Directive:
| |
Service |
Directive |
Module |
| Purpose |
Provide data and application data |
Adds custom behaviour to HTML code |
Organise and structure the Angular app |
| Syntax |
@Injectable |
@Directive |
@NgModule |
| Usage |
Injected into components and services |
Applied to HTML elements in templates |
To organise components, services and directives |
| Dependency Injection |
Yes |
No |
Yes |
| Communication |
Enables communication between components |
Manipulate DOM or add behaviours |
Handle dependencies and providers |
| Reusability |
supports code reuse |
supports UI and behaviour reuse |
organises and supports component/service reuse |
| Example |
AuthService for user authentication |
CustomValidationDirective, Custom forms |
Root module i.e. AppRoutingModule and others |
Share your thoughts in the comments
Please Login to comment...